# Hello ZEP Script

> **What is ZEP Script?**
>
> ZEP Script is a powerful scripting language designed to operate on ZEP.
>
> It offers a wide range of foundational systems such as avatar and object manipulation, payment integration, chat functionality, and real-time capabilities. Even if you're new to coding, ZEP Script makes it easy to get started.
>
> With ZEP Script, you can unleash your creativity and build a variety of applications, including games, calendars, visitor lists, utility apps, and much more. The possibilities are endless!
>
> Start exploring the world of ZEP Script and create your very own metaverse app.

<figure><img src="/files/ThsC7yhjMk619EHfql9T" alt=""><figcaption></figcaption></figure>

## ZEP Script Use Cases

ZEP Script is easy to use, and anyone can use it!

<figure><img src="/files/9FNQtPhQZ3fdP6Rh1xty" alt=""><figcaption><p>Unique Maps Created with ZEP Script</p></figcaption></figure>

### 🕹️Games

You can develop a wide range of enjoyable games with the help of ZEP Script.

#### ​Rabbit Mountain

🐰 [Visit Now](https://zep.us/play/8jqEO4) (only available in Korean)

In this Rabbit Mountain map, players control their avatars to ascend the mountain while avoiding rolling snowball obstacles.

These descending snowballs were created using the gameplay elements from the mini-game "Avoid Poop."

<figure><img src="/files/c3v0pwVpCtjmFejFOEan" alt=""><figcaption></figcaption></figure>

#### Bonbon School Detectives (Escape Room)

🕵️ [Visit Now](https://zep.us/play/D9JMjl)

Step into the shoes of a detective in this immersive escape room game. Players must uncover clues, solve puzzles, and complete tasks within a limited time frame to escape from the game setting.

Experience the excitement of this captivating game with the applied vignette effect.

<figure><img src="/files/9oZ5MfWndl5xSe4NfYUI" alt=""><figcaption></figcaption></figure>

#### Boxing Arena

🥊 [Visit Now](https://zep.us/play/yOw9Av)

Experience the intense Boxing Arena, inspired by the mini-game "Boxing Match."

Press Z to throw punches at another player. Safeguard your HP blocks and strive to be the last survivor.

The last survivor earns the title of the Boxing King.

<figure><img src="/files/Fqy59vP8mnsFuMuE7kSp" alt=""><figcaption></figcaption></figure>

### 🎉 Events

With ZEP Script, you can plan and host interactive events that engage participants.

#### Klaytn Museum

✈️ [Visit Now](https://zep.us/play/DwPndd) (only available in Korean)

Immerse yourself in the Klaytn Museum, a Space that showcases the technical prowess of Klaytn through the utilization of ZEP Script.

<figure><img src="/files/QYFqXd9sBv8j4y8rUtcl" alt=""><figcaption></figcaption></figure>

#### UNICEF Sponsors Event Space

The mission and work of UNICEF are brought to life through the implementation of ZEP Script. Users can explore interactive maps and engage in natural learning experiences.

<figure><img src="/files/2oKAVqPa7aqNrs9FLHCr" alt=""><figcaption></figcaption></figure>

#### Jet Land Event Space

✈️ [Visit Now](https://zep.us/play/D63k6z) (only available in Korean)

This Space is themed around the Samsung vacuum cleaner brand "Jet". With its theme park-inspired design, users can immerse themselves in a variety of games and entertainment options brought to life through the power of ZEP Script.

You can provide users with an exciting and enjoyable experience, showcasing the fun elements created using ZEP Script.

<figure><img src="/files/Uba2nBRy3esakDKRVn3f" alt=""><figcaption></figcaption></figure>


# ZEP Script Guide

Anyone can create an app that runs in ZEP!

ZEP Script boasts a number of functions beyond what is included in the Map Editor. ZEP Script allows users to change avatar or object sprite sheets, customize the UI, turn invisible, etc.&#x20;

You can create your very own metaverse app using ZEP Script. Create unique games, calendars, visitors’ lists, utility apps, and so much more!

## Index

### [ZEP Script Development Guide](/zep-script/zep-script-guide/zep-script-development-guide)

* Javascript Development Tips
* TypeScript Development Tips
* ZEP Script Deployment Guide

### [API Documentation](/zep-script/zep-script-api)

* ScriptAPP
* ScriptMap
* ScriptPlayer
* ScriptWidget

### [Explore ZEP Script](/zep-script/zep-script-guide/explore-zep-script)

* [Tutorials](/zep-script/zep-script-guide/explore-zep-script/tutorials)
  * Displaying a Message
  * Changing Avatar Image
  * Using HTML
  * Communicating with an External API
  * Creating a 2-second Stun Effect
* [ZEP Script Example Code](/zep-script/zep-script-guide/explore-zep-script/zep-script-example-code)
  * Timer
  * Zombie Game
  * Paintman Game
  * Hangul Quiz Game
  * Avoid Poop Game
  * Boxing Game
  * Sidebar App
  * Race

### [ZEP Script FAQ](/zep-script/zep-script-guide/zep-script-faq)

### [Appendix](/zep-script/zep-script-guide/appendix)

## Tutorials (Available in Korean)

{% embed url="<https://www.youtube.com/watch?t=3s&v=daFDZoJAHo0>" %}

Step-by-step :fire: [<mark style="color:purple;">**metaverse development guidance**</mark>](https://zepxsparta.oopy.io/) on ZEP!


# ZEP Script Development Guide

Updated 2022.08.01

## Getting Started

### Introduction

Anyone can create apps that run on the metaverse platform ZEP.

ZEP Script supports various functions, such as character/object manipulation and custom UI.

From creative games to productivity apps like calendars and guestbooks, anyone can create their own metaverse apps!

:fire: **ZEP Script Use Cases**

### Development Environment

* JavaScript (ES6)

  :bulb: **JavaScript Development Tips**
* Typescript

  :computer: **TypeScript Development Guide**
* Canvas
* Web browser (Desktop/Mobile)

### Categories

{% hint style="info" %}
Apps developed using ZEP Script can be applied to a map by selecting one of the three types below. To connect the app and the map, please refer to the [**Deployment Guide**](/zep-script/zep-script-guide/zep-script-development-guide/zep-script-deployment-guide)<mark style="color:purple;">.</mark>
{% endhint %}

**1) Mini-Game**

Mini-Games are installable apps that can be installed and used on any map. In Spaces where you have permission to embed, you can embed these apps by clicking the **Mini-Game** button in the sidebar on the left side of the screen. The app runs the moment that it is embedded. The user that embedded the app can terminate it by **jumping on it using the space bar**<mark style="color:purple;">.</mark>

<figure><img src="/files/zWfhCvI1S6gBz11rJ5EI" alt=""><figcaption></figcaption></figure>

**2) Normal App**

Normal Apps are apps that can only work on certain maps. After developing and uploading a Normal App, users with **Admin** **or higher permissions** can apply it. To apply apps, go to the sidebar > **Settings** > **Map Settings** > **Add Normal App**. Scripts can be applied without any additional app installation steps, although only to maps that you have permission to edit.

<figure><img src="/files/kgIlhAhdgZa4KvhC0Jbe" alt=""><figcaption></figcaption></figure>

**3) Sidebar App**

Sidebar apps are apps that are displayed as an icon on the left sidebar of the PC. After developing and uploading a Sidebar App, you can add it from the sidebar > **App** > **App Management** list from the play screen of a map in which you have owner permission. In a Space where a sidebar app is installed, the sidebar app is displayed to everyone who enters the Space.

<figure><img src="/files/SKYVWiqRLx5G904bEB6p" alt=""><figcaption></figcaption></figure>


# JavaScript Development Tips

By using the **zep-script-SDK** library, you can keep your folder structure neat and make the project compression process simpler than before. Let’s take a look at how to use the **zep-script-SDK**.

<div align="left"><figure><img src="/files/a2mHY4EhuVm8XHDAlTLt" alt=""><figcaption></figcaption></figure></div>

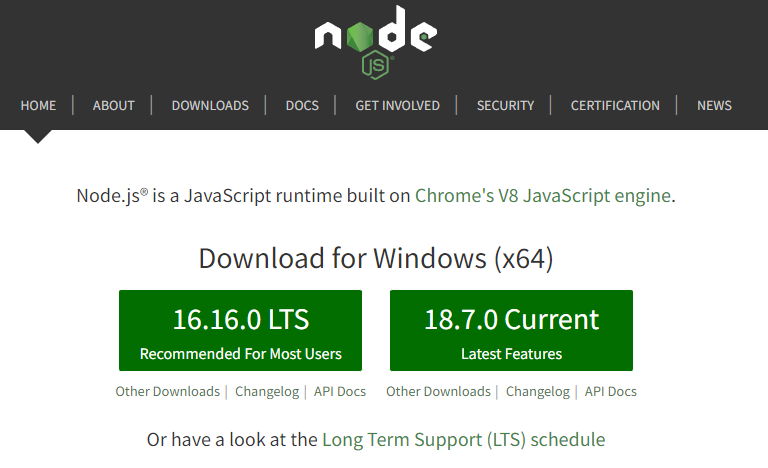
### 1. Install **node.js**

{% hint style="info" %}
Visit <https://nodejs.org/en/> to download and install node.js.

We recommend installing the LTS version, which is the most stable version.
{% endhint %}

<div align="left"><figure><img src="/files/Wa92G8upZCkPZi6Kij1x" alt=""><figcaption></figcaption></figure></div>

### 2. Organize Project Folders

To use the library, the project folder should be organized as follows:

The **res** folder is where you put the images, sounds, and html files to be used in the app.

→ The folder name must be **res**.

<div align="left"><figure><img src="/files/d9NyR15PfXvGC4I20WoB" alt=""><figcaption></figcaption></figure></div>

### 3. Create a Project as a Zip File Using the CLI

Now when you deploy your app, you can use the CLI to create a project as a zip file with a command.

The CLI can be run from the terminal for MacOS, Windows PowerShell in windows, or the terminal environment provided since Windows 11.

> **Running PowerShell on Windows**
>
> **Shift + right-click** in the empty space of the folder in which main.js is located.
>
> Choose **`Open PowerShell window here`** or **`Open command window here`**.
>
> ![](/files/3EXzNLiRLQKGwGq6r6TH)
>
> A **Windows PowerShell** or **Command Prompt** window will launch as follows:
>
> ![](/files/uTKeO2Qy603XePhGFxMi)

Open a command window in the folder where the **main.js** file is located and enter the following command to create a compressed file.

```powershell
npx zep-script archive
```

<div align="left"><figure><img src="/files/Gcz3VL9YipVBVlG1rEcv" alt=""><figcaption></figcaption></figure></div>

If the compression process was successful, you can check that a compressed file has been created in the folder as follows:

<div align="left"><figure><img src="/files/h9ENxLAdgfbiQKvufSZf" alt=""><figcaption></figcaption></figure></div>

Finally, after creating the zip file, you’re ready to deploy your app.

### 4. Deploy a Project

**1.** **Deploy on a website**

You can deploy your app by uploading the zip file created above.

Refer to the [ZEP Script Deployment Guide](/zep-script/zep-script-guide/zep-script-development-guide/zep-script-deployment-guide) and distribute your app!

**2. Deploy using CLI**

You can deploy the zip file created by using CLI.

Create a `zep-script.json` file as below and set the app to upload. (Make sure not to change the file name.)

<figure><img src="/files/RRystJoq1QJeQbezUlGZ" alt=""><figcaption></figcaption></figure>

```json
{
    "appId": "Zjkgoj",  // app ID
    "name": "Template", // app name
    "description": "Template application" , // app description
    "type": "normal" // app type ( "normal" or "minigame" or "sidebar" )
}
```

⭐ appID: Enter the ID of the app to upload.

* To change an existing app, access <https://zep.us/me/apps/>, select an app to upload, and then enter the text appended to apps/ in the address bar. (E.g., "Zjkgoj" for the reference image below)

<figure><img src="/files/5ih0XupYPyi4mffIBcMq" alt=""><figcaption></figcaption></figure>

Open a command window in the folder where the **main.js** file is located and enter the following command to create a compressed file.

```powershell
npx zep-script publish
```

Account verification is required during the app upload process.

When the email input section appears below, enter the email address of the account that owns the app to be deployed.

<figure><img src="/files/uT79CUdiEA7KCFgMasoY" alt=""><figcaption></figcaption></figure>

When you see the message saying, **Sending login code to your email**, go to the mailbox of the email you entered above. Check the verification code and enter it to the command window to start deploying.

<figure><img src="/files/eUyupdeoauZqbT3sTjCI" alt=""><figcaption></figcaption></figure>

The deploy process is complete when a green checkmark appears on the left of **Publishing…** as shown below.

<figure><img src="/files/NA3HAZyUPi9VREFHtCyO" alt=""><figcaption></figcaption></figure>

You can see your app has been deployed in the [**My Apps**](https://zep.us/me/apps) page as described above in the **zep-script.json** file.

<figure><img src="/files/LPM6Il5Cg90edUjBq1EL" alt=""><figcaption></figcaption></figure>

For more information about the library, please refer to the contents of the GitHub repository below.\
[ zep-script-sdk/packages/zep-script-cli at main · zep-us/zep-script-sdk](https://github.com/zep-us/zep-script-sdk/tree/main/packages/zep-script-cli)


# ZEP Script Deployment Guide

This document explains how to deploy an app created with ZEP Script.

## STEP 1

Select all of the files to be used, including the **main.js** file developed with ZEP Script, image files, and widget files, and compress them.

{% hint style="danger" %}
Note:

* The app’s file name and type must be set as “**main.js**”.
* **Select the individual files together** to compress. Do not compress a folder.
* The supported filename extension is \***.zip**.
  {% endhint %}

![](/files/XSgCr43sg6j1jEEytFrW)

{% file src="/files/xIP0lpNQrmPxD4Y2wHCU" %}

## STEP 2

Create an account on ZEP and sign in, on the [**My Spaces**](https://zep.us/spaces/me) page click **Your Profile Name** > [**My apps (Beta)**](https://zep.us/me/apps).

<div align="left"><figure><img src="/files/XJAycfQPoitDEl968keK" alt=""><figcaption></figcaption></figure></div>

## STEP 3

3\) Click **Upload app** on the [**My apps (Beta)**](https://zep.us/me/apps) page.

<div align="left"><figure><img src="/files/6iAdtLYaAKxv4oHIMIxl" alt=""><figcaption></figcaption></figure></div>

## STEP 4

Click the **Upload** button after filling out the **App name**, **Description**, selecting the app **Type**, and uploading the **Icon**, and compressed **ZEP script file**.

<div align="left"><figure><img src="/files/Af2zSv6ZG6a76Z0HzS7c" alt=""><figcaption></figcaption></figure></div>

<div align="center"><figure><img src="/files/Sg7JxlyF62odwc1qbxXn" alt=""><figcaption><p>This is how the app name and icon appear. (Mini-Game)</p></figcaption></figure></div>

## STEP 5

You can install apps to your desired maps according to their App Type.

* **Normal App:**

  Enter **Map Editor** on a map for which you have an Editor role or higher and in the **Map manager** in the bottom left corner click ⚙️ > **Edit** to bring up the **Map Setting** pop-up and select your App from the Application drop-down menu.

<div align="left"><figure><img src="/files/wEUi6yyKBHronA1pI7s2" alt=""><figcaption></figcaption></figure> <figure><img src="/files/bRxDNr3COFQPmr23p5HX" alt=""><figcaption></figcaption></figure></div>

* **Mini-Game:**

  Enter the play screen > Select the **Mini-Game** button on the side bar.

<div align="left"><figure><img src="/files/LLDNTqoNnAYTguWKcnVW" alt=""><figcaption></figcaption></figure></div>

## 🚧 Debugging and Error Messages

When the app is executed, error messages will be displayed in <mark style="color:red;">red text</mark> in the chat message box for all who have permission settings of Staff or higher.

<div align="left"><figure><img src="/files/oby05Shz7hLLqMkSuIOB" alt=""><figcaption></figcaption></figure></div>


# TypeScript Development Tips

### ⭐ Things to Note When Developing in TypeScript

When developing with TypeScript, you must put the **Script** keyword in front of the **App, Map, Player,** or **Widget** keywords.

```jsx
// When developing in JavaScript
App.sayToAll("Hello World!");

// When developing in TypeScript
ScriptApp.sayToAll("Hello World!");
```

### 1. Install **node.js**

{% hint style="info" %}
Visit <https://nodejs.org/en/> to download and install node.js.

We recommend installing the LTS version, which is the most stable version.
{% endhint %}

<div align="left"><figure><img src="/files/uWRgx4xfAJ0YyVBxEsp5" alt=""><figcaption></figcaption></figure></div>

### 2. Create the Project Folder

A sample project for developing in ZEP Script can be downloaded through the CLI.

The CLI can be run from the terminal for MacOS, Windows PowerShell in windows, or the terminal environment provided since Windows 11.

> **Running PowerShell on Windows**
>
> **Shift + right-click** in the empty space of the folder in which main.js is located.
>
> Choose **`Open PowerShell window here`** or **`Open command window here`**.
>
> ![](/files/ofn5BnQrqQevJWSTtBi8)
>
> A **Windows PowerShell** or **Command Prompt** window will launch as follows:
>
> ![](/files/9zO5l4h6o2L1tYPkfZdO)

Enter the command to create the project folder as follows:

```bash
npx zep-script init MyZepApp --npm
```

<div align="left"><figure><img src="/files/ulPwffJtm4rz0ArAlTQE" alt=""><figcaption></figcaption></figure></div>

<div align="left"><figure><img src="/files/HYIlKWvz8lB3joDQ1vJM" alt=""><figcaption></figcaption></figure></div>

If the message `Project {Folder Name} initialized successfully` is displayed as seen above, the environment for developing **ZEP Script** with TypeScript is now ready.

### 3. Browse the Folder Structure

If you go to the created project folder, you can see the files as follows:

The **res** folder is an abbreviation of "**resources"** and is where you put images or html files needed for the app.

<div align="left"><figure><img src="/files/vn9ZdJsRVQZmHhCO6jv9" alt=""><figcaption></figcaption></figure></div>

The **main.ts** file created here is where you write the app development code.

This **main.ts** file contains sample code as seen below. You can refer to this code for development.

<div align="left"><figure><img src="/files/HjUuHPlLYoNha88ai7yx" alt=""><figcaption></figcaption></figure></div>

With the exception of the **main.ts file and res folder,** the remaining files and folders are configuration files for developing ZEP Script with TypeScript, and you do not need to modify them separately during development.

### 4. Create a JavaScript Build

Since **ZEP Script** can only be executed through JavaScript, it must go through a build process that converts TypeScript to JavaScript.

Open a command window in the folder where the **main.js** file is located and enter the following command to create a new build.

```bash
npx zep-script build
```

<div align="left"><figure><img src="/files/VtHEjAXZwsyOsPfAvmqn" alt=""><figcaption></figcaption></figure></div>

If the build is created successfully, you can see that a folder named **dist** has been created.

The **dist** folder contains the **main.js** file that was created by converting the TypeScript code written in the **main.ts** into JavaScript.

<div align="left"><figure><img src="/files/3gEJp6Ln2legDWmXCzwu" alt=""><figcaption></figcaption></figure></div>

<div align="left"><figure><img src="/files/JY1Ev8FXRS3Ca7JSSU5T" alt=""><figcaption></figcaption></figure></div>

### 5. Create a Compressed File

To distribute an app created with ZEP Script, you need to create a zip file that contains the main.js file and the images and html files to be used in the app.

Open a command window in the root of your project’s folder and enter the following command to create a compressed file.

```powershell
npx zep-script archive
```

<div align="left"><figure><img src="/files/5Y0zGysJLf1THzndiFyd" alt=""><figcaption></figcaption></figure></div>

If the compression process was successful, you can check that a compressed file has been created in the folder as follows:

<div align="left"><figure><img src="/files/UR4ZztFaGaAmOkVDGOjA" alt=""><figcaption></figcaption></figure></div>

Finally, after creating the zip file, you’re ready to deploy the app.<br>

### 6. Deploy a Project

1. **Deploy on a website**

You can deploy your app by uploading the zip file created above.

Refer to the [ZEP Script Deployment Guide](/zep-script/zep-script-guide/zep-script-development-guide/zep-script-deployment-guide) and distribute your app!

&#x20; &#x20;

&#x20; **2. Deploy using CLI**

You can deploy the zip file created by using CLI.

Open the zep-script.json file in the project folder and run the app to upload.

(Make sure to create the zep-script.json file.)

<figure><img src="/files/jTWGZ2tRWu5gmcBsYiFr" alt=""><figcaption></figcaption></figure>

```json
{
    "appId": "Zjkgoj",  // app ID
    "name": "Template", // app name
    "description": "Template application" , // app description
    "type": "normal" // app type( "normal" or "minigame" or "sidebar" )
}
```

⭐ appID: Enter the ID of the app to upload.

* To change an existing app, access <https://zep.us/me/apps/>, select an app to upload, and then enter the text appended to apps/ in the address bar. (E.g., "Zjkgoj" for the reference image below)

<figure><img src="/files/D2VQkGdRvGI8iJONj2fQ" alt=""><figcaption></figcaption></figure>

Once set, run PowerShell in the project folder path and enter a command for deployment as below.

```powershell
npm run deploy or npx zep-script publish
```

When the email input section appears below, enter the email address of the account that owns the app to be deployed.

![](/files/XCMfOaIJmfKDrr40iC2i)

When you see the message saying, **Sending login code to your email**, go to the mailbox of the email you entered above. Check the verification code and enter it to the command window to start deploying.

<figure><img src="/files/YvuilxXdxhAexlUxmIgJ" alt=""><figcaption></figcaption></figure>

The deploy process is complete when a green checkmark appears on the left of **Publishing…** as shown below.

<figure><img src="/files/1sVoffiopqkcehxy9hDD" alt=""><figcaption></figcaption></figure>

You can see your app has been deployed in the [My Apps](https://zep.us/me/apps) page as described above in the **zep-script.json** file.

<figure><img src="/files/U5z2qIFVASNXX6hLeMep" alt=""><figcaption></figcaption></figure>

For more information about the library, please refer to the contents of the GitHub repository below.\
[zep-script-sdk/packages/zep-script-cli at main · zep-us/zep-script-sdk](https://github.com/zep-us/zep-script-sdk/tree/main/packages/zep-script-cli)


# Explore ZEP Script

### Tutorial

Follow the tutorial to gradually familiarize yourself with ZEP Script!

* [<mark style="color:purple;">Displaying a Message</mark>](/zep-script/zep-script-guide/explore-zep-script/tutorials/displaying-a-message)
* [<mark style="color:purple;">Understanding the ZEP App Lifecycle</mark>](/zep-script/zep-script-api/scriptapp/lifecycle)
* [<mark style="color:purple;">Changing Avatar Image</mark>](/zep-script/zep-script-guide/explore-zep-script/tutorials/changing-avatar-image)
* [<mark style="color:purple;">Using HTML</mark>](/zep-script/zep-script-guide/explore-zep-script/tutorials/using-html)
* [<mark style="color:purple;">Communicating with an External API</mark>](/zep-script/zep-script-api)
* [<mark style="color:purple;">Create a 2-second Stun Effect</mark>](/zep-script/zep-script-guide/explore-zep-script/tutorials/creating-a-2-second-stun-effect)

### ZEP Script Example Code

* [<mark style="color:purple;">Timer</mark>](/zep-script/zep-script-guide/explore-zep-script/zep-script-example-code/timer)
* [<mark style="color:purple;">Zombie Game</mark>](/zep-script/zep-script-guide/explore-zep-script/zep-script-example-code/zombie-game)
* [<mark style="color:purple;">Paintman Game</mark>](/zep-script/zep-script-guide/explore-zep-script/zep-script-example-code/paintman-game)
* [<mark style="color:purple;">Hangul Quiz Game</mark>](/zep-script/zep-script-guide/explore-zep-script/zep-script-example-code/hangul-quiz-game)
* [<mark style="color:purple;">Avoid Poop Game</mark>](/zep-script/zep-script-guide/explore-zep-script/zep-script-example-code/avoid-poop-game)
* [<mark style="color:purple;">Boxing Game</mark>](/zep-script/zep-script-guide/explore-zep-script/zep-script-example-code/boxing-game)
* [<mark style="color:purple;">Sidebar App</mark>](/zep-script/zep-script-guide/explore-zep-script/zep-script-example-code/sidebar-app)
* [<mark style="color:purple;">Race</mark>](/zep-script/zep-script-guide/explore-zep-script/zep-script-example-code/race)


# Tutorials

### Tutorial

Follow the tutorial to gradually familiarize yourself with ZEP Script!

* [<mark style="color:purple;">Displaying a Message</mark>](/zep-script/zep-script-guide/explore-zep-script/tutorials/displaying-a-message)
* [<mark style="color:purple;">Understanding the ZEP App Lifecycle</mark>](/zep-script/zep-script-api/scriptapp/lifecycle)
* [<mark style="color:purple;">Changing Avatar Image</mark>](/zep-script/zep-script-guide/explore-zep-script/tutorials/changing-avatar-image)
* [<mark style="color:purple;">Using HTML</mark>](/zep-script/zep-script-guide/explore-zep-script/tutorials/using-html)
* [<mark style="color:purple;">Communicating with an External API</mark>](/zep-script/zep-script-guide/explore-zep-script/tutorials/communicating-with-an-external-api)
* [<mark style="color:purple;">Create a 2-second Stun Effect</mark>](/zep-script/zep-script-guide/explore-zep-script/tutorials/creating-a-2-second-stun-effect)


# Displaying a Message

Displaying a Message - Hello world

1. Let’s try displaying a message in the center of the app. The default center label is set to a black background with white text.

```jsx
// main.js

App.showCenterLabel("Hello world");
```

2\. Result

<div align="left"><figure><img src="/files/hoELhaJFwaN3saDD6MXa" alt=""><figcaption></figcaption></figure></div>

{% hint style="warning" %}
Please Note&#x20;

* For the tutorial, we recommend setting the app type to Mini-Game.&#x20;
* The JSON file name must be “main”. Please create a new text file and name it main.js.&#x20;
* If you do not know how to deploy an app, please refer to the [<mark style="color:purple;">**ZEP Script Deployment Guide**</mark>](/zep-script/zep-script-guide/zep-script-development-guide/zep-script-deployment-guide)<mark style="color:purple;">.</mark>
  {% endhint %}


# Changing Avatar Image

1. Prepare a sample sprite sheet with the animation. If you do not have one, please download the image below.

<div align="left"><figure><img src="/files/xF3XOLBzeSBC29xBnvPI" alt=""><figcaption></figcaption></figure></div>

{% hint style="danger" %}
If you are using a sprite sheet you did not create, please be cautious of copyright law.
{% endhint %}

2\. As seen in the image above, single frames of the same size are aligned in each frame into a sprite sheet image. The file extension must be a PNG file.

* TIP : For avatars, we recommend the following frame size of 48(px) x 64(px) for each action frame.

<div align="left"><figure><img src="/files/hSNm3zbNKqQur0AmvSX0" alt=""><figcaption></figcaption></figure></div>

{% hint style="success" %}
&#x20;A **sprite sheet** is a bitmap image file that has several small graphic frames aligned. It is used when developing a game to create a 2D animation by compiling frames of a continuous pose of a character or avatar into one image file.
{% endhint %}

3\. Load a sprite sheet by using the following `App.loadSpritesheet` API.

{% code overflow="wrap" %}

```jsx
App.loadSpritesheet(fileName: string, frameWidth: integer, frameHeight: integer, anims: array, frameRate: integer): ScriptDynamicResource
```

{% endcode %}

* First Argument(fileName): Adds the file extension in the name of the sprite sheet
* Second Argument(frameWidth): Width of one action frame size (px)
* Third Argument(frameHeight): Height of one action frame size (px)
* Fourth Argument(anims): Animation name determined in ZEP (left, right, up, down) and numbers of each image index

{% hint style="success" %}
&#x20;Image index number order starts from 0 with the top-left image.
{% endhint %}

* Fifth Argument(frameRate): Determine how many frames will repeat within 1 second.

4\. `player.sendUpdated()` needs to be written to apply the player’s attribute change

5\. Example Code

{% code overflow="wrap" %}

```jsx
// Creates a variable named blueman in JavaScript grammar
let blueman = null;

// Reads and saves the variable's sprite sheet
blueman = App.loadSpritesheet('blueman.png', 48, 64, {
    left: [5, 6, 7, 8, 9], // left is an animation name that is already walking in the predetermined left direction 
    up: [15, 16, 17, 18, 19], // Index numbers in the file to be used for each name
    down: [0, 1, 2, 3, 4],
    right: [10, 11, 12, 13, 14],
}, 8); // 8 frames per second. 

// Switches the player's avatar to the blueman image when player enters
App.onJoinPlayer.Add(function(player){
	player.sprite = blueman;
  
  // Applies the player attribute changes when executed
	player.sendUpdated();
})
```

{% endcode %}

6\. Usage

```jsx
// Saves at the same time the variable is called
let blueman = App.loadSpritesheet('blueman.png', 48, 64, {
    left: [5, 6, 7, 8, 9], 
    up: [15, 16, 17, 18, 19],
    down: [0, 1, 2, 3, 4],
    right: [10, 11, 12, 13, 14],
}, 8);
```

{% hint style="success" %}
Imagine avatar changes not only applied upon entry but under other special conditions too. Think about them and then try creating them!
{% endhint %}

{% hint style="warning" %}
Please Note

* For the tutorial, we recommend setting the app type to Mini-Game.
* The JSON file name must be “main”. Please create a new text file and name it main.js.
* If you do not know how to deploy an app, please refer to the [<mark style="color:purple;">**ZEP Script Deployment Guide**</mark>](/zep-script/zep-script-guide/zep-script-development-guide/zep-script-deployment-guide)<mark style="color:purple;">.</mark>
  {% endhint %}


# Using HTML

1. You can draw any shape of UI on the ZEP canvas. In ZEP, UI elements are expressed through HTML.
2. You can bring an HTML file to a certain location using the `App.showWidget()`function. In this case, the file name, alignment, as well as width and height of the widget can be configured using arguments. Please refer to the [<mark style="color:purple;">ScriptApp’s Methods</mark>](/zep-script/zep-script-api/scriptapp/methods) page for more information on values for alignment.
3. You can send the desired value to the HTML file using the `sendMessage()` method to the created variable.
4. Write the HTML syntax as shown below (my.html) and then use `addEventListener` to receive the message sent from main.js.

* main.js

```jsx
//Set in advance the UI location values as variables
let position = 'middle';
let width = 400;
let height = 400;

// Create a tag called "state" using "my.html" and pass the value "hello"
let _widget = App.showWidget('my.html', position, width, height);
_widget.sendMessage({
	state: "hello",
}); 
```

* my.html

{% code overflow="wrap" %}

```html
<html>
<div id="test">-</div>
<script type="text/javascript">
		**window**.**addEventListener**('message', function(e) {
			// Since the sent tag value is "state", it is received in the form below
			var state = e.data.state; 
			// Apply this to "id test" above
			document.getElementById("test").innerText = state;
		})
</script>
</html>
```

{% endcode %}

{% hint style="warning" %}
Please Note&#x20;

\- For the tutorial, we recommend setting the app type to Installable App.&#x20;

\- The JSON file name must be “main.” Please create a new text file and name it “main.js.”&#x20;

\- If you do not know how to deploy an app, please refer to the [<mark style="color:purple;">**ZEP Script Deployment Guide**</mark>](/zep-script/zep-script-guide/zep-script-development-guide/zep-script-deployment-guide)<mark style="color:purple;">.</mark>
{% endhint %}


# Communicating with an External API

You can send GET, POST, etc. requests with arguments to an external API.

### httpGet

Changes the nicknames of the users who have just entered with the [<mark style="color:purple;">Korean Nickname Generator</mark>](https://nickname.hwanmoo.kr/) API.

<div align="center"><figure><img src="/files/V94qyeJZkFw39OGYgHeE" alt=""><figcaption></figcaption></figure></div>

{% code overflow="wrap" %}

```jsx
// Executes when a player enters
App.onJoinPlayer.Add(function (player) {
	App.httpGet(
		"https://nickname.hwanmoo.kr/?format=json&count=1&max_length=6&whitespace=_",
		null,
		function (res) {
			// Change the response to a JSON object
			let response = JSON.parse(res);
			player.name = response.words[0];
			player.sendUpdated();
		}
	);
});
```

{% endcode %}

### httpPost

Receives the header and data sent from the app in response and displays it in the chat window.

{% code overflow="wrap" %}

```jsx
// Activates function when q is pressed
App.addOnKeyDown(81, function (player) {
	App.httpPost(
		"https://postman-echo.com/post",
		{
			"test-header": "zep",
		},
		{
			name: "zepscript",
		},
		(res) => {
			let response = JSON.parse(res);
			App.sayToAll(`header sent: ${response.headers["test-header"]}`, 0xffffff);
			App.sayToAll(`data sent: ${response.form.name}`, 0xffffff);
		}
	);
});
```

{% endcode %}

{% hint style="warning" %}
Please Note&#x20;

\- For the tutorial, we recommend setting the app type to Mini-Game.&#x20;

\- The JSON file name must be “main.” Please create a new text file and name it “main.js.”&#x20;

\- If you do not know how to deploy an app, please refer to the [<mark style="color:purple;">**ZEP Script Deployment Guide**</mark>](/zep-script/zep-script-guide/zep-script-development-guide/zep-script-deployment-guide)<mark style="color:purple;">.</mark>
{% endhint %}

***


# Creating a 2-Second Stun Effect

### Creating a 2-Second Stun Effect

```jsx
let _players = App.players;

// Event when player enters 
App.onJoinPlayer.Add(function(p) {
  p.tag = {
      stun : false, // Whether stunned, false
      sTime : 2, //Set stun effect to 2 seconds
  };
	_players = App.players;
});

// When the player attacks another player (Z key)
App.onUnitAttacked.Add(function(sender, x, y, target) {
    if(!target.tag.stun)
    {
        target.tag.stun = true; // Change whether stunned to true
        target.moveSpeed = 0; // Change movement speed to 0
        target.sendUpdated();
    }
});

App.onUpdate.Add(function(dt){
	for(let i in _players) {
		let p = _players[i];
		// If whether stunned is true
		if(p.tag.stun)
		{
		    p.tag.sTime -= dt; //Subtract dt for each update until the stun effect duration becomes 0.
		    if(p.tag.sTime <= 0) // When the stun effect duration becomes under 0,
		    {
		        p.tag.stun = false; // Change whether stunned to false
		        p.tag.sTime = 2; // Reset duration to 2 seconds
		        p.moveSpeed = 80; // Normalize movement speed
		        p.sendUpdated();
		    }
		}
	}
});

// Event when player exits
App.onLeavePlayer.Add(function(p) {
    p.moveSpeed = 80; // Normalize movement speed
    p.sendUpdated();
    _players = App.players;
});
```

{% hint style="warning" %}
Please Note&#x20;

\- For the tutorial, we recommend setting the app type to Mini-Game.&#x20;

\- The JSON file name must be “main.” Please create a new text file and name it “main.js.”&#x20;

\- If you do not know how to deploy an app, please refer to the [<mark style="color:purple;">**ZEP Script Deployment Guide**</mark>](/zep-script/zep-script-guide/zep-script-development-guide/zep-script-deployment-guide)<mark style="color:purple;">.</mark>
{% endhint %}

***

***


# ZEP Script Example Code

## Timer

You can create a timer that works in ZEP. You can modify it to fit your personal development style and use it in ZEP.

## Zombie Game

This is a working Zombie Game script that can be run from the \[Side Bar] > \[Mini-Game] menu. You can modify it to fit your personal development style and use it.

## Paintman Game

This is a working Paintman Game script that can be run from the \[Side Bar] > \[Mini-Game] menu. You can modify it to fit your personal development style and use it.

## Hangul Quiz Game

This is a working Hangul Quiz Game script that can be run from the \[Side Bar] > \[Mini-Game] menu. You can modify it to fit your personal development style and use it.

## Avoid Poop Game

This is a working Avoid Poop Game script that can be run from the \[Side Bar] > \[Mini-Game] menu. You can modify it to fit your personal development style and use it.

## Boxing Game

This is a working Duel Game script that can be run from the \[Side Bar] > \[Mini-Game] menu. You can modify it to fit your personal development style and use it.

## Sidebar App

A sidebar app is an app that is displayed as an icon on the PC’s left side of the screen.

Using the examples provided below, you can create your sidebar app to match your personal developer needs.

### Race

This is a working Race Game script that can be run from the \[Side Bar] > \[Mini-Game] menu. You can modify it to fit your personal development style and use it.<br>


# Timer

**Example (Timer) -**

```jsx
let _timer = 90;
let _stateTimer = 0;

App.onUpdate.Add(function(dt){
	_stateTimer += dt;
	
	if(_stateTimer >= 1){
		_stateTimer = 0;
		_timer -= 1;
	}

	
	if(_timer <= 0){
			// time over then...
	}
})
```


# Zombie Game

**1) File**

{% file src="/files/xjv0rlORoylqsNm97lTh" %}

**2) main.js**

{% code overflow="wrap" %}

```jsx
// load sprite
let monster = App.loadSpritesheet('monster.png', 96, 96, {
    // defined base anim
    left: [8, 9, 10, 11],
    up: [12, 13, 14, 15],
    down: [4, 5, 6, 7],
    right: [16, 17, 18, 19],
}, 8);

const STATE_INIT = 3000;
const STATE_READY = 3001;
const STATE_PLAYING = 3002;
const STATE_JUDGE = 3004;
const STATE_END = 3005;

let _start = false; // Whether the game starts
let _players = App.players; // App.players : get total players
let _lastSurvivor = null;
let _zombieKing = [];
let _state = STATE_INIT;
let _stateTimer = 0; // Timer to check status value
let _live = 0; // number of survivors
let _resultstr;

function startApp()
{
    if(_players.length > 2)
    {
        // Set the number of zombies
        let zombiCnt = Math.floor(_players.length * 0.1);
        if(zombiCnt < 1)
            zombiCnt = 1;

        let allPlayer = [];
        let zombieIdx = [];

        for(let i = 0; i < _players.length; ++i)
        {
            allPlayer.push(_players[i]);
        }

        for(let i = 0; i < zombiCnt; ++i)
        {
            let index = Math.floor(allPlayer.length * Math.random());
            if(!zombieIdx.includes(allPlayer[index].id))
            {
                zombieIdx.push(allPlayer[index].id);
                allPlayer.splice(index, 1);
            }
        }

        // give players zombie attribute
        for(let i in _players)
        {
            let p = _players[i];
            // create and utilize option data using tags.
            p.tag = {};
            if(zombieIdx.includes(p.id))
            {
                p.tag.zombie = true;
                p.tag.attack = 0;
            }
            else
            {
                p.tag.zombie = false;
                p.tag.attack = 0;
                _live++;
            }
            
            // Must use this method to call and update player properties
            p.sendUpdated();
        }                                                                                               
        
        _start = true;
    }
    else
    {
        App.showCenterLabel(`Playable number of people: 3 or more`);
        startState(STATE_END);
    }
}

function startState(state)
{
    _state = state;
    _stateTimer = 0;

    switch(_state)
    {
        case STATE_INIT:
            startApp();
            break;
        case STATE_READY:
            App.showCenterLabel("The game will start soon.");
            for(let i in _players)
            {
                let p = _players[i];
                p.moveSpeed = 0;
                // Change the attribute of zombies
                if(p.tag.zombie)
                {
                    p.title = '<P:ZERO>';
                    p.sprite = monster;
                }
                p.sendUpdated();
            }
            break;
        case STATE_PLAYING:
            for(let i in _players)
            {
                let p = _players[i];
                // Change speed and label text according to player status
                if(p.tag.zombie)
                {
                    p.moveSpeed = 85;
                    p.showCenterLabel('Infect people!');
                }
                else
                {
                    p.moveSpeed = 80;
                    p.showCenterLabel('Survive from zombies!');
                }
                p.sendUpdated();
            }
            break;
        case STATE_JUDGE:
            for(let i in _players) {
                let p = _players[i];
                p.moveSpeed = 0;
                p.sendUpdated();
            }

            judgement(_live);
            break;
        case STATE_END:
            _start = false;

            for(let i in _players)
            {
                let p = _players[i];
                p.moveSpeed = 80;
                p.title = null;
                p.sprite = null;
                p.sendUpdated();
            }

            // Clear all objects in the map
            Map.clearAllObjects();
            break;
    }
   
}

function checkSuvivors()
{
    let resultlive = 0;
    for(let i in _players)
    {
        let p = _players[i];
        if(!p.tag.zombie)
        {
            _lastSurvivor = p;
            ++resultlive;
        }
    }

    return resultlive;
}

function judgement(number)
{   
    // The highest number of attacks among all players
    let attack = 0;

    for(let i in _players)
    {
        let p = _players[i];

        if(p.tag.attack > attack)
            attack = p.tag.attack;            
    }
    
    zombieKing = [];
    for(let i in _players)
    {   
        let p = _players[i];
        
        if(p.tag.attack == attack)
            zombieKing.push(p);
    }

    let index = Math.floor(Math.random() * zombieKing.length);

    if(number == 1) // when there are survivors
        resultstr = `${_lastSurvivor.name} is the last survivor!\nThe Strongest Zombie [` + zombieKing[index].name + '] Number of infections : ' + attack;
    else if(number == 0) // when there are no survivors
        resultstr = `No survivors.\nThe Strongest Zombie [` + zombieKing[index].name + '] Number of infections : ' + attack;
}

App.onStart.Add(function(){
    startState(STATE_INIT);
});

// event triggered when players join the Space 
App.onJoinPlayer.Add(function(p) {
    p.tag = {
        zombie : false,
        attack : 0,
    };

    if(_start) {
        p.tag.zombie = true;
        p.sprite = monster;
        p.sendUpdated();
        
        judgement(checkSuvivors());
    }   
    _players = App.players;
});

// event triggered when players leave the Space
App.onLeavePlayer.Add(function(p) {
    if(_start) {
        judgement(checkSuvivors());
    }

    p.title = null;
    p.sprite = null;
    p.moveSpeed = 80;
    p.sendUpdated();

    _players = App.players;
});

// event triggered when the game block is pressed
App.onDestroy.Add(function() {
    App.stopSound();
});

// event triggered when player touches other players 
App.onPlayerTouched.Add(function(sender, target, x, y) {
    if(_state != STATE_PLAYING)
        return;

    if(!sender.tag.zombie)
        return;

    if(target.tag.zombie)
        return;

    target.tag.zombie = true;
    target.sprite = monster;
    sender.tag.attack += 1;
    target.sendUpdated();
    
    _live = checkSuvivors();
    if(_live >= 2)
    {
        App.showCenterLabel(`${target.name} is infected!\n(${_live} survivors!)`);
        return;
    }
    else
        startState(STATE_JUDGE);
});

// called every 20ms
// param1 : deltatime ( elapsedTime )
App.onUpdate.Add(function(dt) {
    if(!_start)
        return;
    
    _stateTimer += dt;

    switch(_state)
    {
        case STATE_INIT:
            App.showCenterLabel("Become a zombie and infect people. The host is faster.\nPeople do their best to run away and be the last survivor.");
            
            if(_stateTimer >= 5)
                startState(STATE_READY);
            break;
        case STATE_READY:
            if(_stateTimer >= 3)
                startState(STATE_PLAYING);
            break;
        case STATE_PLAYING:
            break;
        case STATE_JUDGE:
            App.showCenterLabel(resultstr);

            if(_stateTimer >= 5)
                startState(STATE_END);
            break;
        case STATE_END:
            break;    
    }
});
```

{% endcode %}


# Paintman Game

**1) File**

{% file src="/files/BmuLdFk5OK4uGJUEFAtg" %}

**2) main.js**

{% code overflow="wrap" %}

```jsx
// load sprite
let redman = App.loadSpritesheet('redman.png', 48, 64, {
    left: [5, 6, 7, 8, 9],       // defined base anim 
    up: [15, 16, 17, 18, 19],    // defined base anim 
    down: [0, 1, 2, 3, 4],       // defined base anim 
    right: [10, 11, 12, 13, 14], // defined base anim 
}, 8);

// load sprite
let blueman = App.loadSpritesheet('blueman.png', 48, 64, {
    left: [5, 6, 7, 8, 9],
    up: [15, 16, 17, 18, 19],
    down: [0, 1, 2, 3, 4],
    right: [10, 11, 12, 13, 14],
}, 8);

const STATE_INIT = 3000;
const STATE_READY = 3001;
const STATE_PLAYING = 3002;
const STATE_JUDGE = 3004;
const STATE_END = 3005;

// load sprite
let red = App.loadSpritesheet('red.png');
let blue = App.loadSpritesheet('blue.png');
let tomb = App.loadSpritesheet('tomb.png');

let _start = false;
let _gameEnd = false;
let _state = STATE_INIT;
let _stateTimer = 0;
let _timer = 90;

let _objects = {};

let _redScore = 0;
let _blueScore = 0;

// for using hash key
let HEIGHT_KEY = 10000000;

let _blueTeam = [];
let _redTeam = [];

let _players = App.players; // App.players : get total players
let TEAM_COUNTER = 0;
let _resultStr = '';

function startState(state)
{
    _state = state;
    _stateTimer = 0;

    switch(_state)
    {
        case STATE_INIT:
            _start = true;
            _stateTimer = 0;
            _timer = 90;

            _redScore = 0;
            _blueScore = 0;
            _objects = {};

            for(let i in _players) {
                let p = _players[i];
                 // create and utilize option data using tags.
                p.tag = {
                    x: p.tileX,
                    y: p.tileY,
                    sturn : false,
                    sTime : 1,
                    super : false,
                    team: Math.floor(TEAM_COUNTER % 2),
                };

                TEAM_COUNTER++;

                if(p.tag.team == 0)
                    _redTeam.push(p);
                else if(p.tag.team == 1)
                    _blueTeam.push(p);

                p.sprite = p.tag.team == 0 ? redman : blueman;
                p.sendUpdated();
            }
            break;
        case STATE_READY:
            for(let i in _players) {
                let p = _players[i];
                p.moveSpeed = 0;
                p.sendUpdated();
            }
            break;
        case STATE_PLAYING:
            for(let i in _players) {
                let p = _players[i];
                p.moveSpeed = 80;
                p.sendUpdated();
            }
            break;
        case STATE_JUDGE:
            for(let i in _players) {
                let p = _players[i];
                p.moveSpeed = 0;
                p.sendUpdated();
            }
            break;
        case STATE_END:
            _start = false;

            for(let i in _players) {
                let p = _players[i];
                p.moveSpeed = 80;
                p.title = null;
                p.sprite = null;
                p.sendUpdated();
            }

            // remove all objects created by the zep-scripts
            Map.clearAllObjects();
            break;
    }
}

App.onStart.Add(function(){
    startState(STATE_INIT);
});

// when player join the space event
App.onJoinPlayer.Add(function(p) {
    p.tag = {
        x: p.tileX,
        y: p.tileY,
        sturn : false,
        sTime : 1,
        super : false,
        team: Math.floor(TEAM_COUNTER % 2),
    };

    if(p.tag.team == 0)
        _redTeam.push(p);
    else if(p.tag.team == 1)
        _blueTeam.push(p);

    TEAM_COUNTER++;
    p.nameColor = p.tag.team == 0 ? 16711680 : 255;
    p.sprite = p.tag.team == 0 ? redman : blueman;
    p.sendUpdated();

    _players = App.players;
});

// when player leave the space event
App.onLeavePlayer.Add(function(p) {
    p.moveSpeed = 80;
    p.title = null;
    p.sprite = null;
    p.sendUpdated();

    _players = App.players; // update all plyers for update(dt)
});

// when player touched objects event
App.onDestroy.Add(function() {
    Map.clearAllObjects();
})

// when player attacked other player event (z key)
App.onUnitAttacked.Add(function(sender, x, y, target) {
    if(_state != STATE_PLAYING)
        return;

    // not stun, not invincible, not on the same team
    if(!target.tag.sturn && sender.tag.team != target.tag.team && !target.tag.super)
    {
        target.tag.sturn = true;
        target.moveSpeed = 0;
        target.sendUpdated();
    }
});

// called every 20ms
// param1 : deltatime ( elapsedTime )
App.onUpdate.Add(function(dt) {
    if(!_start)
        return;

    _stateTimer += dt;

    switch(_state)
    {
        case STATE_INIT:
            App.showCenterLabel("The team that has painted the most land wins.\nHitting another teammate stuns them for 1 second.");
            
            if(_stateTimer >= 5)
            {
                startState(STATE_READY);
            }
            break;
        case STATE_READY:
            App.showCenterLabel("The game will start soon.");
            if(_stateTimer >= 3)
            {
                startState(STATE_PLAYING);
            }
            break;
        case STATE_PLAYING:
            App.showCenterLabel(_timer +  `\nRED TEAM  VS  BLUE TEAM\n` + _redScore + "  VS  " + _blueScore);
            if(_stateTimer >= 1) {
                _stateTimer = 0;
                _timer--;
            }

            // time over
            if(_timer <= 0)
            {
                if(_redScore > _blueScore)
                {
                    for(let i in _players) {
                        let p = _players[i];
                        p.title = null;
                        if(p.tag.team == 1)
                        {
                            p.sprite = tomb;
                            p.moveSpeed = 0;
                            p.sendUpdated();
                        }
                    }
                    _resultStr = 'RED TEAM  VS  BLUE TEAM\n' + _redScore + "  VS  " + _blueScore + '\nRED TEAM WIN';
                }
                else if(_redScore < _blueScore)
                {
                    for(let i in _players) {
                        let p = _players[i];
                        p.title = null;
                        if(p.tag.team == 0)
                        {
                            p.sprite = tomb;
                            p.moveSpeed = 0;
                            p.sendUpdated();
                        }
                        _resultStr = 'RED TEAM  VS  BLUE TEAM\n' + _redScore + "  VS  " + _blueScore + '\nBLUE TEAM WIN';
                    }
                }
                else
                {
                    for(let i in _players) {
                        let p = _players[i];
                        p.title = null;
                        p.sprite = null;
                        p.sendUpdated();
                    }  
                    _resultStr = 'RED TEAM  VS  BLUE TEAM\n' + _redScore + "  VS  " + _blueScore + '\nDRAW';
                }
                startState(STATE_JUDGE);
            }
            else
            {
                for(let i in _players) {
                    let p = _players[i];
                    
                    // for speed buff
                    if(_timer == 30 || _timer == 20 || _timer == 10)
                    {
                        if(_redScore > _blueScore)
                        {
                            if(p.tag.team == 1)
                            {
                                // set player title
                                p.title = '<SPEED UP>';
                                p.moveSpeed = 90;
                                p.sendUpdated();
                            }
                            else
                            {
                                p.title = null;
                                p.moveSpeed = 80;
                                p.sendUpdated();
                            }
                        }
                        else if(_redScore < _blueScore)
                        {
                            if(p.tag.team == 0)
                            {
                                p.title = '<SPEED UP>';
                                p.moveSpeed = 90;
                                p.sendUpdated();
                            }
                            else
                            {
                                p.title = null;
                                p.moveSpeed = 80;
                                p.sendUpdated();
                            }
                        }
                    }

                    // strun state check
                    if(p.tag.sturn)
                    {
                        p.tag.sTime -= dt;
                        if(p.tag.sTime <= 0)
                        {
                            p.tag.sturn = false;
                            p.tag.super = true;
                            p.tag.sTime = 1;
                            p.moveSpeed = 80;
                            p.sendUpdated();
                        }
                    }

                    // invincible state check
                    if(p.tag.super)
                    {
                        p.tag.sTime -= dt;
                        if(p.tag.sTime <= 0)
                        {
                            p.tag.super = false;
                            p.tag.sTime = 1;
                            p.sendUpdated();
                        }
                    }

                    // paint tile and update score
                    if(p.tag.x != p.tileX || p.tag.y != p.tileY) {
                        p.tag.x = p.tileX;
                        p.tag.y = p.tileY;
                        
                        let oldValue = _objects[p.tileY * HEIGHT_KEY + p.tileX];
                        if(oldValue == p.tag.team)
                            continue;
        
                        if(oldValue == 0) {
                            _redScore--;
                        } else if(oldValue == 1) {
                            _blueScore--;
                        }
        
                        if(p.tag.team == 0)
                            _redScore++;
                        else
                            _blueScore++;
                        
                        _objects[p.tileY * HEIGHT_KEY + p.tileX] = p.tag.team;
                        
                        Map.putObject(p.tileX, p.tileY, p.tag.team == 0 ? red : blue,
                        {
                            overlap: true,
                        });
                    }
                }
            }
            break;
        case STATE_JUDGE:
            App.showCenterLabel(_resultStr);

            if(_stateTimer >= 5)
            {
                startState(STATE_END);
            }
            break;
        case STATE_END:
            break;
    }
});
```

{% endcode %}


# Hangul Quiz Game

**1) File**

{% file src="/files/O9uj3kkZcQcQSn5TqguV" %}

**2) main.js**

{% code overflow="wrap" %}

```jsx
const STATE_INIT = 3000;
const STATE_READY = 3001;
const STATE_PLAYING = 3002;
const STATE_JUDGE = 3004;
const STATE_END = 3005;

const WORD_LINES = [
    '한글날 휴게소 현기증 형광펜 호날두 허니문 하노이 핫도그 홍두깨 헤드셋 해돋이 한라봉 한라산 호랑이 허리띠 현미경 흰머리 황무지 햄버거 학부모 휘발유 허벅지 하수구 호신술 홍수아 화승총 허스키 햄스터 해운대 활주로 휴지통 화장품 회초리 핫팬츠 하회탈',
    '피규어 팔꿈치 포도주 피라냐 피라미 피뢰침 프리킥 프라하 포미닛 팥빙수 표백제 판소리 피시방 팔씨름 피아노 편의점 파자마 포장지 표지판 파충류 파출부 파출소 포청천 팬클럽 포켓볼 피카소 피카츄 폭탄주 피터팬',
    '태극기 태권도 턱걸이 테니스 트렁크 터미널 퇴마사 토마토 탬버린 투석기 턱시도 탕수육 토스트 태양계 티아라 타이밍 탈의실 트위터 퇴직금 통조림 태진아 태평양 테헤란',
    '캥거루 콧구멍 코끼리 캐나다 콩나물 코너킥 컨디션 코러스 카메라 카메오 키보드 콤바인 코뿔소 케이크 코코넛 카타르 칵테일 커플링',
    '참기름 철가방 초능력 축농증 취두부 청계천 책갈피 책꽂이 초능력 축농증 창덕궁 차두리 최루탄 최면술 칠면조 청바지 청소년 출석부 찹쌀떡 청와대 첫인상 치와와 초인종 추어탕 초음파 침전물 청첩장 초콜릿 치트키 출판사 챔피언 침팬지 최홍만',
    '계기판 개나리 기내식 강낭콩 교도관 고드름 골동품 기러기 가로등 가래떡 글러브 그림자 기모노 금메달 거머리 교무실 공무원 건망증 구미호 김병만 국방부 거북선 광복절 곱빼기 가속도 각선미 기숙사 가오리 걸음마 강의실 거짓말 교차로 골키퍼 과태료 김태원 김태희 건포도 곰팡이 골판지 공포탄 김흥국 광화문 공휴일 고현정 꽹과리 까나리 깍두기 꽃다발 꽃등심 꼽등이 까마귀 까치발 깐풍기',
    '케첩 킹카 킹콩 컨닝 채찍 창문 참깨 천국 축구 출근 친구 치과 취권 채권 초과 족발 절벽 젖병 주부 전복 중복 정복 절반 족보 쟁반 주번 좀비 제비 사과 사기 시급 시계 손금 선거 수능 설날 스님',
    '모래 미래 미로 만루 떡밥 딸기 떡국 두유 득음 뉴욕 노을 낙엽 녹용 노인 눈물 냉면 나비 나방 가위 거울 근육 기타 깃털 구토 굴뚝 개념 그네 구름 기린 경마 경매 고막 가방 공부 고백 간병 갈비 김밥 거봉 군밤 기분 건빵 가시'
];

let WORDS = [];

let _state = STATE_INIT;
let _stateTimer = 0;
let _timer = 0;
let _choanswer = '';
let _answer = '';
let _start = false;
let _widget = null; // using for contents UI
let _players = App.player;
let _result = '';

for(let w in WORD_LINES)
    WORDS =  WORDS.concat(WORD_LINES[w].trim().split(' '));

function cho_hangul(str) {
    cho = ["ㄱ","ㄲ","ㄴ","ㄷ","ㄸ","ㄹ","ㅁ","ㅂ","ㅃ","ㅅ","ㅆ","ㅇ","ㅈ","ㅉ","ㅊ","ㅋ","ㅌ","ㅍ","ㅎ"];
    result = "";
    for (let i = 0; i < str.length; ++i ) {
      code = str.charCodeAt(i)-44032;
      if(code>-1 && code<11172) result += cho[Math.floor(code/588)];
      else result += str.charAt(i);
    }
    return result;
}

App.onStart.Add(function(){
    startState(STATE_INIT);
});

// when chatting event
// player : person who chatted
// text : chat text
// return : enter chatting box
// return false or true : not appear in chatting box
App.onSay.add(function(player, text) {
    if(_state == STATE_PLAYING)
    {
        if(_answer == text)
        {
            _result = player.name + '님 정답!\n정답은 ' + _answer;

            startState(STATE_JUDGE);
        }
    }
});

function startState(state) {
    _state = state;
    _stateTimer = 0;

    switch(_state)
    {
        case STATE_INIT:
            if(_widget)
            {
                _widget.destroy();
                _widget = null;
            }
            _answer = WORDS[Math.floor(Math.random() * WORDS.length)];
            _timer = 60;
    
            _choanswer = cho_hangul(_answer);
    
            // called html UI
            // param1 : file name
            // param2 : position 
            // [ top, topleft, topright, middle, middleleft, middleright, bottom, bottomleft, bottomright, popup ]
            // param3 : width size
            // param4 : height size
            _widget = App.showWidget('widget.html', 'top', 200, 300);
            
            _widget.sendMessage({
                state: _state,
                timer: _timer,
                answer: _choanswer,
            });

            startState(STATE_READY);
            break;
        case STATE_READY:
            _start = true;
            startState(STATE_PLAYING);
            break;
        case STATE_PLAYING:
            App.showCenterLabel('목표: 초성힌트로 단어를 찾아내세요.',0xFFFFFF, 0x000000, 115);
            _widget.sendMessage({
                state: _state,
                timer: _timer,
                answer: _choanswer,
            });
            break;
        case STATE_JUDGE:
            break;
        case STATE_END:
            if(_widget)
            {
                _widget.destroy();
                _widget = null; // must to do for using again
            }

            _start = false;
            break;
    }
}

App.onLeavePlayer.Add(function(p) {
    p.title = null;
    p.sprite = null;
    p.moveSpeed = 80;
    p.sendUpdated();
});

App.onDestroy.Add(function() {
    _start = false;
    
    if(_widget)
    {
        _widget.destroy();
        _widget = null;
    }
});

App.onUpdate.Add(function(dt) {
    if(!_start)
        return;

    _stateTimer += dt;

    switch(_state)
    {
        case STATE_INIT:
            break;
        case STATE_READY:
            _start = true;
            break;
        case STATE_PLAYING:
            if(_stateTimer >= 1)
            {
                _stateTimer = 0;
                _timer -= 1;
            }

            if(_timer == 0)
            {
                _result = '정답은 ' + _answer + ' 입니다.';
                startState(STATE_JUDGE);
            }
            break;
        case STATE_JUDGE:
            App.showCenterLabel(_result, 0xFFFFFF, 0x000000, 115);

            if(_stateTimer >= 3)
                startState(STATE_END);
            break;
        case STATE_END:
            break;
    }
});
```

{% endcode %}


# Avoid Poop Game

**1) File**

{% file src="/files/ONRP4uB453pfiGKlpSyo" %}

**2) main.js**

{% code overflow="wrap" %}

```jsx
// load sprite
let poop = App.loadSpritesheet('poop.png', 48, 43, [0], 16);

// load sprite
let tomb = App.loadSpritesheet('tomb.png', 32, 48, {
    left: [0],  // defined base anim 
    right: [0], // defined base anim 
    up: [0],    // defined base anim 
    down: [0],  // defined base anim 
});

const STATE_INIT = 3000;
const STATE_READY = 3001;
const STATE_PLAYING = 3002;
const STATE_JUDGE = 3004;
const STATE_END = 3005;

let _level = 1;
let _levelTimer = 15;
let _levelAddTimer = 0;

let _start = false;
let _timer = 90;

let _poops = [];
let _stateTimer = 0;

let _genTime = 0;
let _dropTime = 0;

let _live = 0;

let _players = App.players; // App.players : get total players

function startApp()
{
    _start = true;
    _stateTimer = 0;
    _genTime = 0;
    _dropTime = 0;
    _timer = 90;

    for(let i in _players) {
        let p = _players[i];
         // create and utilize option data using tags.
        p.tag = {
            alive : true,
        };
    }
}

function startState(state)
{
    _state = state;
    _stateTImer = 0;
    switch(_state)
    {
        case STATE_INIT:
            startApp();
            break;
        case STATE_READY:
            break;
        case STATE_PLAYING:
            // Show Label
            App.showCenterLabel("Game Start");
            break;
        case STATE_JUDGE:
            for(let i in _poops) {
                let b = _poops[i];
                Map.putObject(b[0], b[1], null);
            }
            break;
        case STATE_END:
            _start = false;
            for(let i in _players) {
                let p = _players[i];
                p.sprite = null;
                p.moveSpeed = 80;
                p.sendUpdated();
            }
            break;
    }
}

function checkSuvivors() {
    if(!_start)
        return;

    let alive = 0;
    for(let i in _players) {
        let p = _players[i];
        if(!p.sprite) {
            lastSurvivor = p;
            ++alive;
        }
    }

    return alive;
}

App.onStart.Add(function() {
    startState(STATE_INIT);
});

// when player join the space event
App.onJoinPlayer.Add(function(p) {
    // create and utilize option data using tags.
    if(_start)
    {
        p.tag = {
            alive : false,
        };

        // change move speed
        p.moveSpeed = 20;
        // change sprite image
        p.sprite = tomb;
        // when player property changed, have to call this method
        p.sendUpdated();
    }
    _players = App.players;
});

// when player leave the space event
App.onLeavePlayer.Add(function(p) {
    p.title = null;
    p.sprite = null;
    p.moveSpeed = 80;
    p.sendUpdated();

    _players = App.players; // App.players : get total players
});

// when player touched objects event
App.onObjectTouched.Add(function(sender, x, y, tileID) {
    if(!_start)
        return;

    if(!sender.tag.alive)
        return;

    sender.tag.alive = false;
    sender.sprite = tomb;
    sender.moveSpeed = 40;
    sender.sendUpdated();

    _live = checkSuvivors();

    if(_live == 1 || _live == 0)
    {
        startState(STATE_JUDGE);
    }
    else
    {
        if(_stateTimer >= 1)
        {   
            _stateTimer = 0;
            _timer--;
            if(_timer <= 0)
            {
                startState(STATE_JUDGE);
            }
        }
    }
});

// when the game block is pressed event
App.onDestroy.Add(function() {
    for(let i in _poops) {
        let b = _poops[i];
        Map.putObject(b[0], b[1], null);
    }
});

// called every 20ms
// param1 : deltatime ( elapsedTime )
App.onUpdate.Add(function(dt) {
    if(!_start)
        return;

    _stateTimer += dt;
    switch(_state)
    {
        case STATE_INIT:
            App.showCenterLabel(`Avoid falling poop.`);

            if(_stateTimer >= 5)
            {
                startState(STATE_READY);
            }
            break;
        case STATE_READY:
            App.showCenterLabel(`The game will start soon.`);

            if(_stateTimer >= 3)
            {
                startState(STATE_PLAYING);
            }
            break;
        case STATE_PLAYING:
            _genTime -= dt;
            if(_genTime <= 0) {
                _genTime = Math.random() * (0.5 - (_level * 0.05));
                
                let b = [Math.floor(Map.width * Math.random()),-1];

                _poops.push(b);
                if(b[1] >= 0)
                    Map.putObject(b[0], b[1], poop, {
                        overlap: true,
                    });
            }

            _dropTime -= dt;
            if(_dropTime <= 0) {
                _dropTime = Math.random() * (0.5 - (_level * 0.08));
                
                for(let i in _poops) {
                    let b = _poops[i];
                    Map.putObject(b[0], b[1], null);
            
                    b[1]++;
                    if(b[1] < Map.height) {
                        Map.putObject(b[0], b[1], poop, {
                            overlap: true,
                        });
                    }
                }

                for(let k = _poops.length - 1;k >= 0;--k) {
                    let b = _poops[k];
                    if(b[1] >= Map.height)
                        _poops.splice(k, 1);
                }
            }

            _levelAddTimer += dt;
            if(_levelAddTimer >= _levelTimer)
            {
                _level++;
                _levelAddTimer = 0;

                if(_level > 6)
                {
                    _level = 6;
                }
            }
            break;
        case STATE_JUDGE:
            if(_live == 1)
            {
                App.showCenterLabel(`${lastSurvivor.name} is last suvivor`);
            }
            else if(_live == 0)
            {
                App.showCenterLabel(`There are no survivors.`);
            }
            else
            {
                App.showCenterLabel(`Final survivors : ` + _live);
            }

            if(_stateTimer >= 5)
            {
                startState(STATE_END);
            }
            break;
        case STATE_END:
            break;
    }
});
```

{% endcode %}


# Boxing Game

**1) File**

{% file src="/files/uqC4e3BTx5EF3l84tQtD" %}

**2) main.js**

{% code overflow="wrap" %}

```jsx
let ghost = App.loadSpritesheet("ghost.png", 32, 48, {
	left: [2],
	right: [1],
	up: [3],
	down: [0],
});

let redBoxing = App.loadSpritesheet("redBoxing.png");

const STATE_INTRO = 3001;
const STATE_INIT = 3002;
const STATE_RULE = 3003;
const STATE_PLAYING = 3004;
const STATE_JUDGE = 3005;
const STATE_END = 3006;

let lastSurvivor = null;
let _start = false;
let _players = App.players;

let _state = STATE_INIT;
let _stateTimer = 0;

let _alive = 0;

let _widget = null;

function init() {
	for (let i in _players) {
		let p = _players[i];
		setHPgage(p, p.tag.hp);
		p.sendUpdated();
	}
	_alive = checkSuvivors();
}

function startState(state) {
	_state = state;
	_stateTimer = 0;
	switch (_state) {
		case STATE_INTRO:
			for (let i in _players) {
				let p = _players[i];
				if (p.tag.widget) {
					p.tag.widget.destroy();
					p.tag.widget = null;
				}
			}
			// Game starts
			_start = true;
			_widget = App.showWidget("intro.html", "middle", 350, 340);
			App.playSound("intro.wav");
			break;
		case STATE_INIT:
			init();
			break;
		case STATE_RULE:
			_widget = App.showWidget("rule.html", "middle", 400, 200);

			for (let i in _players) {
				let p = _players[i];
				p.moveSpeed = 0;
				p.sendUpdated();
			}
			break;
		case STATE_PLAYING:
			if (_widget) {
				_widget.destroy();
				_widget = null;
			}

			_widget = App.showWidget("status.html", "top", 700, 300);

			for (let i in _players) {
				let p = _players[i];
				p.moveSpeed = 80;
				p.sendUpdated();
			}

			break;
		case STATE_JUDGE:
			break;
		case STATE_END:
			if (_widget) {
				_widget.destroy();
				_widget = null;
			}

			_start = false;

			for (let i in _players) {
				let p = _players[i];
				p.sprite = null;
				p.attackSprite = null;
				p.title = null;
				p.sprite = null;
				p.moveSpeed = 80;
				p.sendUpdated();
			}

			Map.clearAllObjects();
			break;
	}
}

// Functions for displaying HP blocks
function setHPgage(p, hp) {
	switch (hp) {
		case 5:
			p.title = "▮▮▮▮▮";
			break;
		case 4:
			p.title = "▮▮▮▮";
			break;
		case 3:
			p.title = "▮▮▮";
			break;
		case 2:
			p.title = "▮▮";
			break;
		case 1:
			p.title = "▮";
			break;
	}
}

// Functions for checking the number of surviving players
function checkSuvivors() {
	let alive = 0;
	for (let i in _players) {
		let p = _players[i];
		if (p.tag.alive) {
			lastSurvivor = p;
			++alive;
		}
	}
	return alive;
}

App.onStart.Add(function () {
	startState(STATE_INTRO);
});

App.onJoinPlayer.Add(function (p) {
	p.tag = {
		widget: null,
		alive: true,
		hp: 5,
		shield: false,
		time: 1, // Property for setting the invincible status for 1 sec after getting hit
	};

	p.attackSprite = redBoxing;

	// When a new player enters during the game, set the player dead
	if (_start) {
		p.moveSpeed = 5;
		p.sprite = ghost;
		p.tag.alive = false;
		p.sendUpdated();
	}

	_players = App.players;
});

App.onLeavePlayer.Add(function (p) {
	p.attackSprite = null;
	p.title = null;
	p.sprite = null;
	p.moveSpeed = 80;
	p.sendUpdated();

	_players = App.players;
});

// When attacking another player
App.onUnitAttacked.Add(function (sender, x, y, target) {
	if (_state != STATE_PLAYING) return;

	// If the attacker is dead, return
	if (!sender.tag.alive) return;

	// If the target is alive, and "shield" is "false"
	if (target.tag.alive && !target.tag.shield) {
		target.tag.hp--; // Reduce the target's health by 1.

		// When the target's health becomes 0 
		if (target.tag.hp == 0) {
			target.title = null; // Delete title
			target.tag.alive = false; // alive property false
			target.sprite = ghost; // Avatar turn into a ghost
			target.moveSpeed = 5; // moveSpeed 80 -> 5
			target.sendUpdated(); // Update target property

			_alive = checkSuvivors();
			// When there is a single last survivor
			if (_alive == 1) {
				if (_widget) {
					_widget.destroy();
					_widget = null;
				}
				// Show all connected players the result.html widget
				_widget = App.showWidget("result.html", "top", 1055, 500);
				// Send the last survivor's nickname to display in the widget
				_widget.sendMessage({
					alive: _alive,
					name: lastSurvivor.name,
				});

				App.playSound("result.wav");

				_stateTimer = 0;
				startState(STATE_JUDGE);
			}
		} else {
			// Target becomes invincible for 1 sec after getting hit (shield = true)
			target.tag.shield = true;
			setHPgage(target, target.tag.hp);
			target.sendUpdated();
		}
	}
});

App.onUpdate.Add(function (dt) {
	if (!_start) return;

	_stateTimer += dt;
	switch (_state) {
		case STATE_INTRO:
			// Display the intro.html widget for 5 secs and start STATE_INIT
			if (_stateTimer >= 5) {
				if (_widget) {
					_widget.destroy();
					_widget = null;
				}
				App.stopSound();

				startState(STATE_INIT);
			}
			break;
		case STATE_INIT:
			startState(STATE_RULE);
			break;

		// Display the rule.html widget for 3 secs and start STATE_PLAYING
		case STATE_RULE:
			if (_stateTimer >= 3) {
				if (_widget) {
					_widget.destroy();
					_widget = null;
				}
				startState(STATE_PLAYING);
			}
			break;

		case STATE_PLAYING:
			// Update the number of survivors of the status.html widget
			if (_widget) {
				_widget.sendMessage({
					suvivors: _alive,
				});
			}

			for (let i in _players) {
				let p = _players[i];

				// Skip if the player is dead
				if (!p.tag.alive) continue;

				// Shield property becomes false after 1 sec 
				if (p.tag.shield) {
					p.tag.time -= dt;
					if (p.tag.time <= 0) {
						p.tag.shield = false;
						p.tag.time = 1; // Reset shield duration to 1 sec
					}
				}
			}

			_alive = checkSuvivors();

			// Display the result.html widget if the number of a survivor is 1 or 0
			if (_alive == 1) {
				if (_widget) {
					_widget.destroy();
					_widget = null;
				}

				_widget = App.showWidget("result.html", "top", 1055, 500);
				_widget.sendMessage({
					alive: _alive,
					name: lastSurvivor.name,
				});

				App.playSound("result.wav");
				startState(STATE_JUDGE);
			} else if (_alive == 0) {
				if (_widget) {
					_widget.destroy();
					_widget = null;
				}

				_widget = App.showWidget("result.html", "top", 1055, 500);
				_widget.sendMessage({
					alive: _alive,
				});

				App.playSound("result.wav");
				startState(STATE_JUDGE);
			}

			break;
		//Display the result.html widget for 5 secs and start STATE_END
		case STATE_JUDGE:
			if (_stateTimer >= 5) {
				startState(STATE_END);
			}
			break;
		case STATE_END:
			break;
	}
});

// Function executes when the app is closed or the game block is destroyed.
App.onDestroy.Add(function () {
	// Delete all objects installed by the app
	Map.clearAllObjects();
});
```

{% endcode %}


# Sidebar App

A simple example that shows a sidebar app widget and closes it by clicking the X button.

To put an image in a widget, you need to **base64 encode the image** and wrap it in **an img tag** as shown in the example html code.

**1) File**

{% file src="/files/IrprvrbrAP4NhqowTcqk" %}

**2) main.js**

```jsx
// Function that works when the sidebar app is touched (clicked).
App.onSidebarTouched.Add(function (p) {
	p.tag.widget = p.showWidget("widget.html", "sidebar", 350, 350);
	p.tag.widget.onMessage.Add(function (player, data) {
		if (data.type == "close") {
			player.showCenterLabel("Widget has been closed.");
			player.tag.widget.destroy();
			player.tag.widget = null;
		}
	});
});

// Function is called when the player enters
App.onJoinPlayer.Add(function (p) {
	p.tag = {
		widget: null,
	};
});

// Function is called when the player exits 
App.onLeavePlayer.Add(function (p) {
	if (p.tag.widget) {
		p.tag.widget.destroy();
		p.tag.widget = null;
	}
});
```

**3) Image of the Sidebar App Running**

<div align="left"><figure><img src="/files/6NTKKgPZzvOVVu9p6GWe" alt=""><figcaption></figcaption></figure></div>

***


# Race

**1) File**

{% file src="/files/ZtPo3WnEfLPIPDL0fTDH" %}

**2) main.js**

<pre class="language-jsx" data-overflow="wrap"><code class="lang-jsx">const STATE_INIT = 3000;
const STATE_READY = 3001;
const STATE_PLAYING = 3002;
const STATE_JUDGE = 3004;
const STATE_END = 3005;
const STATE_INTRO = 3006;

let _players = App.players; 
let _state = STATE_INIT; 
let _start = false; 
let _stateTimer = 0; 
let _countDown = 10; 
let _finishCountDown = false;
let _finishCount = 30;
let _finishTimer = 0; 
let _delayTimer = 0; 
let _playerBaseSpeed = 120; 
let _rank = 1; 
let _rankList = []; 

// When all players pass the finish line   
function finishCheck(){
	
	let allPlayer = 0; 
	let finishedPlayer = 0; 

	for(let p of _players){

		if(!p)
			continue; 

		if(p.tag.isNotPlayer)
			continue; 

		if(p.tag.isFinish)
			finishedPlayer++;
		
		allPlayer++; 
	}

	if(finishedPlayer == allPlayer)
		return true 
	
	return false; 
}

// Check if the race map is normally set; if not, return the error message
function checkSetting(){

	let warningMsg = '';

	if (!Map.hasLocation("race_start_point")) {
		warningMsg = 'race_start_point';

	}
	if (!Map.hasLocation("race_end_point")) {
		warningMsg = 'race_end_point';

	}
	if (!Map.hasLocation("race_finish_point")) {
		warningMsg = 'race_finish_point';

	}
	
	return warningMsg; 
}

function startState(state){

	_state = state; 
  	_stateTimer = 0; 

  	switch (state) {
		
    	case STATE_INIT:
     		for(let p of _players){
				//Check the user who started Race app
				if(p.id == App.creatorID){
					if(p.isMobile)
					//Widget for mobile users
						p.tag.widget = p.showWidget("setting.html", "bottom", 440, 340);
					else
					//Widget for desktop users
						p.tag.widget = p.showWidget("setting.html", "middle", 440, 340);
					
					p.tag.widget.sendMessage({ 
						str_title         : 'Run',
						str_title_text1   : "A race to see who reaches the finish line the fastest",
						str_title_text2   : 'Click the Start Running button to start the game',
						str_title_start   : "Start",
						str_title_how     : "How to set up a map"
					});
					
					p.tag.widget.onMessage.Add(function (sender, msg) {
						//Delete the displayed widget when quitting the game
						if (msg.type == "cancle") {
							if(p.tag.widget_warning){
								p.tag.widget_warning.destroy();
								p.tag.widget_warning = null;
							}

							if(p.tag.widget){
								p.tag.widget.destroy();
								p.tag.widget = null;
							}
						
						} else {
							// Check the necessary settings for the map 									
							let warning = checkSetting();
		
							if(warning !== ''){
								if(p.tag.widget_warning){
									p.tag.widget_warning.destroy();
									p.tag.widget_warning = null;
								}
		
								if(p.isMobile)
									p.tag.widget_warning = App.showWidget("warning.html", "top", 440, 60);
								else 
									p.tag.widget_warning = App.showWidget("warning.html", "bottom", 440, 250);
								
								p.tag.widget_warning.sendMessage({
									str_warningText :  'Race track needs to be set up',
									str_warningText2 : ' needed)',
									str_warningText3 : 'Run',
									warningMsg: warning,
								})
							} else {
								if(p.tag.widget){
									p.tag.widget.destroy();
									p.tag.widget = null;
								}
								
								startState(STATE_INTRO);
								_start = true;
							}
						}
					})  
				}
			}
    		break;

		case STATE_INTRO: 
			App.showCenterLabel("\n minigame - RUN \n\n", 0xffffff, 0x000000, 120); ;
			break; 
		
		case STATE_READY:
			for(let p of _players){
				if(p.tag.start)
				   continue; 
				
				//Locate all players to "race_start_point"
				p.spawnAtLocation("race_start_point"); 

				p.moveSpeed = 0; 
			   	p.sendUpdated();
			}
			break;
		
		case STATE_PLAYING:	
			
			App.showCenterLabel("Start!!", 0xffffff, 0x000000, 120); ;
			
			for(let p of _players){
				if(p.tag.start)
				continue; 
				p.moveSpeed = _playerBaseSpeed; 
				p.sendUpdated();
			}
			break

		// Process the game result
		case STATE_JUDGE:
			for(let i =0 ; i &#x3C;_rankList.length; i++){
				let rank = ''; 
				if(i == 0)
					rank = '1st'; 
				else if(i == 1)
					rank = '2nd';
				else if(i == 2)
					rank = '3rd'; 
				else
					rank = `${i + 1}th`;
				//Display the ranking when the game ends
				App.sayToAll(`${rank} : ${_rankList[i].name} !`);
			}
			for(let p of _players){
				p.moveSpeed = 80; 
				p.sendUpdated();
			}
			_start = false;

			break

		// Process the game end
		case STATE_END:
			for(let p of _players){
				//Spawn all players to "race_end_point" when the game ends
				p.spawnAtLocation("race_end_point"); 
				
				if(p.tag.isNotPlayer)
					p.tag.isNotPlayer = false;
			}
			_start = false;
			
			break
  }
}

App.onLeavePlayer.add(function(p){
	_players = App.players;

	p.moveSpeed = 80; 
	p.sendUpdated();

})

// Process when a player enters the Space
App.onJoinPlayer.Add(function (p) {
	p.tag = {};
  
	//Process when a player enters after the game has started
	if (_start) {
		p.tag.isNotPlayer = true;  

	} else {
		p.tag.isNotPlayer = false; 
		p.tag.speedTimer = 0;
		p.tag.isFinish = false;  
		p.tag.speedChnage = false; 
	  	p.sendUpdated();
	}
	//Locate a player who enters after the game has started to "race_end_point"
	if(p.tag.isNotPlayer)
		p.spawnAtLocation("race_end_point"); 

	_players = App.players;
  });

App.onStart.Add(function(){
	startState(_state);

	//When a player passes through the locations "speed_set_40", "speed_set_60", "speed_set_140", and "speed_set_160" 
	//its speed becomes the value of the location for 2secs and become normal (_playerBaseSpeed) again
	//e.g. passing "speed_set_40" turns the player's speed to 40 
	let speed = [40,60,140,160]; 

	for(let i =0; i&#x3C;speed.length; i++){
		App.addOnLocationTouched(`speed_set_${speed[i]}`, function(p){

			if(_state !== STATE_PLAYING)
				return; 

			p.moveSpeed = speed[i]; 
			p.tag.speedTimer = 0; 
			p.tag.speedChnage = true;

			//A label saying "Speed increased" or "Speed reduced" appears to the player when the speed has changed
			let str = '';
			if(i == 0)
				str = 'Speed greatly reduced';
			else if(i == 1)
				str = 'Speed reduced';
			else if(i == 2)
				str = 'Speed increased';
			else
				str = 'Speed greatly increased';

			p.showCenterLabel(`${str}`, 0xffffff, 0x000000, 120); 
			p.sendUpdated();	
		})
	}

	//"speed_set_random" means the player's speed will become one of 40, 60, 140, or 160 in a random way for 2 secs
	App.addOnLocationTouched(`speed_set_random`, function(p){
		if(_state !== STATE_PLAYING)
			return; 

		p.moveSpeed = speed[Math.floor(Math.random() * 4)]; 
		//A label saying "Speed increased" or "Speed reduced" appears to the player when the speed has changed
		let str = '';
		if(p.moveSpeed == 40)
			str = 'Speed greatly reduced';
		else if(p.moveSpeed == 60)
			str = 'Speed reduced';
		else if(p.moveSpeed == 140)
			str = 'Speed increased';
		else
			str = 'Speed greatly increased';

		p.showCenterLabel(`${str}`, 0xffffff, 0x000000, 120); 
		p.tag.speedTimer = 0; 
		p.tag.speedChnage = true;
		p.sendUpdated();
	})

	//When a player passes the finish line
	App.addOnLocationTouched("race_finish_point", function(p){
		if(p.tag.isFinish)
			return; 

		if(p.tag.isNotPlayer)
			return;

		_delayTimer = 0; 

		// When the first runner passes the finish line, a 30-second countdown begins
		if(!_finishCountDown)
			_finishCountDown = true;

		// Check if any player passes the finish line first time 
		p.tag.isFinish = true; 
		_rankList.push(p); 
		_rank++;
	})
});
 
App.onUpdate.Add(function(dt){
	_stateTimer += dt; 

	if(_start){
		for(let p of _players){
			if(p.tag.isNotPlayer)
				p.showCenterLabel("game is in progress, please wait..",0xffffff, 0x000000, 120);
		}
	}

	switch (_state) {
		case STATE_INIT:
		break;
		case STATE_INTRO: 
			if(_stateTimer >= 3){
				startState(STATE_READY);
			}
			break; 
		case STATE_READY:
			//A 10-second countdown begins at the start line
			App.showCenterLabel(`${_countDown}  seconds later the race will start. `,0xffffff, 0x000000, 120); 

			if(_stateTimer >= 1){
				_stateTimer = 0; 
				_countDown --; 
			} 
			
			//The race begins when the countdown is over (when "_countDown" becomes 0)  
			if(_countDown &#x3C;= 0)
				startState(STATE_PLAYING); 
			break;
		case STATE_PLAYING:
			
			for(let p of _players){

				if(finishCheck() &#x26;&#x26; _rankList.length == 0){
					p.showCenterLabel("There is no winner",0xffffff, 0x000000, 120);
					p.spawnAtLocation("race_end_point"); 
					startState(STATE_END);
				}
				// else if(finishCheck())
				// 	startState(STATE_JUDGE);
				
				if(p.tag.isNotPlayer)
					continue; 
				if(p.tag.speedChnage)
					p.tag.speedTimer += dt; 
				
				//The speed returns to normal (_playerBaseSpeed) after 2 secs whichever tile players pass 
				if(p.tag.speedTimer >= 2 &#x26;&#x26; p.tag.speedChnage){
					p.moveSpeed = _playerBaseSpeed; 
					p.tag.speedChnage = false; 
					p.sendUpdated(); 
				}
			}
			
			if(_finishCountDown)
				{	
					_delayTimer += dt; 
					//When the first player passes the finish line, a label showing the name and a countdown number appears above the player avatar's head
					if(_delayTimer &#x3C;=1.5)
						App.showCenterLabel(`${_rankList[_rankList.length -1].name}  ${_rank - 1} place ! \n\n ${_finishCount} seconds later the race will end`,0xffffff, 0x000000, 120);
					else
						App.showCenterLabel(`${_finishCount} seconds later the race will end`,0xffffff, 0x000000, 120);

					_finishTimer += dt; 

					if(_finishTimer >= 1){
						_finishCount--; 
						_finishTimer = 0; 
					}
					// When the countdown is over or every player has finished, move to the next state
					if(_finishCount == 0 || finishCheck()){
						startState(STATE_JUDGE); 
					}
				}
			break; 
		case STATE_JUDGE:
			//A label appears that says who the winner is for 5 sec
			if(_stateTimer &#x3C;= 5){
				App.showCenterLabel(`- Winner - \n\n ${_rankList[0].name}`,0xffffff, 0x000000, 120);
			} 
<strong>			//A label appears that says "You will soon be transported to the waiting room" for 5 sec
</strong>			else if(_stateTimer > 5 &#x26;&#x26; _stateTimer &#x3C;= 10 ){
				App.showCenterLabel("You will soon be transported to the waiting room",0xffffff, 0x000000, 120);
			}
			else {
				startState(STATE_END);
			}
			break;
		case STATE_END:
			
			break;
	}
});
</code></pre>

***


# ZEP Script FAQ

#### Q. Can I change the avatar’s appearance using ZEP Script?

{% hint style="success" %}
Yes, after loading the sprite sheet, you can apply it and change the avatar’s appearance when a specific event occurs. Please check the [<mark style="color:purple;">Changing Avatar Image</mark>](/zep-script/zep-script-guide/explore-zep-script/tutorials/changing-avatar-image) page.
{% endhint %}

#### Q. Is ZEP Script free to use?

{% hint style="success" %}
Yes, developing and deploying apps using ZEP Script is free.
{% endhint %}

#### Q. Is it possible to charge users using ZEP Script?

{% hint style="success" %}
Not at this time, but we plan to add a cash purchase and cryptocurrency purchase feature.
{% endhint %}

#### Q. Can I sell an app created using ZEP Script?

{% hint style="success" %}
It is not possible currently, but it will be in a future update.
{% endhint %}

#### Q. Is there an easier way to debug an app created using ZEP Script without deploying it?

{% hint style="success" %}
We are preparing an improved developer environment, but it is not available at this time.
{% endhint %}

#### Q. Can I use a different programming language to develop ZEP Script?

{% hint style="success" %}
Currently, the ZEP Script development environment only supports JavaScript.
{% endhint %}

#### Q. I would like to link with my own server API. How do I do this?

{% hint style="success" %}
ZEP Script supports JavaScript API Call. For more information, please refer to the [<mark style="color:purple;">Communicating with an External API</mark>](/zep-script/zep-script-guide/explore-zep-script/tutorials/communicating-with-an-external-api) page.
{% endhint %}


# Appendix

* [<mark style="color:purple;">ZEP Script Use Cases</mark>](/zep-script/zep-script-guide/appendix/zep-script-use-cases)
* [<mark style="color:purple;">Understanding Spaces and Maps</mark>](/zep-script/zep-script-guide/appendix/understanding-spaces-and-maps)
* [<mark style="color:purple;">JavaScript Keycode List</mark>](/zep-script/zep-script-guide/appendix/javascript-keycode-list)
* [<mark style="color:purple;">Understanding Sprite Sheets</mark>](/zep-script/zep-script-guide/appendix/understanding-sprite-sheets)
* [<mark style="color:purple;">TileEffectType Detailed Explanation</mark>](/zep-script/zep-script-guide/appendix/tileeffecttype-detailed-explanation)
* [<mark style="color:purple;">What are Reference Coordinates?</mark>](/zep-script/zep-script-guide/appendix/what-are-reference-coordinates)
* [<mark style="color:purple;">Communicating with an External API</mark>](/zep-script/zep-script-guide/explore-zep-script/tutorials/communicating-with-an-external-api)
* [<mark style="color:purple;">How to Use URL Query Strings</mark>](/zep-script/zep-script-guide/appendix/how-to-use-url-query-strings)
* [<mark style="color:purple;">Grammar Available for Widgets</mark>](/zep-script/zep-script-guide/appendix/grammar-available-for-widgets)
* [<mark style="color:purple;">Object Interaction with ZEP Script</mark>](/zep-script/zep-script-guide/appendix/object-interaction-with-zep-script)
* [<mark style="color:purple;">Object npcProperty</mark>](/zep-script/zep-script-guide/appendix/object-npcproperty)


# ZEP Script Use Cases

## Games

Here you can see some examples of games that were developed using ZEP Script.

### 🗃 ZEP Script Use Cases

You can use **ZEP Script** to create a variety of fun games.

Check out some games development cases that are used.

### Saving Private Kang: Lingtea X Kingdom of the Winds: Yeon

Kingdom of the Wind: Yeon, ZEP, and Lingtea collaborated to create a quest-style game called **“Saving Private Kang.”**

<div align="left"><figure><img src="/files/QXAp3FMuVnVMel7FdjBq" alt=""><figcaption></figcaption></figure></div>

### Arcade-Style Mini-Game: Lingtea X Kingdom of the Winds: Yeon

Kingdom of the Wind: Yeon, ZEP, and Lingtea collaborated to create an arcade-style mini-game featuring imagery from Kingdom of the Wind: Yeon, such as squirrels and acorns.

This is a very cutely expressed game.

<div align="left"><figure><img src="/files/B9extOPLv4MbQSiWd9t2" alt=""><figcaption></figcaption></figure></div>

### Paintman Game at the SUPERCAT Job Fair

This is a “Paintman” game that was played at the SUPERCAT Job Fair.

Using ZEP Script, you can even develop games for groups of 100 people or more!

<div align="left"><figure><img src="/files/9fnQ9t7UIFPiRZMDPdM5" alt=""><figcaption></figcaption></figure></div>

### Omok Game Developed by ZEP Users

There are more and more cases of ZEP users designing games using ZEP Script. Omok that is played with ZEP characters! Isn’t that fun?

<div align="left"><figure><img src="/files/ctbJ5LTg9bZgxBS6xA9F" alt=""><figcaption></figcaption></figure></div>

## Events

Here you can see some examples of ZEP Script being used for events.

###

### 🗃 ZEP Script Use Cases

By using **ZEP Script,** you can create a more interactive event.

See some examples of events using **ZEP Script** below.

### **Klaytn Museum**

This is an example of effectively demonstrating the technical strengths of the Klaytn blockchain by implementing **ZEP Script**.

<div align="left"><figure><img src="/files/8dCi4cf6NOiIRRRguHyR" alt=""><figcaption><p>Conveyor belt implemented using ZEP Script</p></figcaption></figure></div>


# Understanding Spaces and Maps

<div align="left"><figure><img src="/files/pT8oLB1iAHKHQ14YbMMK" alt=""><figcaption><p>The relationship between a Space and its maps</p></figcaption></figure></div>

A Space is a unit of a group of one or more maps.

Spaces and maps have a **HashID** to distinguish them from other Spaces or maps.

One of the maps included in a Space has the “Entry Map” property, and if you access a Space with only a spaceHashID and no mapID, you will be moved to the map with the “Entry Map” property.

If you go into the ZEP Map Editor, you can see the following URL format:

<div align="center"><figure><img src="/files/PtTdoR1cGcwK6JLMkDvs" alt=""><figcaption></figcaption></figure></div>

Here you can see that **Ak42Xz** is the **SpaceHashID** while **25g3RQ** is the **MapHashID**.


# JavaScript Keycode List

<table data-header-hidden><thead><tr><th width="227">Input Key</th><th>Keycode</th></tr></thead><tbody><tr><td>backspace</td><td>8</td></tr><tr><td>tab</td><td>9</td></tr><tr><td>enter</td><td>13</td></tr><tr><td>shift(left)</td><td>16</td></tr><tr><td>shift(right)</td><td>16</td></tr><tr><td>ctrl(left)</td><td>17</td></tr><tr><td>ctrl(right)</td><td>17</td></tr><tr><td>alt(left)</td><td>18</td></tr><tr><td>alt(right)</td><td>18</td></tr><tr><td>pause/break</td><td>19</td></tr><tr><td>caps lock</td><td>20</td></tr><tr><td>escape</td><td>27</td></tr><tr><td>space</td><td>32</td></tr><tr><td>page up</td><td>33</td></tr><tr><td>page down</td><td>34</td></tr><tr><td>end</td><td>35</td></tr><tr><td>home</td><td>36</td></tr><tr><td>left arrow</td><td>37</td></tr><tr><td>up arrow</td><td>38</td></tr><tr><td>right arrow</td><td>39</td></tr><tr><td>down arrow</td><td>40</td></tr><tr><td>print screen</td><td>44</td></tr><tr><td>insert</td><td>45</td></tr><tr><td>delete</td><td>46</td></tr><tr><td>0</td><td>48</td></tr><tr><td>1</td><td>49</td></tr><tr><td>2</td><td>50</td></tr><tr><td>3</td><td>51</td></tr><tr><td>4</td><td>52</td></tr><tr><td>5</td><td>53</td></tr><tr><td>6</td><td>54</td></tr><tr><td>7</td><td>55</td></tr><tr><td>8</td><td>56</td></tr><tr><td>9</td><td>57</td></tr><tr><td>a</td><td>65</td></tr><tr><td>b</td><td>66</td></tr><tr><td>c</td><td>67</td></tr><tr><td>d</td><td>68</td></tr><tr><td>e</td><td>69</td></tr><tr><td>f</td><td>70</td></tr><tr><td>g</td><td>71</td></tr><tr><td>h</td><td>72</td></tr><tr><td>i</td><td>73</td></tr><tr><td>j</td><td>74</td></tr><tr><td>k</td><td>75</td></tr><tr><td>l</td><td>76</td></tr><tr><td>m</td><td>77</td></tr><tr><td>n</td><td>78</td></tr><tr><td>o</td><td>79</td></tr><tr><td>p</td><td>80</td></tr><tr><td>q</td><td>81</td></tr><tr><td>r</td><td>82</td></tr><tr><td>s</td><td>83</td></tr><tr><td>t</td><td>84</td></tr><tr><td>u</td><td>85</td></tr><tr><td>v</td><td>86</td></tr><tr><td>w</td><td>87</td></tr><tr><td>x</td><td>88</td></tr><tr><td>y</td><td>89</td></tr><tr><td>z</td><td>90</td></tr><tr><td>left window key</td><td>91</td></tr><tr><td>right window key</td><td>92</td></tr><tr><td>select key</td><td>93</td></tr><tr><td>numpad 0</td><td>96</td></tr><tr><td>numpad 1</td><td>97</td></tr><tr><td>numpad 2</td><td>98</td></tr><tr><td>numpad 3</td><td>99</td></tr><tr><td>numpad 4</td><td>100</td></tr><tr><td>numpad 5</td><td>101</td></tr><tr><td>numpad 6</td><td>102</td></tr><tr><td>numpad 7</td><td>103</td></tr><tr><td>numpad 8</td><td>104</td></tr><tr><td>numpad 9</td><td>105</td></tr><tr><td>multiply</td><td>106</td></tr><tr><td>add</td><td>107</td></tr><tr><td>substract</td><td>109</td></tr><tr><td>decimal point</td><td>110</td></tr><tr><td>divide</td><td>111</td></tr><tr><td>f1</td><td>112</td></tr><tr><td>f2</td><td>113</td></tr><tr><td>f3</td><td>114</td></tr><tr><td>f4</td><td>115</td></tr><tr><td>f5</td><td>116</td></tr><tr><td>f6</td><td>117</td></tr><tr><td>f7</td><td>118</td></tr><tr><td>f8</td><td>119</td></tr><tr><td>f9</td><td>120</td></tr><tr><td>f10</td><td>121</td></tr><tr><td>f11</td><td>122</td></tr><tr><td>f12</td><td>123</td></tr><tr><td>num lock</td><td>144</td></tr><tr><td>scroll lock</td><td>145</td></tr><tr><td>audio volume mute</td><td>173</td></tr><tr><td>audio volume down</td><td>174</td></tr><tr><td>media player</td><td>175</td></tr><tr><td>audio volume up</td><td>181</td></tr><tr><td>launch application 1</td><td>182</td></tr><tr><td>launch application 2</td><td>183</td></tr><tr><td>semi-colon</td><td>186</td></tr><tr><td>equal sign</td><td>187</td></tr><tr><td>comma</td><td>188</td></tr><tr><td>dash</td><td>189</td></tr><tr><td>period</td><td>190</td></tr><tr><td>forward slash</td><td>191</td></tr><tr><td>Backquote</td><td>192</td></tr><tr><td>open bracket</td><td>219</td></tr><tr><td>back slash</td><td>220</td></tr><tr><td>close bracket</td><td>221</td></tr><tr><td>single quote</td><td>222</td></tr></tbody></table>


# Understanding Sprite Sheets

## App.loadSpritesheet

<div align="left"><figure><img src="/files/zbd3HcYQGia7TzXni8qf" alt=""><figcaption></figcaption></figure></div>

```jsx
// 
App.loadSpritesheet(fileName: string, frameWidth: integer, frameHeight: integer, anims: array, frameRate: integer)
```

### frameWidth & frameHeight

Each Blueman sprite has an image size of 48 px\*64 px.

If 48 and 64 are specified for frameWidth and frameHeight respectively, each image will be numbered from 0 to 41.

## anims

anims refers to an array to assign animations to.

The form is different if the sprite is being used for an avatar compared to when the sprite is being used for an object.

### Example 1) Dancing Blueman Object

The dancing Blueman object animation corresponds to images 21 to 38 as shown in the code below.

You can use image numbers by specifying them as an array.

{% code overflow="wrap" %}

```jsx
let blueman_dance = App.loadSpritesheet(
	"blueman.png",
	48,
	64,
	[20, 21, 22, 23, 24, 25, 26, 27, 28, 29, 30, 31, 32, 33, 34, 35, 36, 37], // Images from 21 to 38 form animation
	8
);
```

{% endcode %}

### Example 2) Using Blueman as an Avatar Image

Unlike objects, avatars can trigger various animations based on which keys the player presses. In this case, you can input { } brackets in the anims parameter and specify an image array for the animation name as follows. There are a total of 9 types of animations that can be assigned to a character as seen below, and they can be omitted if the sprite sheet doesn’t contain frames for a specific animation.

```jsx
let blueman = App.loadSpritesheet('blueman.png', 48, 64, {
    left: [5, 6, 7, 8, 9], // images that moves left
    up: [15, 16, 17, 18, 19],
    down: [0, 1, 2, 3, 4],
    right: [10, 11, 12, 13, 14],
		dance: [20,21,22,23,24,25,26,27,28,29,30,31,32,33,34,35,36,37],
		down_jump: [38],
		left_jump: [39],
		right_jump: [40],
		up_jump: [41],
}, 8);
// Player avatar changes when the player enters
App.onJoinPlayer.Add(function(player){
	player.sprite = blueman;
	player.sendUpdated();
});
```

### Example 3) As a Single Image

<div align="left"><figure><img src="/files/gXtpsp5PGs8NLD8rMpbe" alt=""><figcaption></figcaption></figure></div>

If the sprite is a single image, you do not need to enter any parameters except for the file name.

```jsx
let blueman = App.loadSpritesheet('blueman.png')
```

A single image can also be applied as a character image. However, since no animation is specified, the image will be the same no matter which direction it moves.

***


# TileEffectType Detailed Explanation

This page explains how to use Tile Effects (TileEffectType) when using the function `Map.putTileEffect`. For more information on Tile Effects, please refer to the link provided below.

:fire: [<mark style="color:purple;">**Tile Effects**</mark>](broken://pages/mLgIqpsZNwnpWkSA5B7A)

## 📗 Basic Tile Effects

### TileEffectType.NONE

A tile effect that has no effect.

**Example**

```jsx
//Erases tile effects on the specified coordinates
Map.putTileEffect(x, y, TileEffectType.NONE);
```

### **TileEffectType.IMPASSABLE**

A tile effect that does not allow users to pass.

**Example**

```jsx
//Sets an IMPASSABLE tile effect on the corresponding coordinates
Map.putTileEffect(x, y, TileEffectType.IMPASSABLE);
```

### **TileEffectType.SPAWN**

A tile effect that spawns users to a coordinate when the user enters the map.

**Example**

```jsx
//Sets the SPAWN tile effect on the corresponding coordinates
Map.putTileEffect(x, y, TileEffectType.SPAWN);
```

## 🌀 Portal Tile Effects

### TileEffectType.PORTAL

A tile effect that moves users to a **different specified location area** or a **different map within the space**.

**Parameter**

<table><thead><tr><th width="163.33333333333331">Name</th><th width="99">Type</th><th>Description</th></tr></thead><tbody><tr><td>type</td><td>Number</td><td>When the type is 0, can set a portal tile that allows players to another map within the Space.<br>When the type is 1, can set a portal tile that allows players to move to another specific location within the map.</td></tr><tr><td>targetMapID</td><td>String</td><td>The MapID value of the target map</td></tr><tr><td>label</td><td>String</td><td>The text value to display over the portal</td></tr><tr><td>triggerByTouch</td><td>Boolean</td><td>When true: activates when contact is made<br>When false: activates when f is pressed</td></tr><tr><td>invisible</td><td>Boolean</td><td>When true: hide the default portal image<br>When false: show the default portal image</td></tr><tr><td>locationName</td><td>String</td><td>Value of the target location’s name (If type is 1, this value is a required field.)</td></tr></tbody></table>

**Example**

{% code overflow="wrap" %}

```jsx
// when type: 0
// Installs a portal tile that leads to another map in the Space
Map.putTileEffect(x, y, TileEffectType.PORTAL, {
	type: 0, // Required 
	locationName: "TEST",  // Optional
	targetMapID: "gyV1N2", // Required 
	label: "PORTAL-TYPE0", // Optional
  triggerByTouch: true // Optional, "false" is default
});

// If type: 1
// Installs a portal tile that leads to a target area in the same map
Map.putTileEffect(x, y, TileEffectType.PORTAL, {
	type: 1, // Required 
	label: "PORTAL-TYPE1",  // Optional
	locationName: "TEST", // Required 
	invisible: true, // Optional, hiding the default portal image
	triggerByTouch: true  // Optional, "false" is default
});
```

{% endcode %}

### TileEffectType.SPACE\_PORTAL

A tile effect that moves participants to another Space.

**Parameter**

<table><thead><tr><th width="171.33333333333331">Name</th><th width="124">Type</th><th>Description</th></tr></thead><tbody><tr><td>label</td><td>String</td><td>The text value to display over the portal</td></tr><tr><td>targetMapID</td><td>String</td><td><p>The SpaceID value of the target Space</p><p>https://zep.us/play/[Space ID]</p></td></tr><tr><td>locationName</td><td>String </td><td>Value of the target location’s name</td></tr><tr><td>triggerByTouch </td><td>Boolean </td><td>When true: activates when contact is made<br>When false: activates when f is pressed</td></tr><tr><td>invisible</td><td>Boolean</td><td>When true: hide the default portal image<br>When false: show the default portal image</td></tr></tbody></table>

**Example**

```jsx
// Installs a portal tile that leads to another Space
Map.putTileEffect(x, y, TileEffectType.SPACE_PORTAL, {
	label: "SPACE_PORTAL",  // Optional
	targetMapID: "zydmYD", //Required 
	locationName: "SPACE1",  // Optional
	invisible: true,  // Optional, "false" is default
	triggerByTouch: true,  // Optional, "false" is default
});
```

## 🌐 Embed Tile Effects

### TileEffectType.EMBED

A tile effect that opens a web link in a new window.

**Parameter**

<table><thead><tr><th width="164.33333333333331">Name</th><th width="111">Type</th><th>Description</th></tr></thead><tbody><tr><td>link</td><td>String</td><td>Value of the web URL</td></tr><tr><td>align2</td><td>String</td><td>Location where to show the window<br>’popup’, ‘sidebar’, ‘top’, ‘topleft’, ‘topright’, ‘middle’, ‘middleleft’, ‘middleright’, ‘bottom’, ‘bottomleft’, ‘bottomright’</td></tr><tr><td>label</td><td>String</td><td>The text value to display over the portal</td></tr><tr><td>triggerByTouch</td><td>Boolean</td><td>When true: activates when contact is made<br>When false: activates when f is pressed</td></tr><tr><td>invisible</td><td>Boolean</td><td>When true: hide the default portal image<br>When false: show the default portal image</td></tr></tbody></table>

**Example**

<pre class="language-jsx"><code class="lang-jsx">// Installs a portal effect that opens a web link in a new window
Map.putTileEffect(x, y, TileEffectType.EMBED, {
	link: "https://zep.us/", // Required
	align2: "top", // Required
<strong>	label: "ZEP-SCRIPT-EMBED",  // Optional
</strong>});
</code></pre>

### TileEffectType.WEB\_PORTAL

A tile effect that opens a web link in a new tab.

**Parameter**

<table><thead><tr><th width="119.33333333333331">Name</th><th width="113">Type</th><th>Description</th></tr></thead><tbody><tr><td>link</td><td>String</td><td>Value of the web URL</td></tr><tr><td>label</td><td>String</td><td>The text value to display over the portal</td></tr><tr><td>invisible</td><td>Boolean</td><td>When true: hide the default portal image<br>When false: show the default portal image</td></tr></tbody></table>

**Example**

```jsx
// Installs a tile effect that opens a web link in a new tab.
Map.putTileEffect(x, y, TileEffectType.WEB_PORTAL, {
	link: "https://zep.us/", // Required
	label: "ZEP-SCRIPT-WEB-PORTAL", // Optional
	invisible: true, // Optional, "false" is default
});
```

### TileEffectType.TILE\_EMBED

A tile effect that embeds a web URL in a designated area.

**Parameter**

<table><thead><tr><th width="135.33333333333331">Name</th><th width="126">Type</th><th>Description</th></tr></thead><tbody><tr><td>link</td><td>String</td><td>Value of the web URL</td></tr><tr><td>width</td><td>number</td><td>Width of the designated area (number of tiles)</td></tr><tr><td>height</td><td>number</td><td>Height of the designated area (number of tiles)</td></tr></tbody></table>

**Example**

```jsx
// Installs a web in a designated area
Map.putTileEffect(x, y, TileEffectType.TILE_EMBED, {
	link: "https://zep.us/", // Required 
	width: 5, // Required 
	height: 5, // Required 
});
```

## 💠 Utility Tile Effects

### TileEffectType.PRIVATE\_AREA

A tile effect that has a private area effect.

**Parameter**

<table><thead><tr><th width="136.33333333333331">Name</th><th width="103">Type</th><th>Description</th></tr></thead><tbody><tr><td>id</td><td>Number</td><td>ID Value of the private area</td></tr><tr><td>impassable</td><td>Boolean</td><td>When true: sets the private area "impassable"</td></tr><tr><td>param1</td><td>String</td><td>When param1 is "true", only one person is allowed per tile</td></tr></tbody></table>

**Example**

```jsx
// Installs a private area in the designated coordinates
Map.putTileEffect(18, 15, TileEffectType.PRIVATE_AREA, {
		id: 3, // Required
		impassable: false,  // Optional, "false" is default
		param1: "true",   // Optional, "false" is default
	});
```

### TileEffectType.LOCATION

A tile effect for a map location.

**Parameter**

<table><thead><tr><th width="132.33333333333331">Name</th><th width="144">Type</th><th>Description</th></tr></thead><tbody><tr><td>label</td><td>String</td><td>The text value to display over the tile</td></tr><tr><td>name</td><td>String</td><td>Name of the map location</td></tr><tr><td>width</td><td>number</td><td>Width of the designated area (number of tiles)</td></tr><tr><td>height</td><td>number</td><td>Height of the designated area (number of tiles)</td></tr></tbody></table>

**Example**

```jsx
// Installs a map location in the designated coordinates
Map.putTileEffect(x, y, TileEffectType.LOCATION, {
	label: "LOCATION",  // Optional
	name: "zep-script-location", // Required 
	width: 3, // Required 
	height: 2, // Required 
});
```

### TileEffectType.AMBIENT\_SOUND

A tile effect for ambient sound.

**Parameter**

<table><thead><tr><th width="177.33333333333331">Name</th><th width="141">Type</th><th>Description</th></tr></thead><tbody><tr><td>link</td><td>String</td><td>Name of the sound file to play (included in the ZIP file)</td></tr><tr><td>activeDistance</td><td>Number</td><td>Radius of ambient sound (number of tiles)</td></tr><tr><td>triggerByTouch</td><td>Boolean</td><td>When true: activates when contact is made<br>When false: activates when f is pressed</td></tr></tbody></table>

**Example**

```jsx
Map.putTileEffect(x, y, TileEffectType.AMBIENT_SOUND, {
	link: "ring.mp3", // Required 
	activeDistance: 1, // Required
	triggerByTouch: false, // Optional
});
```


# What are Reference Coordinates?

Reference coordinates are standards of where the image will be displayed when the object is placed.

What will happen when the object image is placed on 3, 3 with the reference coordinates of Left-Top as displayed below?

<div align="left"><figure><img src="/files/Fo99vgVzx1ufOfQuWUna" alt=""><figcaption></figcaption></figure></div>

The image will be placed on the 3, 3 tile box like below if the reference coordinates are Left-Top.

<div align="left"><figure><img src="/files/EgHLBiPhx3ZF3v8wustK" alt=""><figcaption></figcaption></figure></div>


# Communicating with an External API

You can send GET, POST, etc. requests with arguments to an external API.

### httpGet

Change the nicknames of the users who have just entered with the [<mark style="color:purple;">Korean Nickname Generator</mark>](https://nickname.hwanmoo.kr/) API.

![](/files/8lPOX1WN5ORPKaG6675E)

```jsx
// Executes when a player enters
App.onJoinPlayer.Add(function (player) {
	App.httpGet(
		"https://nickname.hwanmoo.kr/?format=json&count=1&max_length=6&whitespace=_",
		null,
		function (res) {
			// Change the response to a json object
			let response = JSON.parse(res);
			player.name = response.words[0];
			player.sendUpdated();
		}
	);
});
```

### httpPost

Receive the header and data sent from the app in response and display in the chat window.

```jsx
// Activates function when q is pressed
App.addOnKeyDown(81, function (player) {
	App.httpPost(
		"https://postman-echo.com/post",
		{
			"test-header": "zep",
		},
		{
			name: "zepscript",
		},
		(res) => {
			let response = JSON.parse(res);
			App.sayToAll(`header sent: ${response.headers["test-header"]}`, 0xffffff);
			App.sayToAll(`data sent: ${response.form.name}`, 0xffffff);
		}
	);
});
```

{% hint style="warning" %}
Please Note

* For the tutorial, we recommend setting the app type to Mini-Game.&#x20;
* The JSON file name must be “main”. Please create a new text file and name it main.js.
* If you do not know how to deploy an app, please refer to the [<mark style="color:purple;">**ZEP Script Deployment Guide**</mark>](/zep-script/zep-script-guide/zep-script-development-guide/zep-script-deployment-guide)<mark style="color:purple;">.</mark>
  {% endhint %}


# How to Use URL Query Strings

A URL query string is a data delivery method that provides input data at the end of the URL.\
**E.g.,** <mark style="color:purple;">`https://zep.us/play/{mapHashId}?{parameter}={value}`</mark>

You can deliver data to a ZEP Space or ZEP Script using a URL query strings.

## URL Query String Parameters Available in ZEP

### 1. name

When users who are not signed in enter a Space, you can set their nickname as the value passed as the name parameter.

* Example: <mark style="color:purple;">`https://zep.us/play/{mapHashId}?name=A`</mark>

  <figure><img src="/files/UtYonPLK6sMVavC8doxB" alt=""><figcaption></figcaption></figure>

:warning: Make sure to deactivate nickname settings pop-up for guests!

<figure><img src="/files/zx2hFeuTdTWAfyeTbe2d" alt=""><figcaption></figcaption></figure>

### 2. customData

You can pass data to ZEP Script player objects.\
You can create a whitelist function, such as identifying users by passing user identification information such as SSO token information to ZEP Script.

**Example 1** \
Receive user information with customData and apply it. (Normal app, sidebar app recommended)

⚡ URL used for example

<mark style="color:purple;">`https://zep.us/play/{mapHashId}?customData={"name":"customUser", "moveSpeed":150, "title":"customTitle"}`</mark>

```jsx
App.onJoinPlayer.Add(function (player) {
  // Checks if there is customData passed
	if (player.customData) {
		// Converts customData to object and uses
		let playerCustomData = JSON.parse(player.customData);
		if (playerCustomData.hasOwnProperty("name")) {
			player.name = playerCustomData["name"];
		}
		if (playerCustomData.hasOwnProperty("moveSpeed")) {
			player.moveSpeed = playerCustomData["moveSpeed"];
		}
		if (playerCustomData.hasOwnProperty("title")) {
			player.title = playerCustomData["title"];
		}
		App.sayToAll("customData applied");
		player.sendUpdated();
	}
  // Displays message if there is no customData passed
  else {
		App.sayToAll("customData not delivered.");
	}
});
```

<figure><img src="/files/eAaqDH0HGfFvxLjPgQ5g" alt=""><figcaption><p>When customData is Successfully Applied</p></figcaption></figure>

<figure><img src="/files/wfhPWbV0Lbmzxml4qPU3" alt=""><figcaption><p>When Failed to Receive customData</p></figcaption></figure>

**Example 2**

Create a simple token-based whitelist function. (Normal app, sidebar app recommended)

{% file src="/files/O7bDMCIodHZcWxeLsOK9" %}

✅ A token with base64 encryption in the browser developer tools (F12) has been created as follows:

<figure><img src="/files/a9Oyo0Eh1OuW022EOcbn" alt=""><figcaption></figcaption></figure>

⚡ URL used for example

<mark style="color:purple;">`https://zep.us/play/{mapHashId}?customData=JTdCJTIydG9rZW4lMjIlM0ElMjIlRUMlOUMlQTAlRUMlQTAlODAxJTJGd2hpdGVMaXN0JTIyJTdE`</mark>

```jsx
App.onJoinPlayer.Add(function (player) {
	player.tag = {};
	if (player.customData) {
		let token = player.customData;
		// Sends token to widget to decrypt
		player.tag.widget = player.showWidget("main.html", "topleft", 1, 1);
		player.tag.widget.sendMessage({
			type: "decode",
			token: token,
		});
		player.tag.widget.onMessage.Add(function (player, data) {
			if (data.type == "decode") {
				let decodedToken = data.decodedToken;
				App.sayToAll(decodedToken);
				// Receives the decrypted code and converts it to an object
				let playerData = JSON.parse(decodedToken);

				let playerName = playerData["token"].split("/")[0];
				let isTrusted = playerData["token"].split("/")[1];

				if (isTrusted == "whiteList") {
					player.name = playerName;
					player.title = "verified user";
					player.sendUpdated();
				}
				player.tag.widget.destroy();
				player.tag.widget = null;
			}
		});
	} else {
		App.sayToAll("customData not delivered.");
	}
});
```

```powershell
// Script used in widget
window.addEventListener("message", function (e) {
  if (e.data.type == "decode") {
		// Decrypt the base64 token
    decodedToken = decodeURIComponent(atob(e.data.token));
    window.parent.postMessage({
      type: "decode",
      decodedToken: decodedToken
    }, "*")
  }
})
```

<figure><img src="/files/08bvMq3lnjxxflwTvsCw" alt=""><figcaption><p>When Successfully Verified with a Token</p></figcaption></figure>


# How to Change the Mobile Interaction Button

You can customize the mobile interaction button by using `App.loadSpriteSheet`.

> Note: The size of the mobile button image is 180 x 180 px.

```
// let button_image = App.loadSpritesheet("button_image.png");
let button;
App.onStart.Add(function () {
        // add button
        button = App.addMobileButton(8, 145, 75, function (player) {
        App.sayToAll(`${player.name}, has tapped the button.`)
	});
	
	button.image = button_image;
	button.sendUpdated();
});
```

<figure><img src="/files/cYdLJDpcO07zN8YnRZSy" alt=""><figcaption><p>Example of the Updated Mobile Button</p></figcaption></figure>


# Grammar Available for Widgets

## Open a Webpage in a New Window

You can open a webpage in a new window by entering the codes below within the widget's `<script>` tag.

```
let url = "https://zep.us/";
window.parent.postMessage({
	type: 'ScriptAction:OPEN_WINDOW',
	link: url,
	zepSystem: true
}, '*');
```


# Object Interaction with ZEP Script

You can create a script by detecting an event with ZEP Script that occurs when interacting with an object installed in the Map Editor.

In order to do this, you have to install an object that interacts with ZEP Script in the Map Editor as in the following.

1. Go to the Map Editor → Install an object → **Object Settings** →  Click **Interact with ZEP Script**\
   ![](/files/lozUiYlOUofsf85mNhLh)
2. Enter values into the **Number** and **Value (optional)** boxes.\
   ![](/files/nCL7dk9sxABJjKyrRFi9)
3. Write a script as below and run the app. Then the value you have entered in advance will be shown when interacting with this object.

```jsx
App.onObjectTouched.Add(function (sender, x, y, tileID, obj) {
    if (obj !== null) {
        if (obj.type == ObjectEffectType.INTERACTION_WITH_ZEPSCRIPTS) {
            App.sayToAll(`Number = ${obj.text}, Value = ${obj.param1}`, 0xFFFFFF);
        }
    } else {
        App.sayToAll(`obj is null`, 0xFFFFFF);
    }
});
```

Please use `[obj.type == ObjectEffectType.INTERACTION_WITH_ZEPSCRIPTS]` as a script condition.


# Object npcProperty

The npcProperty can be specified in the option parameters of the `Map.putObjectWithKey(x, y, dynamicResource, option)` function, and up to five properties can be defined.

<table><thead><tr><th width="171.33333333333331">Name</th><th width="113">Type</th><th>Description</th></tr></thead><tbody><tr><td>name</td><td>string</td><td>Name to be displayed above an object</td></tr><tr><td>hp</td><td>number</td><td>Current HP of an object</td></tr><tr><td>hpMax</td><td>number</td><td>Maximum HP of an object</td></tr><tr><td>gaugeWidth</td><td>number</td><td><p>Width of the HP gauage bar</p><p>If left blank, it is set to the width of the image.</p></td></tr><tr><td>hpColor</td><td>number</td><td>Color of the HP gauage bar<br>E.g. 0x03ff03 (green)</td></tr></tbody></table>

**Example 1 - Create an object using npcProperty**

![](/files/vXBpk2DMlU6J6MGcV15t)

{% file src="/files/ki2d2yApgoXJzc8qD6Tv" %}

```javascript
let blueman = App.loadSpritesheet('blueman.png', 48, 64, {
    left: [5, 6, 7, 8, 9],
    up: [15, 16, 17, 18, 19],
    down: [0, 1, 2, 3, 4],
    right: [10, 11, 12, 13, 14],
    dance: [20,21,22,23,24,25,26,27,28,29,30,31,32,33,34,35,36,37],
    down_jump: [38],
    left_jump: [39],
    right_jump: [40],
    up_jump: [41],
}, 8);
App.addOnKeyDown(81, function (player) {
    const objectKey = "TestBlueMan";
    const bluemanObject = Map.putObjectWithKey(18, 6, blueman, {
	npcProperty: { name: "BlueMan", hpColor: 0x03ff03, hp: 100, hpMax: 100 },
	overlap: true,
	movespeed: 100,
	key: objectKey, 
	useDirAnim: true 
    });

    Map.playObjectAnimationWithKey(objectKey, "down", -1);
});
```

**Example 2 -Implement an HP dropping effect using npcProperty.**

![](/files/95d1ZAtLGgAmIjhCcoUV)

{% file src="/files/8nxiktehoKIYTnGGtOZC" %}

```javascript
let blueman = App.loadSpritesheet('blueman.png', 48, 64, {
    left: [5, 6, 7, 8, 9], // Image of leftward movement
    up: [15, 16, 17, 18, 19],
    down: [0, 1, 2, 3, 4],
    right: [10, 11, 12, 13, 14],
    dance: [20,21,22,23,24,25,26,27,28,29,30,31,32,33,34,35,36,37],
    down_jump: [38],
    left_jump: [39],
    right_jump: [40],
    up_jump: [41],
}, 8);

App.addOnKeyDown(81, function (player) {
    const objectKey = "TestBlueMan";
	const bluemanObject = Map.putObjectWithKey(18, 6, blueman, {
		npcProperty: { name: "BlueMan", hpColor: 0x03ff03, hp: 100, hpMax: 100 },
		overlap: true,
                collide: true, // ★ collid: true
		movespeed: 100, 
		key: objectKey, 
		useDirAnim: true
	});

    Map.playObjectAnimationWithKey(objectKey, "down", -1);
});

App.onAppObjectAttacked.Add(function (p, x, y, layer, key) {
    const targetObject = Map.getObjectWithKey(key);
    targetObject.npcProperty.hp -= 10;
    if(targetObject.npcProperty.hp > 0) {
        const hpPercentage = targetObject.npcProperty.hp / targetObject.npcProperty.hpMax;
        if (hpPercentage < 0.3) {
            targetObject.npcProperty.hpColor = 0xff0000;
        } else if (hpPercentage < 0.7) {
            targetObject.npcProperty.hpColor = 0xffa500;
        }
        targetObject.sendUpdated();
    } else {
        Map.putObjectWithKey(targetObject.tileX, targetObject.tileY, null, { key: key })
    }
});

```


# ZEP Script API

This document provides guidance on the four classes that make up ZEP Script.

### Introduction

ZEP Script consists of the following four classes:

### [<mark style="color:purple;">ScriptApp</mark>](/zep-script/zep-script-api/scriptapp)

Script responsible for overall functions in the Space where the app is installed

* [<mark style="color:purple;">Lifecycle</mark>](/zep-script/zep-script-api/scriptapp/lifecycle)
* [<mark style="color:purple;">Field</mark>](/zep-script/zep-script-api/scriptapp/field)
* [<mark style="color:purple;">Event Listeners</mark>](/zep-script/zep-script-api/scriptapp/event-listeners)
* [<mark style="color:purple;">Callbacks</mark>](/zep-script/zep-script-api/scriptapp/callbacks)
* [<mark style="color:purple;">Methods</mark>](/zep-script/zep-script-api/scriptapp/methods)

### [<mark style="color:purple;">ScriptMap</mark>](/zep-script/zep-script-api/scriptmap)

Script responsible for adding, modifying, or deleting tiles or objects on the map

* [<mark style="color:purple;">Field</mark>](/zep-script/zep-script-api/scriptmap/field)
* [<mark style="color:purple;">Methods</mark>](/zep-script/zep-script-api/scriptmap/methods)

### [<mark style="color:purple;">ScriptPlayer</mark>](/zep-script/zep-script-api/scriptplayer)

Script responsible for functions designating player settings and coordinates, and also for calling user information

* [<mark style="color:purple;">Field</mark>](/zep-script/zep-script-api/scriptplayer/field)
* [<mark style="color:purple;">Methods</mark>](/zep-script/zep-script-api/scriptplayer/methods)

### [<mark style="color:purple;">ScriptWidget</mark>](/zep-script/zep-script-api/scriptwidget)

Script that can use pre-made HTML within the map as a widget

* [<mark style="color:purple;">Field</mark>](/zep-script/zep-script-api/scriptwidget/field)
* [<mark style="color:purple;">Event Listeners</mark>](/zep-script/zep-script-api/scriptwidget/event-listeners)
* [<mark style="color:purple;">Methods</mark>](/zep-script/zep-script-api/scriptwidget/methods)


# API Summary

### :mag:Use Ctrl + F to search the API you want and click the title for details!

## ═════════════════════

## 🕹️ ScriptApp&#x20;

## ═════════════════════

## ♻️ Lifecycle

### [onInit](/zep-script/zep-script-api/scriptapp/lifecycle#oninit)

{% hint style="info" %}
&#x20;App.onInit.Add(function(){})
{% endhint %}

This function is called once when running the app for the first time.

### [onJoinPlayer](/zep-script/zep-script-api/scriptapp/lifecycle#onjoinplayer)

{% hint style="info" %}
App.onJoinPlayer.Add(function(player){})
{% endhint %}

Once onInit is called, this event lets all connected players enter and then operates whenever a new player enters afterward.

### [onStart](/zep-script/zep-script-api/scriptapp/lifecycle#onstart)

{% hint style="info" %}
App.onStart.Add(function(){})
{% endhint %}

This function is called once after players have entered via onJoinPlayer.

### [onUpdate](/zep-script/zep-script-api/scriptapp/lifecycle#onupdate)

{% hint style="info" %}
App.onUpdate.Add(function(dt){})
{% endhint %}

This function runs periodically about every 20ms.

### [onLeavePlayer](/zep-script/zep-script-api/scriptapp/lifecycle#onleaveplayer)

{% hint style="info" %}
&#x20;App.onLeavePlayer.Add(function(player){})
{% endhint %}

This function operates whenever a player exits. After that, this function kicks all players from the app when another app is launched or the installed Game Block is destroyed.

### [onDestroy](/zep-script/zep-script-api/scriptapp/lifecycle#ondestroy)

{% hint style="info" %}
App.onDestroy.Add(function(){})
{% endhint %}

It operates when another app is launched or the installed Game Block is destroyed.

## 🗃️ Field

### [spaceHashID & mapHashID](broken://pages/tDQnn0o07RdoXBHwuVWQ#spacehashid-and-maphashid)

{% hint style="info" %}
App.spaceHashID: String \
App.mapHashID: String
{% endhint %}

This calls spaceHashID and mapHashID of the Space where an app is installed. ([<mark style="color:purple;">Understanding Spaces and Maps</mark>](/zep-script/zep-script-guide/appendix/understanding-spaces-and-maps))

### [creatorID](/zep-script/zep-script-api/scriptapp/field#creatorid)

{% hint style="info" %}
App.creatorID
{% endhint %}

This calls the ID value of the player who executed the app.

### [players](/zep-script/zep-script-api/scriptapp/field#players)

{% hint style="info" %}
App.players: ScriptPlayer\[]
{% endhint %}

This calls a list of all players on the map as an array.

### [playerCount](/zep-script/zep-script-api/scriptapp/field#playercount)

{% hint style="info" %}
App.playerCount: Number
{% endhint %}

This calls the number of all players on the map where the app is installed.

### [cameraEffect & cameraEffectParam1](/zep-script/zep-script-api/scriptapp/field#cameraeffect-and-cameraeffectparam1)

{% hint style="info" %}
App.cameraEffect: NONE = 0, SPOTLIGHT = 1 \
App.cameraEffectParam1: Number
{% endhint %}

App.cameraEffect: variable value to set the type of camera effect

App.cameraEffectParam1: range value of camera effect

### [displayRatio](/zep-script/zep-script-api/scriptapp/field#displayratio)

{% hint style="info" %}
App.displayRatio
{% endhint %}

Value to control display zooming (Default value: 1)

### [storage](broken://pages/tDQnn0o07RdoXBHwuVWQ#storage)

{% hint style="info" %}
App.storage: String
{% endhint %}

App value storage space in the Space (Limited to Space)

### [followPlayer](/zep-script/zep-script-api/scriptapp/field#followplayer)

{% hint style="info" %}
&#x20;App.followPlayer: Boolean
{% endhint %}

This shows whether the app’s follow function is enabled. (Default value: false)

### [showName](broken://pages/tDQnn0o07RdoXBHwuVWQ#showname)

{% hint style="info" %}
&#x20;App.showName: Boolean
{% endhint %}

This shows whether the player's nickname is hidden. (Default value: true)

## 🛰️ EventListeners

### [onSay](/zep-script/zep-script-api/scriptapp/event-listeners#onsay)

{% hint style="info" %}
App.onSay.Add(function(player, text){});
{% endhint %}

This function operates when a player enters chat.

### [onPlayerTouched](/zep-script/zep-script-api/scriptapp/event-listeners#onplayertouched)

{% hint style="info" %}
App.onPlayerTouched.Add(function(sender, target, x, y){});
{% endhint %}

This function operates when an avatar collides with another avatar.

### [onObjectTouched](/zep-script/zep-script-api/scriptapp/event-listeners#onobjecttouched)

{% hint style="info" %}
App.onObjectTouched.Add(function(sender, x, y){});
{% endhint %}

This function operates when an avatar collides with an object.

### [onAppObjectTouched](/zep-script/zep-script-api/scriptapp/event-listeners#onappobjecttouched)

{% hint style="info" %}
App.onAppObjectTouched.Add(function(key, sender, x, y){});
{% endhint %}

️This function operates when an avatar collides with an object with a key value.

### [onUnitAttacked](/zep-script/zep-script-api/scriptapp/event-listeners#onunitattacked)

{% hint style="info" %}
App.onUnitAttacked.Add(function(sender, x, y, target){});
{% endhint %}

This function operates when a player attacks another avatar with Z.

### [onObjectAttacked](/zep-script/zep-script-api/scriptapp/event-listeners#onobjectattacked)

{% hint style="info" %}
App.onObjectAttacked.Add(function(sender, x, y){});
{% endhint %}

This function operates when a player attacks an object with the Z key.

### [onSidebarTouched](/zep-script/zep-script-api/scriptapp/event-listeners#onsidebartouched)

{% hint style="info" %}
App.onSidebarTouched.Add(function(player){});
{% endhint %}

This function operates when a player touches the Sidebar app.

### [onTriggerObject](/zep-script/zep-script-api/scriptapp/event-listeners#ontriggerobject)

{% hint style="info" %}
App.onTriggerObject.Add(function(player, layerID, x, y, key){});
{% endhint %}

This function that when an avatar interacts with an object with the F key.

### [onAppObjectAttacked](#onappobjectattacked)

{% hint style="info" %}

```
App.onAppObjectAttacked.Add(function (sender, x, y, layer, key) {});
```

{% endhint %}

This function operates when an avatar attacks an object with a key value with the Z key.

## ☎️ Callbacks

### [runLater](/zep-script/zep-script-api/scriptapp/callbacks#runlater)

{% hint style="info" %}
App.runLater(function(){}, time: number);
{% endhint %}

This executes a callback function after a period of time (in seconds).

### [addOnTileTouched](/zep-script/zep-script-api/scriptapp/callbacks#addontiletouched)

{% hint style="info" %}
App.addOnTileTouched(x: integer, y: integer, function(player){})
{% endhint %}

This executes a callback function when a player gets to the designated X and Y coordinates.

### [addOnLocationTouched](/zep-script/zep-script-api/scriptapp/callbacks#addonlocationtouched)

{% hint style="info" %}
App.addOnLocationTouched(name: string, function(player){})
{% endhint %}

This executes a callback function when a player gets to the designated area specified by the Map Editor.

### [addOnKeyDown](/zep-script/zep-script-api/scriptapp/callbacks#addonkeydown)

{% hint style="info" %}
App.addOnKeyDown(keycode : number, function(player){});
{% endhint %}

This executes a callback when a player presses the specified key.

### [setTimeout](/zep-script/zep-script-api/scriptapp/callbacks#settimeout)

{% hint style="info" %}
setTimeout(function(){}, time: number);
{% endhint %}

This executes a callback after time (ms).

### [setInterval](/zep-script/zep-script-api/scriptapp/callbacks#setinterval)

{% hint style="info" %}
setInterval(function(){}, time: number);
{% endhint %}

This executes a callback at a specified time interval (ms).

### [addMobileButton](/zep-script/zep-script-api/scriptapp/callbacks#addmobilebutton)

{% hint style="info" %}
App.addMobileButton( anchor: number, posX: number, posY: number, function(player){} )
{% endhint %}

This executes by pressing a custom button added in the mobile environment.

### [putMobilePunch](/zep-script/zep-script-api/scriptapp/callbacks#putmobilepunch)

{% hint style="info" %}
App.putMobilePunch(enable: boolean = true)
{% endhint %}

This adds a punch button in the mobile environment when "enable" is "true."

### [putMobilePunchWithIcon](#putmobilepunchwithicon)

{% hint style="info" %}
App.putMobilePunchWithIcon(icon: ScriptDynamicResource)
{% endhint %}

This function adds a punch button using a image loaded.

## 💠 Methods

### [loadSpritesheet](/zep-script/zep-script-api/scriptapp/methods#loadspritesheet)

{% hint style="info" %}
App.loadSpritesheet(fileName: string, frameWidth: integer, frameHeight: integer, anims: array, frameRate: integer): ScriptDynamicResource
{% endhint %}

This function reads a sprite sheet picture file and makes it an object.

### [showCenterLabel](/zep-script/zep-script-api/scriptapp/methods#showcenterlabel)

{% hint style="info" %}
App.showCenterLabel(text: string, color: uint = 0xFFFFFF, bgColor: uint = 0x000000, offset: number = 0, time: number = 3000)
{% endhint %}

This function displays text for 3 seconds at the designated location for all players.

### [showCustomLabel](/zep-script/zep-script-api/scriptapp/methods#showcustomlabel)

{% hint style="info" %}
App.showCustomLabel(text: string, color: number = 0xFFFFFF, bgColor: number = 0x000000, offset: number = 0, width = 100, opacity = 0.6, time: number = 3000);
{% endhint %}

This function displays text for 3 seconds at the designated location for all players.

You can decorate the text by inserting `span` tags in the text part.

### [sayToAll](/zep-script/zep-script-api/scriptapp/methods#saytoall)

{% hint style="info" %}
&#x20;App.sayToAll(text: string, color: uint = 0xFFFFFF)
{% endhint %}

This function displays text in the chat window.

### [showWidget](/zep-script/zep-script-api/scriptapp/methods#showwidget)

{% hint style="info" %}
&#x20;App.showWidget(fileName: string, align: string, width: integer, height: integer): ScriptWidget
{% endhint %}

This function loads the HTML file as a widget at the align position specified for all players.

### [showBuyAlert](#showbuyalert)

{% hint style="info" %}
player.showBuyAlert(itemName: string, price: number, callback: function)
{% endhint %}

This function displays a purchase widget to a player and executes a callback function that runs when a purchase is completed.

### [hideBuyAlert](#hidebuyalert)

{% hint style="info" %}
player.hideBuyAlert()
{% endhint %}

This function closes a player's purchase widget.

### [showYoutubeWidget](/zep-script/zep-script-api/scriptapp/methods#showyoutubewidget)

{% hint style="info" %}
App.showYoutubeWidget(link: string, align: string, width: integer, height: integer): ScriptWidget
{% endhint %}

This function calls the YouTube video corresponding to the link to the widget.

### [spawnPlayer](/zep-script/zep-script-api/scriptapp/methods#spawnplayer)

{% hint style="info" %}
App.spawnPlayer(playerID: string, tileX: integer, tileY: integer)
{% endhint %}

This function moves the player corresponding to playerID to tileX and tileY coordinates.

### [kickPlayer](/zep-script/zep-script-api/scriptapp/methods#kickplayer)

{% hint style="info" %}
App.kickPlayer(playerID: string)
{% endhint %}

This function kicks the player corresponding to playerID.

### [forceDestroy](/zep-script/zep-script-api/scriptapp/methods#forcedestroy)

{% hint style="info" %}
App.forceDestroy();
{% endhint %}

This function shuts down the mini-game app.

### [clearChat](/zep-script/zep-script-api/scriptapp/methods#clearchat)

{% hint style="info" %}
App.clearChat();
{% endhint %}

This function deletes all chat history.

### [getPlayerByID](#getplayerbyid)

{% hint style="info" %}
App.getPlayerByID(playerID: string);
{% endhint %}

This function returns a player corresponding to the id.

### [playSound](/zep-script/zep-script-api/scriptapp/methods#playsound)

{% hint style="info" %}
App.playSound(fileName: string, loop: boolean = false, overlap: boolean = false)
{% endhint %}

This function plays the sound file to all players.

### [playSoundLink](/zep-script/zep-script-api/scriptapp/methods#playsoundlink)

{% hint style="info" %}
App.playSoundLink(link: string, loop: boolean = false)
{% endhint %}

This function plays the sound corresponding to the link to all players.

### [stopSound](/zep-script/zep-script-api/scriptapp/methods#stopsound)

{% hint style="info" %}
App.stopSound();
{% endhint %}

This function stops all playing sounds.

### [changeAttackSound](#changeattacksound)

{% hint style="info" %}
App.changeAttackSound(fileName:string)
{% endhint %}

This function changes the poke (Z key) sound effects.

### [httpGet](/zep-script/zep-script-api/scriptapp/methods#httpget)

{% hint style="info" %}
App.httpGet(url: string, headers: object, function(res: string){})
{% endhint %}

This function calls for HTTP Get request.

### [httpPost](/zep-script/zep-script-api/scriptapp/methods#httppost)

{% hint style="info" %}
App.httpPost(url: string, headers: object, body: object, function(res: string))
{% endhint %}

This function calls for HTTP Post request.

### [httpPostJson](/zep-script/zep-script-api/scriptapp/methods#httppostjson)

{% hint style="info" %}
App.httpPostJson(url: string, headers: object, body: object, function(res: string))
{% endhint %}

This function calls for HTTP Post request in JSON.

### [sendUpdated](/zep-script/zep-script-api/scriptapp/methods#sendupdated)

{% hint style="info" %}
App.sendUpdated()
{% endhint %}

This function applies the updated app-related field values when changes are made.

### [save](/zep-script/zep-script-api/scriptapp/methods#save)

{% hint style="info" %}
App.save()
{% endhint %}

This function applies the updated app storage values when changes are made.

## ═════════════════════

## 🗺️ ScriptMap&#x20;

## ═════════════════════

## 🗃️ Field

### [width & height](/zep-script/zep-script-api/scriptmap/field#width-and-height)

{% hint style="info" %}
Map.width : Number Map.height : Number
{% endhint %}

Calls the map’s width and height values.

## 💠 Methods

### [putTileEffect](/zep-script/zep-script-api/scriptmap/methods#puttileeffect)

{% hint style="info" %}
Map.putTileEffect(x: number, y: number, tileID: TileEffectType)
{% endhint %}

This function applies a tile effect to the specified coordinates.

### [putObject](/zep-script/zep-script-api/scriptmap/methods#putobject)

{% hint style="info" %}
Map.putObject(x: number, y: number, dynamicResource: ScriptDynamicResource, option: JsValue)
{% endhint %}

This function places the object at the specified coordinates. (Reference coordinates: Left-Top) → What are [**Reference Coordinates?**](broken://spaces/u4PFrNZjiq0L6ogrcQ8C)

### [putObjectMultiple](#putobjectmultiple)

{% hint style="info" %}
Map.putObjectMultiple(tileArray: array, type: PutObjectType, dynamicResource: ScriptDynamicResource, option: object);
{% endhint %}

This function installs objects at once by entering coordinates to place objects in a two-dimensional array. This allows you to reduce the load when you install many objects at once.

### [putObjectWithKey](/zep-script/zep-script-api/scriptmap/methods#putobjectwithkey)

{% hint style="info" %}
Map.putObjectWithKey(x: number, y: number, dynamicResource: ScriptDynamicResource, option: JsValue)
{% endhint %}

This function places an object on the specified coordinates (Reference coordinates: Left-Top)

### [getObjectWithKey](/zep-script/zep-script-api/scriptmap/methods#getobjectwithkey)

{% hint style="info" %}
Map.getObjectWithKey(key: String)
{% endhint %}

This function gets the information of the object with the corresponding key value.

### [playObjectAnimation](/zep-script/zep-script-api/scriptmap/methods#playobjectanimation)

{% hint style="info" %}
Map.playObjectAnimation(x: number, y: number, name: string)
{% endhint %}

This function activates the object animation at the corresponding coordinates.

The above function must be preceded by the **Map.putObject** function.

### [playObjectAnimationWithKey](/zep-script/zep-script-api/scriptmap/methods#playobjectanimationwithkey)

{% hint style="info" %}
Map.playObjectAnimation(key: string, animName: string, repeatCount: number)
{% endhint %}

This function executes the object's sprite animation whose key value matches.

### [moveObject](/zep-script/zep-script-api/scriptmap/methods#moveobject)

{% hint style="info" %}
Map.moveObject(x: number, y: number, targetX: number, targetY: number, time: number)
{% endhint %}

This function moves the object from the object’s x,y coordinates to the target x,y coordinates for a certain amount of time (secs).

The above function must be preceded by the **Map.putObject** function.

### [moveObjectWithKey](/zep-script/zep-script-api/scriptmap/methods#moveobjectwithkey)

{% hint style="info" %}
Map.moveObjectWithKey(key: string, targetX: number, targetY: number, path:boolean = true)
{% endhint %}

This function moves an object with a key value to the specified coordinates.

### [clearAllObjects()](/zep-script/zep-script-api/scriptmap/methods#clearallobjects)

{% hint style="info" %}
Map.clearAllObjects()
{% endhint %}

This function removes all objects created by the ZEP script.

### [getTile](#gettile)

{% hint style="info" %}
Map.getTile(layer: number, x: number, y: number)
{% endhint %}

This returns the type value of the tile at the x and y coordinates of the corresponding layer. If no tile, this returns "-1."

### [hasLocation](/zep-script/zep-script-api/scriptmap/methods#haslocation)

{% hint style="info" %}
Map.hasLocation(locationName: String)
{% endhint %}

This function checks if the corresponding location exists in the map and returns true or false accordingly.

### [getObjectsByType](/zep-script/zep-script-api/scriptmap/methods#getobjectsbytype)

{% hint style="info" %}
Map.getObjectsByType(type: numer) : array
{% endhint %}

&#x20;This function returns the objects that correspond to Type.

### [getTopObjectsByType](/zep-script/zep-script-api/scriptmap/methods#gettopobjectsbytype)

{% hint style="info" %}
Map.getTopObjectsByType(type: numer) : array
{% endhint %}

&#x20;This function returns the top objects that correspond to each type.

### [sayObjectWithKey](#sayobjectwithkey)

{% hint style="info" %}
Map.sayObjectWithKey( key: string, message: string )
{% endhint %}

This function displays a word balloon above an object with a key value.

## ═════════════════════

## 👥 ScriptPlayer&#x20;

## ═════════════════════

## 🗃️ Field

### [id , name](/zep-script/zep-script-api/scriptplayer/field#id-name)

{% hint style="info" %}
player.id : Number player.name : String
{% endhint %}

This calls the player ID and nickname values.

### [title](/zep-script/zep-script-api/scriptplayer/field#title)

{% hint style="info" %}
player.title : String
{% endhint %}

Title is a yellow text that displays above the avatar’s nickname.

### [role](/zep-script/zep-script-api/scriptplayer/field#role)

{% hint style="info" %}
player.role : Number
{% endhint %}

Role is the player’s permission roles’ number value.

The following values will be displayed depending on the player’s role.

| Guest  | -1   | Staff | 2000 |
| ------ | ---- | ----- | ---- |
| Member | 0    | Admin | 3000 |
| Editor | 1000 | Owner | 3001 |

### [tileX, tileY](/zep-script/zep-script-api/scriptplayer/field#tilex-tiley)

{% hint style="info" %}
&#x20;player.tileX: Number player.tileY: Number
{% endhint %}

The x axis value and y axis value of where the player’s avatar is standing.

### [dir](/zep-script/zep-script-api/scriptplayer/field#dir)

{% hint style="info" %}
player.dir : Number
{% endhint %}

The direction the player’s avatar is looking.&#x20;

The following values are displayed depending on the direction the avatar is looking.

| Direction | Number | Direction    | Number |
| --------- | ------ | ------------ | ------ |
| Left      | 1      | Top-Left     | 5      |
| Up        | 2      | Bottom-Left  | 6      |
| Right     | 3      | Top-Right    | 7      |
| Down      | 4      | Bottom-Right | 8      |

### [moveSpeed](/zep-script/zep-script-api/scriptplayer/field#movespeed)

{% hint style="info" %}
player.moveSpeed : Number
{% endhint %}

This is the player’s movement speed value. (Default value: 80)

### [sprite](/zep-script/zep-script-api/scriptplayer/field#sprite)

{% hint style="info" %}
player.sprite : ScriptDynamicResource
{% endhint %}

A sprite image of the player’s avatar. (Resets to the default avatar image when inputting **null**)

### [tag](/zep-script/zep-script-api/scriptplayer/field#tag)

{% hint style="info" %}
&#x20;player.tag: Any
{% endhint %}

Give necessary attribute values to a player by using tag.

### [hidden](/zep-script/zep-script-api/scriptplayer/field#hidden)

{% hint style="info" %}
player.hidden: Boolean
{% endhint %}

If the hidden attribute value is true, the corresponding player is not visible to other players.

### [spotlight](/zep-script/zep-script-api/scriptplayer/field#spotlight)

{% hint style="info" %}
player.spotlight: Boolean
{% endhint %}

This activates or deactivates the player’s spotlight feature.

### [disableVideo, disableAudio](/zep-script/zep-script-api/scriptplayer/field#disablevideo-disableaudio)

{% hint style="info" %}
player.disableVideo : Boolean \
player.disableAudio : Boolean
{% endhint %}

This activates or deactivates the player’s video/audio features.&#x20;

### [attackType](/zep-script/zep-script-api/scriptplayer/field#attacktype)

{% hint style="info" %}
player.attackType : Number
{% endhint %}

This is a player’s attack type performed by pressing z. (Default value: 0)

### [attackParam1](/zep-script/zep-script-api/scriptplayer/field#attackparam1)

{% hint style="info" %}
player.attackParam1: Number
{% endhint %}

This is an attribute for the attack image’s distance range shown when pressing z. The attack’s possible distance range does not increase.

### [attackParam2](/zep-script/zep-script-api/scriptplayer/field#attackparam2)

{% hint style="info" %}
player.attackParam2: Number
{% endhint %}

This is an attribute for distance available for attack. This is only valid when attackType is set to a ranged attack.

### [attackSprite](/zep-script/zep-script-api/scriptplayer/field#attacksprite)

{% hint style="info" %}
player.attackSprite : ScriptDynamicResource
{% endhint %}

This is an attribute for the attack image shown when pressing z.

### [walletAddress](/zep-script/zep-script-api/scriptplayer/field#walletaddress)

{% hint style="info" %}
player.walletAddress : String
{% endhint %}

This is the player’s wallet address.

### [storage](/zep-script/zep-script-api/scriptplayer/field#storage)

{% hint style="info" %}
player.storage : String
{% endhint %}

This is the storage space for the player value within the space. (Limited to the Space)

### [isMobile](/zep-script/zep-script-api/scriptplayer/field#ismobile)

{% hint style="info" %}
&#x20;player.isMobile : Boolean
{% endhint %}

This displays whether the player is connected via mobile in true or false.

### [isMoving](/zep-script/zep-script-api/scriptplayer/field#ismoving)

{% hint style="info" %}
player.isMoving : Boolean
{% endhint %}

If the player is moving, this function returns True. If not, this returns False.

### [isJumping](/zep-script/zep-script-api/scriptplayer/field#isjumping)

{% hint style="info" %}
player.isJumping : Boolean
{% endhint %}

If the player is jumping, this function returns True. If not, this returns False.

### [customData](/zep-script/zep-script-api/scriptplayer/field#customdata)

{% hint style="info" %}
&#x20;player.customData : String
{% endhint %}

This field saves the value received as a query string. [How to Use URL Query Strings](/zep-script/zep-script-guide/appendix/how-to-use-url-query-strings)

### [displayRatio](/zep-script/zep-script-api/scriptplayer/field#displayratio)

{% hint style="info" %}
player.displayRatio: number
{% endhint %}

This function zooms the player's display in or out. (Default Value: 1)

### [titleColor](/zep-script/zep-script-api/scriptplayer/field#titlecolor)

{% hint style="info" %}
player.titleColor: number
{% endhint %}

This function can read and change the player title's color.

### [emailHash](/zep-script/zep-script-api/scriptplayer/field#emailhash)

{% hint style="info" %}
player.emailHash
{% endhint %}

This function reads the hash value of the player's email.

### [isGuest](/zep-script/zep-script-api/scriptplayer/field#isguest)

{% hint style="info" %}
player.isGuest
{% endhint %}

If the player is not signed in, this function returns True.

## 💠 Methods

### [showCenterLabel](broken://pages/pOwCneDJgc3EKRByq0zI#showcenterlabel)

{% hint style="info" %}
&#x20;player.showCenterLabel(text: string, color: uint = 0xFFFFFF, bgColor: uint = 0x000000, offset: number = 0, time: number = 3000)
{% endhint %}

This function displays text for 3 seconds at a designated location to the corresponding player.

### [showCustomLabel](broken://pages/pOwCneDJgc3EKRByq0zI#showcustomlabel)

{% hint style="info" %}
player.showCustomLabel(text: string, color: number = 0xFFFFFF, bgColor: number = 0x000000, offset: number = 0, width = 100, opacity = 0.6, time: number = 3000);
{% endhint %}

This function displays a text for 3 seconds at a specific location to all players.

You can decorate the text by adding `span` tags to the text.

### [showWidget](broken://pages/pOwCneDJgc3EKRByq0zI#showwidget)

{% hint style="info" %}
player.showWidget(fileName: string, align: string, width: integer, height: integer): ScriptWidget
{% endhint %}

This function calls the html file as a widget to the player’s designated align location.

### [showBuyAlert](/zep-script/zep-script-api/scriptplayer/methods#showbuyalert)

{% hint style="info" %}
player.showBuyAlert(itemName: string, price: number, callback: function)
{% endhint %}

This function displays a purchase widget to a player and executes a callback function that runs when a purchase is completed.

### [sendMessage](#sendmessage)

{% hint style="info" %}
&#x20;player.sendMessage(text: string, color: uint = 0xFFFFFF)
{% endhint %}

This function sends a private message to a player in the chat window.

### [showPrompt](/zep-script/zep-script-api/scriptplayer/methods#showprompt)

{% hint style="info" %}
player.showPrompt(text: string, function(inputText))
{% endhint %}

This function displays an input window and executes a callback function that runs according to a player's response.

### [showConfirm](/zep-script/zep-script-api/scriptplayer/methods#showconfirm)

{% hint style="info" %}
player.showConfirm(text: string, function(result))
{% endhint %}

&#x20;This function displays an confirm window and executes a callback function that runs when a player clicks "OK". When a player clicks "Cancel," this callback function doesn't operate.

### [showAlert](/zep-script/zep-script-api/scriptplayer/methods#showalert)

{% hint style="info" %}
&#x20;player.showAlert(text: string, function())
{% endhint %}

This function displays an alert window and executes a callback function that runs when a player clicks "OK".

### [showWidgetResponsive](/zep-script/zep-script-api/scriptplayer/methods#showwidgetresponsive)

{% hint style="info" %}

```
player.showWidgetResponsive(fileName:string, marginTop:number, marginRight:number, marginBottom:number, marginLeft:number)
```

{% endhint %}

This function displays the widget by defining the top/bottom/left/right margin using a responsive percentage of the screen size.

### [showEmbed](#showembed)

{% hint style="info" %}
player.showEmbed(url: string, align: string, width: number, height: number, hasBackdrop: boolean = true)
{% endhint %}

This function opens a web URL as an embed in the designated location.

### [openWebLink](#openweblink)

{% hint style="info" %}

```
player.openWebLink(url:string, popup:boolean=false)
```

{% endhint %}

This function opens a web URL in a new tab or window to a player.

### [isEmail](broken://pages/pOwCneDJgc3EKRByq0zI#isemail)

{% hint style="info" %}
player.isEmail(email: string): boolean
{% endhint %}

Depending on whether the corresponding player’s email is the same as the parameter value, the value will return as true when it matches and false when it does not match.

### [getLocationName](broken://pages/pOwCneDJgc3EKRByq0zI#getlocationname)

{% hint style="info" %}
player.getLocationName : string
{% endhint %}

This displays the location name of where the player is standing.

### [spawnAt](broken://pages/pOwCneDJgc3EKRByq0zI#spawnat)

{% hint style="info" %}
player.spawnAt(tileX: int ,tileY: int, dir: int = 0)
{% endhint %}

This moves the player’s avatar to look in the designated direction when on tileX and tileY coordinates.

### [spawnAtLocation](broken://pages/pOwCneDJgc3EKRByq0zI#spawnatlocation)

{% hint style="info" %}
player.spawnAtLocation(name: string, dir:int = 0)
{% endhint %}

This moves the player’s avatar to a specific area called name and makes them look in a designated direction.

### [spawnAtMap](broken://pages/pOwCneDJgc3EKRByq0zI#spawnatmap)

{% hint style="info" %}
player.spawnAtMap(spaceHashID string, mapHashID:string = null)
{% endhint %}

This moves the player to the corresponding Space’s map.

### [playSound](broken://pages/pOwCneDJgc3EKRByq0zI#playsound)

{% hint style="info" %}
Player.playSound(fileName: string, loop: boolean = false, overlap: boolean = false)
{% endhint %}

This function plays sound to the corresponding player.

### [playSoundLink](broken://pages/pOwCneDJgc3EKRByq0zI#playsoundlink)

{% hint style="info" %}
player.playSoundLink(link: string, loop: boolean = false)
{% endhint %}

This function plays sound for all players.

### [sendUpdated](broken://pages/pOwCneDJgc3EKRByq0zI#sendupdated)

{% hint style="info" %}
&#x20;player.sendUpdated()
{% endhint %}

This function applies the changed value whenever field values pertaining to App or Player are changed.

### [save](broken://pages/pOwCneDJgc3EKRByq0zI#save)

{% hint style="info" %}
player.save()
{% endhint %}

This function applies the changed value whenever values pertaining to App or Player storage are changed.

## ═════════════════════

## 🧙‍♂️ ScriptWidget&#x20;

## ═════════════════════

## 🗃️ Field

### [id](broken://pages/KSjwtdtjBJQqp2nAcMNS#id)

{% hint style="info" %}
widget.id
{% endhint %}

This calls the widget’s id value.

## 🛰️ EventListeners

### [onMessage](broken://pages/hBEEdCorQa3S86gShWXm#onmessage)

{% hint style="info" %}
widget.onMessage.Add(function(player, data: any){});
{% endhint %}

Callback function that activates when a message is sent from the widget to the App.

## 💠 Methods

### [sendMessage](broken://pages/33xkkRJUeCMIKPnz44AV#sendmessage)

{% hint style="info" %}
widget.sendMessage(object: any)
{% endhint %}

This sends data to the widget from the App.

### [destroy](broken://pages/33xkkRJUeCMIKPnz44AV#destroy)

{% hint style="info" %}
widget.destroy()
{% endhint %}

This function closes the widget.


# ScriptApp

**ScriptApp** class consists of the five categories below. You can see detailed information if you click the title of each category.

### [<mark style="color:purple;">Lifecycle</mark>](/zep-script/zep-script-api/scriptapp/lifecycle)

> An app’s lifecycle is a cycle where an app starts, runs, and until it ends. This category contains the functions that can create the app’s entire lifecycle by executing necessary actions in situations when the app starts, runs, and ends.

### [<mark style="color:purple;">Field</mark>](/zep-script/zep-script-api/scriptapp/field)

> This category contains the properties of an app where you can view the Space, maps, or user information or you can use the storage space.

### [<mark style="color:purple;">Event Listeners</mark>](/zep-script/zep-script-api/scriptapp/event-listeners)

> This category contains the functions that can detect and execute various events based on what happens in a map, such as players typing specified words or attacking a specific object.

### [<mark style="color:purple;">Callbacks</mark>](/zep-script/zep-script-api/scriptapp/callbacks)

> &#x20;This category has the functions that set conditions, such as when players press a key designated by the script developer or arrive at a specific point, and operate when the condition is satisfied.

### [<mark style="color:purple;">Methods</mark>](/zep-script/zep-script-api/scriptapp/methods)

> &#x20;This category has functions that provide convenient techniques such as UI display, moving or kicking users, and playing sound.


# Lifecycle

### Introduction

An app’s **lifecycle** refers to a cycle where an app starts, runs, and ends. You can create an app’s lifecycle by executing necessary actions in situations **when the app starts, runs, or ends**.

<table><thead><tr><th width="186">Name</th><th>Description</th></tr></thead><tbody><tr><td>onInit</td><td>Function that is called once when running the app the first time</td></tr><tr><td>onJoinPlayer</td><td>Once onInit is called, the event lets all connected players enter and operates whenever a player enters afterward.</td></tr><tr><td>onStart</td><td>Function that is called once after each player enters through onJoinPlayer</td></tr><tr><td>onUpdate</td><td>Function that runs periodically every 20ms</td></tr><tr><td>onLeavePlayer</td><td>This function causes all players to exit an app when another app is launched or the installed Game Block is destroyed.</td></tr><tr><td>onDestroy</td><td>Operates when another app is launched or the installed Game Block is destroyed.</td></tr></tbody></table>

### Understanding an App’s Lifecycle

Lifecycle functions are necessary as they help create functions according to an app’s life cycle. As you can see in the image below, **Enter-Phase** functions operate when an app starts. When an app is running, **Update-Phase** functions operate periodically, and when it ends, **Exit-Phase** functions start.

Make your app’s lifecycle from onInit to onDestroy utilizing the timing of each phrase.

<div align="left"><figure><img src="/files/tsIfAPAsw396QO8GijhN" alt=""><figcaption></figcaption></figure></div>

<mark style="background-color:yellow;">**Lifecycle at a Glance**</mark>

```jsx
// The first event called when running the app (before the user enters)
// Normal and Sidebar apps are called when the map is executed after applying the script [ Enter ]
App.onInit.Add(function(){
});

// All players enter the app through this event [ Enter ]
// Calls whenever a player enters afterward [ Events ]
App.onJoinPlayer.Add(function(player) {
});

// Event that starts first when each player enters [ Enter ]
App.onStart.Add(function(){
});

// Calls event every 20ms
// dt: deltatime (time taken for the previous frame to complete) [ Update ]
App.onUpdate.Add(function(dt){
});

// onUpdate again after handling the event callback

// Causes all players to leave the app when the app exits [ Exit ]
App.onLeavePlayer.Add(function(player){
});

// Last called when an app exits [ Exit ]
// Normal app and Sidebar app are closed separately
App.onDestroy.Add(function(){
});
```

## 1️⃣ Enter-Phase Functions

This guides the functions called during the **lifecycle’s Enter Phase** along with the execution of an app.

### onInit

{% hint style="info" %}
App.onInit.Add(function(){})
{% endhint %}

This function is called once when running the app for the first time.

**Parameter**

* None

**Example**

Display chat in onInit. (Make this as a Mini-Game to check it out.)

```jsx
App.onInit.Add(function(){
	App.sayToAll("-- onInit --")
	App.sayToAll("   ready..  ")
	App.sayToAll("------------")
});
```

### onJoinPlayer

{% hint style="info" %}
App.onJoinPlayer.Add(function(player){})
{% endhint %}

Once onInit is called, this event lets all connected players enter and then operates whenever a new player enters afterward.

**Parameter**

<table><thead><tr><th width="124.33333333333331">Name</th><th width="128">Type</th><th>Description</th></tr></thead><tbody><tr><td>player</td><td>Player</td><td>The player who enters<br>The player’s parameter names can be changed arbitrarily</td></tr></tbody></table>

**Example**

Display a message when a player enters.

```jsx
App.onJoinPlayer.Add(function(player){
	App.showCenterLabel(`${player.name} has entered.`)
});
```

### onStart

{% hint style="info" %}
App.onStart.Add(function(){})
{% endhint %}

This function is called once after players have entered via onJoinPlayer.

**Parameter**

* None

**Example**

Display chat in onStart. (Make this as a Mini-Game to check it out.)

```jsx
App.onStart.Add(function(){
	App.sayToAll("-- App Start --")
});
```

<mark style="background-color:yellow;">**Understanding the Flow of Enter-Phase Functions**</mark>

Check **the Enter-Phase lifecycle** flow with codes.\
Make a Mini-Game with the code below and run it!

```jsx
// main.js
App.onInit.Add(function(){
	App.sayToAll("-- onInit --")
	App.sayToAll("   ready..  ")
	App.sayToAll("------------")
});

App.onJoinPlayer.Add(function(player){
	App.sayToAll(`${player.name} has entered.`)
});

App.onStart.Add(function(){
	App.sayToAll("-- App Start --")
});
```

<div align="center"><figure><img src="/files/Ys4yoUzz6MsITzRj3IqS" alt=""><figcaption><p>Figure of Enter-phase functions in sequence</p></figcaption></figure></div>

## 2️⃣ Update-Phase Functions

Update has an onUpdate function that runs periodically about every 20ms.

When an event such as onJoinPlayer or onLeavePlayer occurs, onUpdate is periodically executed again after handling the event.

### onUpdate

{% hint style="info" %}
App.onUpdate.Add(function(dt){})
{% endhint %}

This function runs periodically about every 20ms.

**Parameter**

<table><thead><tr><th width="122.33333333333331">Name</th><th width="130">Type</th><th>Description</th></tr></thead><tbody><tr><td>dt</td><td>Number</td><td>deltatime (time taken for the previous frame to complete, about 20ms)<br>The dt parameter names can be changed arbitrarily</td></tr></tbody></table>

**Example**

Make a 10-second timer using the onUpdate function.

<div align="center"><figure><img src="/files/UembLwiQT8lhBUxrsnSA" alt=""><figcaption><p>Timer Example</p></figcaption></figure></div>

```jsx
let countdown = 10;
let timer = 0;
App.onUpdate.Add(function(dt){
	timer += dt;
	if(timer >=1){
		if(countdown >= 0)
		{
			App.showCenterLabel(countdown--);
		}
		else{
			App.showCenterLabel("Time Over");
		}
		timer = 0;
	}
})
```

## 3️⃣ Exit-Phase Functions

These functions execute when an app ends.

### onLeavePlayer

{% hint style="info" %}
App.onLeavePlayer.Add(function(player){})
{% endhint %}

This function operates whenever a player exits. After that, this function kicks all players from the app when another app is launched or the installed Game Block is destroyed.

**Parameter**

<table><thead><tr><th width="124">Name</th><th width="113.33333333333331">Type</th><th>Description</th></tr></thead><tbody><tr><td>player</td><td>Player</td><td>The player who exits<br>The player’s parameter names can be changed arbitrarily</td></tr></tbody></table>

**Example**

Display a message when a player exits.

```jsx
// Executes when a player exits
App.onLeavePlayer.Add(function(player){
	App.showCenterLabel(`${player.name} has left.`)
});
```

### onDestroy

{% hint style="info" %}
&#x20;App.onDestroy.Add(function(){})
{% endhint %}

It operates when another app is launched or the installed Game Block is destroyed.

**Parameter**

* None

**Example**

Display a message when Game Block is destroyed. (Mini-Game)

<div align="left"><figure><img src="/files/kLgqRpqxNcA73Dt7W7MR" alt=""><figcaption></figcaption></figure></div>

```jsx
// Executes when Game Block is destroyed
App.onDestroy.Add(function(){
	App.showCenterLabel("Game Block has been destroyed.")
});
```

***

***


# Field

### Introduction

**Field** contains the attributes of an app. With these fields, you can view the Space, maps, or user information, or you can store values for later.

🔒 Fields with this icon are read-only fields that cannot be revised.

<table><thead><tr><th width="207">Name</th><th>Description</th></tr></thead><tbody><tr><td>🔒 spaceHashID</td><td>Outputs the hash value of the Space where the app is installed</td></tr><tr><td>🔒 mapHashID</td><td>Outputs the hash value of the map where the app is installed</td></tr><tr><td>🔒 creatorID</td><td>Calls the ID value of the player who executed the app</td></tr><tr><td>🔒 players</td><td>Calls a list of all players on the map as an array</td></tr><tr><td>🔒 playerCount</td><td>Calls the number of all players on the map where the app is installed</td></tr><tr><td>cameraEffect</td><td>Variable value to set the type of camera effect</td></tr><tr><td>cameraEffectParam</td><td>Range value of camera effect</td></tr><tr><td>displayRatio</td><td>Value to control display zooming</td></tr><tr><td>storage</td><td>App value storage space in the Space (Space limited)</td></tr><tr><td>followPlayer</td><td>Determines if the app’s follow function is enabled</td></tr><tr><td>showName</td><td>Determines if the player's nickname is hidden</td></tr><tr><td>🔒 appHashID</td><td>Calls the hash value of the app</td></tr></tbody></table>

## 📚 API Description and Example

### spaceHashID & mapHashID

{% hint style="info" %}
App.spaceHashID: String App.mapHashID: String
{% endhint %}

This calls spaceHashID and mapHashID of the Space where an app is installed. ([<mark style="color:purple;">Understanding Spaces and Maps</mark>](/zep-script/zep-script-guide/appendix/understanding-spaces-and-maps))

**Example**

Display spaceHashID and mapHashID of the map where an app is installed.

```jsx
// Activates function when a player enters
App.onJoinPlayer.Add(function(player){
  // Displays spaceHashID and mapHashID in the chat window
	App.sayToAll(`spaceHashID: ${App.spaceHashID}`); // spaceHashID: Ak42Xz
	App.sayToAll(`mapHashID: ${App.mapHashID}`) // mapHashId: 25g3RQ
})
```

### creatorID

{% hint style="info" %}
App.creatorID: Number
{% endhint %}

This calls the ID value of the player who executed the app.

**Example**

Display the nickname of the player who executed the app.

```jsx
// Activates function when a player enters
App.onJoinPlayer.Add(function(player){
  if(player.id == App.creatorID){
		App.sayToAll(`${player.name} has executed the app.`)
	}
})
```

### players

{% hint style="info" %}
App.players: ScriptPlayer\[]
{% endhint %}

This calls a list of all players on the map as an array.

**Example**

Display the nicknames of all players on the map.

```jsx
// Activates function when q is pressed
// App.addOnKeyDown
App.addOnKeyDown(81,function(p){
	//Displays the nicknames of all players in the chat window via App.players
	let players = App.players;
	for(let i in players){
		let player = players[i]
		App.sayToAll(player.name)
	}
})
```

### playerCount

{% hint style="info" %}
App.playerCount: Number
{% endhint %}

This calls the number of all players on the map where the app is installed

**Example**

Display the number of all players on the map.

```jsx
// Activates function when q is pressed
// App.addOnKeyDown
App.addOnKeyDown(81,function(p){
	// Displays the number of all current players
	App.sayToAll(`the number of all current players: ${App.playerCount}`)
})
```

### cameraEffect & cameraEffectParam1

{% hint style="info" %}
App.cameraEffect: NONE = 0, SPOTLIGHT = 1 \
App.cameraEffectParam1: Number
{% endhint %}

App.cameraEffect: variable value to set the type of camera effect

App.cameraEffectParam1: range value of camera effect

**Example**

Make a function to turn the vignette effect on/off.

```jsx
// Activates function when q is pressed
// Press once to turn the vignetting on and press twice to turn off
// App.addOnKeyDown
App.addOnKeyDown(81,function(p){
	if(App.cameraEffect == 0){
		App.cameraEffect = 1; // 1 = vignette effect
		App.cameraEffectParam1 = 500; // Sets the range of the vignette effect to 500
	}
	else if(App.cameraEffect == 1){
		App.cameraEffect = 0; // Turns off the vignette effect
	}
	App.sendUpdated(); // When the app's Field Value is changed, new values are applied using App.sendUpdated()
})
```

<div align="left"><figure><img src="/files/ND5elgkcpcIv7KlnZ9Th" alt=""><figcaption><p>Figure of the vignette effect range set to 500</p></figcaption></figure></div>

### displayRatio

{% hint style="info" %}
App.displayRatio: Number
{% endhint %}

Value to control display zooming (default value: 1)

**Example**

Bind a zoom function to q to control display zooming.

```jsx
// Activates function when q is pressed
// Press once to zoom in and press twice to return to the original state
// App.addOnKeyDown
App.addOnKeyDown(81,function(p){
	if(App.displayRatio == 1){
		*App.displayRatio = 5;*
	}else{
		*App.displayRatio = 1;
	}
	App.sendUpdated(); //* When the app's Field Value is changed, new values are applied using App.sendUpdated()
})
```

<div align="left"><figure><img src="/files/GsgrHegpKd5fv84LD9ba" alt=""><figcaption><p>When displayRatio is set to 5</p></figcaption></figure> <figure><img src="/files/f7lwMtN5AyYuyhBLT3Fl" alt=""><figcaption><p>When displayRatio is set to 1</p></figcaption></figure></div>

### storage

{% hint style="info" %}
App.storage: String
{% endhint %}

App value storage space in the Space (Space limited)

**Example**

Save a simple text to App storage.

{% hint style="success" %}
Saved values don’t disappear even though the app ends
{% endhint %}

```jsx
// Activates function when q is pressed
// App.addOnKeyDown
App.addOnKeyDown(81,function(p){
	App.storage = "data";
	App.save(); // When the storage value is changed, new values are applied using App.save()
})

// Activates function upon pressing w
App.addOnKeyDown(87,function(p){
	App.sayToAll(App.storage); // Displays the value stored in App storage to the chat window
})
```

### followPlayer

{% hint style="info" %}
App.followPlayer: Boolean
{% endhint %}

This shows whether the app’s follow function is enabled (default value: false)

When normal apps or Mini-Game apps are running, the “follow” function becomes deactivated as followPlayer value is set to false.

**Example**

Make a function to turn the follow function on or off.

```jsx
// Activates function when q is pressed
// Key function that changes the followPlayer value
// App.addOnKeyDown explanation 
App.addOnKeyDown(81,function(p){
	if(App.followPlayer){
		App.followPlayer = false;
	}else{
		App.followPlayer = true;
	*}*
	App.sayToAll(`App.followPlayer: ${App.followPlayer}`)
	*App.sendUpdated(); //* When the app's Field Value is changed, new values are applied using App.sendUpdated()
})
```

***

### showName

{% hint style="info" %}
&#x20;App.showName: Boolean
{% endhint %}

This shows whether the player's nickname is hidden.

When App.showName is set to false, the nickcnames of all players are hidden.

**Example**

```jsx
// Activates function when q is pressed
// Key function that changes the showName value
App.addOnKeyDown(81,function(p){
	if(App.showName){
		App.showName = false;
	}else{
		App.showName = true;
	}
	App.sayToAll(`App.showName: ${App.showName}`)
	App.sendUpdated(); //When the app's Field Value is changed, new values are applied using App.sendUpdated()
})

```

### appHashID

{% hint style="info" %}
App.appHashID: String&#x20;
{% endhint %}

This calls the hash value of the app

**Example**

Display the app's HashID to the chat window.

```jsx
// Activates function when a player enters
App.onJoinPlayer.Add(function(player){
	App.sayToAll(`appHashID: ${App.appHashID}`); 
})
```

### Appendix

[<mark style="color:purple;">Understanding Spaces and Maps</mark>](/zep-script/zep-script-guide/appendix/understanding-spaces-and-maps)


# Storage

App storage is where you keep the app data inside Spaces.

### How to Store Data in App Storage

> **Recommended**

{% hint style="info" %}
App.setStorage(string);
{% endhint %}

The App.setStorage function is a data storage function complementing existing app data storage methods.

> **Not recommended**

{% hint style="danger" %}
App.storage = string;\
App.save();
{% endhint %}

If the app is running on several maps in the same Space, the above method may cause issues such as data being overwritten.

### How to Read the App Storage Value

{% hint style="info" %}
App.getStorage(function(){})
{% endhint %}

The App.getStorage function helps synchronize the app data so that it can have the same data by checking if the same app is running on another map within the same Space.

{% hint style="warning" %}
As the App.getStorage function is an asynchronous function, synchronization cannot be guaranteed if you add a code that uses App.storage on the very next line of this function.
{% endhint %}

### App Storage Example

Install the example code below as a sidebar app and press Q on another map in the same Space to see if the "count" value is synchronized.

```javascript

App.onStart.Add(function(){
	if(App.storage == null){
		App.setStorage(JSON.stringify({count: 0}))
	}
})
// // Activates function when q is pressed
App.addOnKeyDown(81,function(player){
	// Updates App.storage and executes a callback function
	App.getStorage(function () {
		let appStorage = JSON.parse(App.storage);
		appStorage.count += 1;
		App.sayToAll(`count: ${appStorage.count}`)
		// Uses App.setStorage to save any changes
		App.setStorage(JSON.stringify(appStorage));
	});
	// Synchronization not guaranteed if you add a code that uses App.storage on the very next line of the App.getStorage function.
	App.sayToAll(App.storage);
})
```


# Event Listeners

### Introduction

These functions **operate in response to specific situations** that may happen in a ZEP Space such as players typing specified words or attacking a specific object.

<table><thead><tr><th width="234">Name</th><th>Description</th></tr></thead><tbody><tr><td>onSay</td><td>Function that operates when a player types chat</td></tr><tr><td>onPlayerTouched</td><td>Function that operates when avatars collide with each other</td></tr><tr><td>onObjectTouched</td><td>Function that operates when an avatar collides with an object</td></tr><tr><td>onAppObjectTouched</td><td>Function that operates when an avatar collides with an object with a key value</td></tr><tr><td>onUnitAttacked</td><td>Function that operates when an avatar attacks another avatar with the Z key</td></tr><tr><td>onObjectAttacked</td><td>Function that operates when an avatar attacks an object with the Z key</td></tr><tr><td>onSidebarTouched</td><td>Function that operates when a player touches the Sidebar app</td></tr><tr><td>onTriggerObject</td><td>Function that operates when an avatar interacts with an object with the F key</td></tr><tr><td>onAppObjectAttacked</td><td>Function that operates when an avatar attacks an object with a key value with the Z key</td></tr></tbody></table>

## 📚 API Description and Example

<mark style="background-color:yellow;">**Event Listeners at a Glance**</mark>

```jsx
// Calls event for every chat that players enter into the chat window
// Text that begins with ! is not displayed in the chat window,
// but can be used in the onSay function.App.onSay.Add(function(player, text) {
});

// Calls event when a player collides with another player
App.onPlayerTouched.Add(function(sender, target, x, y){
});

// Calls event when the player collides with an object
App.onObjectTouched.Add(function(sender, x, y, tileID) {  
});

// Calls event when the player collides with an object with a key value
App.onAppObjectTouched.Add(function(key, sender, x, y){});

// Calls event when the player attacks another player (Z key)
App.onUnitAttacked.Add(function(sender, x, y, target) {
});

// Calls event when the player attacks an object (Z key)
App.onObjectAttacked.Add(function(sender, x, y){
});

// Calls event when an avatar attacks an object with a key value with the Z key
App.onAppObjectAttacked.Add(function (sender, x, y, layer, key) {
});
```

### onSay

{% hint style="info" %}
App.onSay.Add(function(player, text){});
{% endhint %}

This function operates when a player enters chat.

**Parameters**

<table><thead><tr><th width="130.33333333333331">Name</th><th width="109">Type</th><th>Description</th></tr></thead><tbody><tr><td>player</td><td>Player</td><td>The player’s parameter refers to the player who enters chat.<br>The player’s parameter names can be changed arbitrarily.</td></tr><tr><td>text</td><td>String</td><td>Text refers to the entered chat content.<br>The text’s parameter names can be changed arbitrarily.</td></tr></tbody></table>

**Example**

Hangul quiz - Makes a function to guess the answer via chat:

```jsx
_answer = "ZEP" // Correct
// Executes when a player enters chat
App.onSay.add(function(player, text) {
    if(_answer == text){
        App.showCenterLabel(player.name + ' Correct!\nThe answer is ' + _answer);
    }
});
```

### onPlayerTouched

{% hint style="info" %}
App.onPlayerTouched.Add(function(sender, target, x, y){});
{% endhint %}

This function operates when an avatar collides with another avatar.

**Parameters**

<table><thead><tr><th width="126">Name</th><th width="113.33333333333331">Type</th><th>Description</th></tr></thead><tbody><tr><td>sender</td><td>Player</td><td>The player who collides</td></tr><tr><td>target</td><td>String</td><td>The player who is the object of the collision</td></tr><tr><td>x, y</td><td>Number</td><td>The X and Y coordinate of the location where the collision occurs</td></tr><tr><td></td><td></td><td>The parameter name of sender, target, X, and Y can be changed arbitrarily</td></tr></tbody></table>

**Example**

Display a message when two avatars collide.

```jsx
// Calls event when two players collide
App.onPlayerTouched.Add(function (sender, target, x, y) {
	App.showCenterLabel(
		`${sender.name} and ${target.name} have collided at the coordinates: (${x}, ${y}).`
	);
});
```

### onObjectTouched

{% hint style="info" %}
App.onObjectTouched.Add(function(sender, x, y){});
{% endhint %}

This function operates when an avatar collides with an object.

**Parameters**

<table><thead><tr><th width="116.33333333333331">Name</th><th width="107">Type</th><th>Description</th></tr></thead><tbody><tr><td>sender</td><td>Player</td><td>The player who collides with the object</td></tr><tr><td>x, y</td><td>Number</td><td>The X and Y coordinate of the location where the collision occurs</td></tr><tr><td>tileID</td><td>Number</td><td>The tile ID of the object</td></tr><tr><td>obj</td><td>Object</td><td>Object</td></tr></tbody></table>

**Example**

Label display

⭐ A collision with an object without the `overlap: true` attribute cannot call this function.

{% file src="/files/GJgEAqSrUmrHYEjAZ7Rk" %}

```jsx
let testObject = App.loadSpritesheet("object.png");

App.onStart.Add(function () {
	Map.putObject(5, 5, testObject, { overlap: true });
});

// Calls event when the player collides with an object
App.onObjectTouched.Add(function (sender, x, y, tileID) {
	Map.putObject(x, y, null);
	App.showCenterLabel(
		`${sender.name} has collided with an object at the coordinates: (${x}, ${y}).`
	);
});
```

```jsx
let testObject = App.loadSpritesheet("object.png");
// available ObjectEffectType
const ObjectEffectType = {
    NONE = 0,
    SHOW_NOTE = 1,
    SHOW_IMAGE = 2,
    PASSWORD_DOOR = 3,
    LINK_WEBSITE = 4,
    EMBED_WEBSITE = 5,
    API_CALL = 6,
    REPLACE_IMAGE = 7,
    NFT_GIVEAWAY = 8,
    NFT_DOOR = 9,
    POST_MESSAGE = 10,
    SHOW_CHAT_BALLOON = 11,
    FT_DOOR = 12,
    POST_MESSAGE_TO_APP = 13,
    DONATION_DOOR = 14,
    IMPASSABLE = 15,
    STAMP = 16,
    TOKEN_DONATION_DOOR = 17,
    CHANGE_OBJECT = 18,
    ANIMATION = 19,
    NFT_DOOR_MOVE = 20,
    INTERACTION_WITH_ZEPSCRIPTS = 21,
    MULTIPLE_CHOICE = 22,
}

App.onStart.Add(function () {
	Map.putObject(5, 5, testObject, { overlap: true });
});

// Calls event when the player collides with an object
App.onObjectTouched.Add(function (sender, x, y, tileID, obj) {
	Map.putObject(x, y, null);
	App.showCenterLabel(
		`${sender.name} has collided with an object at the coordinates: (${x}, ${y}).(Type: ${obj.type})`
	);
});
```

### onAppObjectTouched

{% hint style="info" %}
App.onAppObjectTouched.Add(function(key, sender, x, y){});
{% endhint %}

️This function operates when an avatar collides with an object with a key value.

**Parameters**

<table><thead><tr><th width="133.33333333333331">Name</th><th width="127">Type</th><th>Description</th></tr></thead><tbody><tr><td>key</td><td>String</td><td>The key value of the object</td></tr><tr><td>sender</td><td>Player</td><td>The player who collides with the object</td></tr><tr><td>x, y</td><td>Number</td><td>The X and Y coordinate of the location where the collision occurs</td></tr></tbody></table>

**Example**

Label display

⭐ A collision with an object without the `overlap: true` attribute cannot call this function.

{% file src="/files/t5vgF4ozWdFyest5whqK" %}

```jsx
let blueman_dance = App.loadSpritesheet(
	"blueman.png",
	48,
	64,
	[20, 21, 22, 23, 24, 25, 26, 27, 28, 29, 30, 31, 32, 33, 34, 35, 36, 37],
	8
);

// Activates function when q is pressed
App.addOnKeyDown(81, function (player) {
	App.sayToAll("Collision test with an object that has a key value");
	Map.putObjectWithKey(8, 5, blueman_dance, { overlap: true, key: "blueman" });
});

App.onAppObjectTouched.Add(function (player, key, x, y) {
	App.sayToAll(
		`${sender.name} has collided with an object whose value is ${key} at the coordinates: (${x}, ${y}).`
	);
});
```

### onUnitAttacked

{% hint style="info" %}
App.onUnitAttacked.Add(function(sender, x, y, target){});
{% endhint %}

This function operates when an avatar attacks another avatar with Z.

**Parameters**

<table><thead><tr><th width="122.33333333333331">Name</th><th width="114">Type</th><th>Description</th></tr></thead><tbody><tr><td>sender</td><td>Player</td><td>The player who attacks</td></tr><tr><td>x, y</td><td>Number</td><td>The X and Y coordinate of the location of the player who attacks</td></tr><tr><td>target</td><td>Player</td><td>The player who is under attack</td></tr><tr><td></td><td></td><td>The parameter name of sender, target, x, and y can be changed arbitrarily</td></tr></tbody></table>

**Example**

Display a message when a player attacks another player.

```jsx
// Calls event when the player attacks another player (Z key)
App.onUnitAttacked.Add(function (sender, x, y, target) {
	App.showCenterLabel(`${sender.name} has attacked ${target.name}.`);
	App.sayToAll(`(${x}, ${y})`);
});
```

### onObjectAttacked

{% hint style="info" %}
App.onObjectAttacked.Add(function(sender, x, y){});
{% endhint %}

This function operates when an avatar attacks an object with the Z key.

**Parameters**

<table><thead><tr><th width="130.33333333333331">Name</th><th width="130">Type</th><th>Description</th></tr></thead><tbody><tr><td>sender</td><td>Player</td><td>The player who attacks</td></tr><tr><td>x, y</td><td>Number</td><td>The X and Y coordinate of the location of the object</td></tr><tr><td></td><td></td><td>The parameter name of sender, x, and y can be changed arbitrarily.</td></tr></tbody></table>

**Example**

Display a message when an avatar attacks an object.

⭐ An attack on an object without the `overlap: true` attribute cannot execute the function.

{% file src="/files/Id4ANGByvpd1rndyHyob" %}

```jsx
let testObject = App.loadSpritesheet("object.png");

App.onStart.Add(function () {
	Map.putObject(5, 5, testObject, { overlap: true });
});
// Calls event when the player attacks an object (Z key)
App.onObjectAttacked.Add(function(sender, x, y){
	App.showCenterLabel(
		`${sender.name} has attacked an object at the coordinates: (${x}, ${y}).`
	);
})
```

### onSidebarTouched

{% hint style="info" %}
App.onSidebarTouched.Add(function(player){});
{% endhint %}

This function operates when a player touches the Sidebar app.

**Parameters**

<table><thead><tr><th width="145.33333333333331">Name</th><th width="127">Type</th><th>Description</th></tr></thead><tbody><tr><td>player</td><td>Player</td><td>The player who touches the Sidebar app</td></tr></tbody></table>

**Example**

Display a message on touching the Sidebar app.

```jsx
App.onSidebarTouched.Add(function (player) {
	App.sayToAll(`${player.name} has touched the Sidebar app.`)
});
```

**Related Tutorial**

[<mark style="color:purple;">Sidebar App Example</mark>](/zep-script/zep-script-guide/explore-zep-script/zep-script-example-code/sidebar-app)

### onTriggerObject

{% hint style="info" %}
App.onTriggerObject.Add(function(player, layerID, x, y, key){});
{% endhint %}

This function that when an avatar interacts with an object with the F key.

**Parameters**

<table><thead><tr><th width="139.33333333333331">Name</th><th width="125">Type</th><th>Description</th></tr></thead><tbody><tr><td>player</td><td>Player</td><td>The player who interacts with the object</td></tr><tr><td>layerID</td><td>Number</td><td>The ID of the layer where the object is installed<br>Object: layerID = 3<br>Top object: layerID = 5</td></tr><tr><td>x, y</td><td>Number</td><td>The X and Y coordinate of the location of the object</td></tr><tr><td>key</td><td>String</td><td>Key value of the interacted object</td></tr></tbody></table>

**Example**

Display a message on interacting with the object.

<figure><img src="/files/wisBoL9RMBoCu3hd3sF6" alt=""><figcaption></figcaption></figure>

```javascript
App.onTriggerObject.Add(function (player, layerID, x, y) {
	App.sayToAll(`playerName: ${player.name} / layer: ${layerID} / coordinates:(${x}, ${y})`);
});
```

### onAppObjectAttacked

{% hint style="info" %}

```
App.onAppObjectAttacked.Add(function (sender, x, y, layer, key) {});
```

{% endhint %}

This function operates when an avatar attacks an object with a key value with the Z key.

**Reference**: [Object npcProperty](/zep-script/zep-script-guide/appendix/object-npcproperty)

**Parameters**

<table><thead><tr><th width="123.33333333333331">Name</th><th width="120">Type</th><th>Description</th></tr></thead><tbody><tr><td>sender</td><td>Player</td><td>The player who attacks</td></tr><tr><td>x, y</td><td>Number</td><td>The X and Y coordinate of the location of the object</td></tr><tr><td>layer</td><td>Number</td><td>The layer where the object is installed</td></tr><tr><td>key</td><td>String</td><td>The key value of the object</td></tr></tbody></table>

**Example**

Display a message on attacking an object with a key value.

![](/files/qzTW6ItnMjv9nvGLh4Mr)

⭐ Attacking an object without the `collide: true` property does not execute the function.

```javascript
App.onAppObjectAttacked.Add(function (sender, x, y, layer, key) {
    App.showCenterLabel(
        `sender: ${sender.name} 
        coordinates: (${x}, ${y})
        layer: ${layer}
        key: ${key}`
    );
})ja
```

**Reference**

{% content-ref url="/pages/iOcGEKOq4SErIlbeRYa5" %}
[Sidebar App](/zep-script/zep-script-guide/explore-zep-script/zep-script-example-code/sidebar-app)
{% endcontent-ref %}


# Callbacks

### Introduction

These functions set conditions, such as when players press a key designated by the script developer or arrive at a specific point, and operate when the condition is satisfied.

<table><thead><tr><th width="232">Name</th><th>Description</th></tr></thead><tbody><tr><td>runLater</td><td>Function operates after specified time (in seconds)</td></tr><tr><td>addOnTileTouched</td><td>Function operates when a player gets to the specified X and Y coordinates</td></tr><tr><td>addOnLocationTouched</td><td>Function operates when a player gets to the specified ‘designated area’</td></tr><tr><td>addOnKeyDown</td><td>Function operates when a player presses the specified key</td></tr><tr><td>setTimeout</td><td>Function operates at a specified time interval (ms)</td></tr><tr><td>setInterval</td><td>Function operates after the specified amount of time (ms)</td></tr><tr><td>addMobileButton</td><td>Function operates after pressing a custom button in the mobile environment</td></tr><tr><td>putMobilePunch</td><td>Function to add a punch button in the mobile environment</td></tr><tr><td>putMobilePunchWithIcon</td><td>Function to add a punch button using a loaded image</td></tr></tbody></table>

## 📚 Description and Example

<mark style="background-color:yellow;">**Callbacks at a Glance**</mark>

```jsx
// Executes a callback function after time (in seconds)
App.runLater(callback, time: number)

// Executes a callback function when a player touches a tile at that location
App.addOnTileTouched(x: integer, y: integer, callback)

// Executes when a player comes in contact with a specific area
App.addOnLocationTouched(name: string, callback)

// Executes when a player presses a certain key
App.addOnKeyDown(keycode : number, callback);

// Executes a callback at a specified time interval (ms)
setTimeout(callback, time: number)

// Executes a callback after time (ms)
setInterval(callback, time: number)

// Executes a function after pressing a custom button in the mobile environment
App.addMobileButton(anchor: number, posX: number, posY: number, function(player){} )

// Adds or deletes a punch button in the mobile environment
App.putMobilePunch(enable: boolean = true)

// Adds a punch button using a image loaded
App.putMobilePunchWithIcon(icon: ScriptDynamicResource)
```

### runLater

{% hint style="info" %}
App.runLater(function(){}, time: number);
{% endhint %}

This executes a callback function after a period of time (in seconds).

**Parameter**

<table><thead><tr><th width="130.33333333333331">Name</th><th width="125">Type</th><th>Description</th></tr></thead><tbody><tr><td>time</td><td>Number</td><td>Calls the function after a set amount of time (in seconds).</td></tr></tbody></table>

**Example**

Display a message five seconds after an app starts.

```jsx
App.onStart.Add(function () {
	App.runLater(function() {
		App.showCenterLabel("message");
	}, 5);
});
```

### addOnTileTouched

{% hint style="info" %}
App.addOnTileTouched(x: integer, y: integer, function(player){})
{% endhint %}

This executes a callback function when a player gets to the designated X and Y coordinates.

**Parameter**

<table><thead><tr><th width="137.33333333333331">Name</th><th width="117">Type</th><th>Description</th></tr></thead><tbody><tr><td>x, y</td><td>Integer</td><td>The designated X and Y coordinates</td></tr></tbody></table>

**Example**

Display a message when a player gets to the designated coordinates.

```jsx
// Calls the function when the player arrives at coordinates 5, 5
App.addOnTileTouched(5, 5, function (player) {
	App.showCenterLabel(`${player.name} arrived at (5, 5)!`);
});
```

### addOnLocationTouched

{% hint style="info" %}
addOnLocationTouched(name: string, function(player){})
{% endhint %}

This executes a callback function when a player gets to the designated area specified by the Map Editor.

**Parameters**

<table><thead><tr><th width="148.33333333333331">Name</th><th width="114">Type</th><th>Description</th></tr></thead><tbody><tr><td>name</td><td>String</td><td>The name of the designated area specified by the Map Editor</td></tr><tr><td>player</td><td>Player</td><td>The player who gets to the designated area<br>The parameter name can be changed arbitrarily</td></tr></tbody></table>

**Example**

Display a message when a player gets to the designated area.

```jsx
// Executes when a player gets to the area named "myLocation"
App.addOnLocationTouched("myLocation", function(player){
	App.showCenterLabel(`${player.name} has arrived at myLocation.`)
});
```

### addOnKeyDown

{% hint style="info" %}
App.addOnKeyDown(keycode : number, function(player){});
{% endhint %}

This executes a callback when a player presses the specified key.

**Parameters**

<table><thead><tr><th width="144.33333333333331">Name</th><th width="129">Type</th><th>Description</th></tr></thead><tbody><tr><td>keycode</td><td>Number</td><td>The number for a key<br><a href="/pages/ZETIYCv77TyJudwuLwZ1"><mark style="color:purple;">JavaScript Keycode List</mark></a></td></tr><tr><td>player</td><td>Player</td><td>The player who presses the specific key<br>The player’s parameter names can be changed arbitrarily</td></tr></tbody></table>

**Example**

Display a message when a player presses “a” (a’s keycode: 65).

```jsx
// Executes when a player presses "a"
App.addOnKeyDown(65, function(player){
	App.sayToAll(`${player.name} has pressed "a".`)
});
```

***

### setTimeout

{% hint style="info" %}
setTimeout(function(){}, time: number);
{% endhint %}

This executes a callback after time (ms).

**Parameter**

<table><thead><tr><th width="123.33333333333331">Name</th><th width="140">Type</th><th>Description</th></tr></thead><tbody><tr><td>time</td><td>Number</td><td>Waiting time (ms) before executing a  callback function </td></tr></tbody></table>

**Example**

Display a message 5 seconds after an app is executed.

```jsx
App.onStart.Add(function () {
	setTimeout(function () {
		App.sayToAll("Display message after 5 seconds");
	}, 5000);
});
```

####

### setInterval

{% hint style="info" %}
setInterval(function(){}, time: number);
{% endhint %}

This executes a callback at a specified time interval (ms).

**Parameter**

<table><thead><tr><th width="133.33333333333331">Name</th><th width="141">Type</th><th>Description</th></tr></thead><tbody><tr><td>time</td><td>Number</td><td>Callback execution cycle (ms)</td></tr></tbody></table>

**Example**

Display a message every one second after an app is executed.

```jsx
let time = 0;
App.onStart.Add(function () {
	setInterval(function () {
		App.sayToAll(`${++time} passed after app execution`);
	}, 1000);
});
```

####

### addMobileButton

{% hint style="info" %}
App.addMobileButton( anchor: number, posX: number, posY: number, function(player){} )
{% endhint %}

This executes by pressing a custom button added in the mobile environment.

**Parameters**

<table><thead><tr><th width="125.33333333333331">Name</th><th width="132">Type</th><th>Description</th></tr></thead><tbody><tr><td>anchor</td><td>Number</td><td>Use numbers for the locations of each mobile button<br>TOP = 0,<br>TOP_LEFT = 1,<br>TOP_RIGHT = 2,<br>MIDDLE = 3,<br>MIDDLE_LEFT = 4,<br>MIDDLE_RIGHT = 5,<br>BOTTOM = 6,<br>BOTTOM_LEFT = 7,<br>BOTTOM_RIGHT = 8</td></tr><tr><td>posX</td><td>Number</td><td>X direction offset</td></tr><tr><td>posY</td><td>Number</td><td>Y direction offset</td></tr><tr><td>player</td><td>Player</td><td>The player who presses the mobile button</td></tr></tbody></table>

**Example**

Add a mobile button.

![](/files/Ji5OPgzNU7tr2UX1CUzK)

```jsx
App.onStart.Add(function () {
	// Bottom_Right
	App.addMobileButton(8, 145, 75, function (player) {
		App.sayToAll(`${player.name}, Bottom A`);
	});
	// Bottom_Right
	App.addMobileButton(8, 145, -20, function (player) {
		App.sayToAll(`${player.name}, Bottom B`);
	});
	// Top
	App.addMobileButton(0, 0, 400, function (player) {
		App.sayToAll(`${player.name}, TOP Bottom`);
	});
	// Top_Left
	App.addMobileButton(1, 50, 400, function (player) {
		App.sayToAll(`${player.name}, TOP_LEFT Bottom`);
	});
	// Top_right
	App.addMobileButton(2, 50, 400, function (player) {
		App.sayToAll(`${player.name}, TOP_RIGHT Bottom`);
	});
	// Middle
	App.addMobileButton(3, 0, 100, function (player) {
		App.sayToAll(`${player.name}, MIDDLE Bottom`);
	});
	// Middle_left
	App.addMobileButton(4, 50, 100, function (player) {
		App.sayToAll(`${player.name}, MIDDLE LEFT Bottom`);
	});
	// Middle_right
	App.addMobileButton(5, 50, 100, function (player) {
		App.sayToAll(`${player.name}, MIDDLE RIGHT Bottom`);
	});
});
```

###

### putMobilePunch

{% hint style="info" %}
App.putMobilePunch(enable: boolean = true)
{% endhint %}

This adds a punch button in the mobile environment when "enable" is "true."

**Parameter**

<table><thead><tr><th width="144.33333333333331">Name</th><th width="129">Type</th><th>Description</th></tr></thead><tbody><tr><td>enable</td><td>Boolean</td><td>Whether the mobile punch button is enabled ("true" is default)</td></tr></tbody></table>

**Example**

Add or delete the mobile punch button by pressing q.

![](/files/ujxQ8LebbrvAXsGIiv0l)

```jsx
let punchButton = false;
// Activates function when q is pressed
App.addOnKeyDown(81, function (player) {
	if (!punchButton) {
		punchButton = true;
		App.putMobilePunch();
	} else {
		punchButton = false;
		App.putMobilePunch(false);
	}
});
```

***

### putMobilePunchWithIcon

{% hint style="info" %}
App.putMobilePunchWithIcon(icon: ScriptDynamicResource)
{% endhint %}

This function adds a punch button using a image loaded.

**Parameter**

<table><thead><tr><th width="94.33333333333331">Name</th><th width="216">Type</th><th>Description</th></tr></thead><tbody><tr><td>icon</td><td>ScriptDynamicResource</td><td>Image resources loaded using App.loadSpriteSheet</td></tr></tbody></table>

**Example**

Add a punch button using a loaded image in the mobile environment by pressing q.

![](/files/1T9uYm0nBNEzyFwZCKWT)![](/files/eVikmpyojWQAhZkQEf9O)

```javascript
const punchIcon = App.loadSpritesheet("punchIcon.png")
// Activates function when q is pressed
App.addOnKeyDown(81, function (player) {
	App.putMobilePunchWithIcon(punchIcon);
});
```

### Appendix

[<mark style="color:purple;">JavaScript Keycode List</mark>](/zep-script/zep-script-guide/appendix/javascript-keycode-list)


# Methods

### Introduction

These functions provide convenient techniques such as UI display, moving or kicking users, and playing sound.

Methods can be divided into [<mark style="color:purple;">**UI**</mark>](#ui)<mark style="color:purple;">**,**</mark> [<mark style="color:purple;">**User Control**</mark>](#user-control)<mark style="color:purple;">**,**</mark> [<mark style="color:purple;">**Sound**</mark>](#sound)<mark style="color:purple;">**,**</mark> [<mark style="color:purple;">**Communication**</mark>](#communication)<mark style="color:purple;">**,**</mark> and [<mark style="color:purple;">**Common**</mark>](#common) depending on their purpose.

### UI

<table><thead><tr><th width="209">Name</th><th>Description</th></tr></thead><tbody><tr><td>loadSpritesheet</td><td>Function to read a sprite sheet picture file and make it an object</td></tr><tr><td>showCenterLabel</td><td>Function to display text for 3 seconds at the designated location for all players</td></tr><tr><td>showCustomLabel</td><td>Function to display text for 3 seconds at the designated location for all players<br>You can decorate text by inserting <code>span</code> tags in the text part.</td></tr><tr><td>showWidget</td><td>Function to load the HTML file as a widget at the align position specified for all players</td></tr><tr><td>showYoutubeWidget</td><td>Function to call the YouTube video corresponding to the link to the widget</td></tr></tbody></table>

### **User Control**

<table><thead><tr><th width="214">Name</th><th>Description</th></tr></thead><tbody><tr><td>spawnPlayer</td><td>Function to move players to the designated X and Y coordinates</td></tr><tr><td>kickPlayer</td><td>Function to kick players</td></tr><tr><td>forceDestroy</td><td>Function to shut down the mini-game app</td></tr><tr><td>clearChat</td><td>Function to delete all chat history</td></tr><tr><td>getPlayerByID</td><td>Function to return a player corresponding to an id</td></tr></tbody></table>

### Sound

<table><thead><tr><th width="216">Name</th><th>Description</th></tr></thead><tbody><tr><td>playSound</td><td>Function to play the sound file</td></tr><tr><td>playSoundLink</td><td>Function to play the sound URL</td></tr><tr><td>stopSound</td><td>Function to stop all the playing sound</td></tr><tr><td>changeAttackSound</td><td>Function to change the poke (Z key) sound effects</td></tr></tbody></table>

### Communication

<table><thead><tr><th width="225">Name</th><th>Description</th></tr></thead><tbody><tr><td>httpGet</td><td>Function to request for HTTP Get</td></tr><tr><td>httpPost</td><td>Function to request for HTTP Post</td></tr><tr><td>httpPostJson</td><td>Function to request for HTTP Post in JSON</td></tr></tbody></table>

### Common

<table><thead><tr><th width="158">Name</th><th>Description</th></tr></thead><tbody><tr><td>sendUpdated</td><td>Function to apply the updated app/player-related field values when changes are made</td></tr><tr><td>save</td><td>Function to apply the updated app/player storage values</td></tr></tbody></table>

## 📚 API Explanation and Example

### 🎨 **UI Methods**

<mark style="background-color:yellow;">**UI at a Glance**</mark>

```jsx
// Reads a sprite sheet picture file, making it an object
App.loadSpritesheet(fileName: string, frameWidth: integer, frameHeight: integer, anims: array, frameRate: integer): ScriptDynamicResource

// Displays text for 1 second at the designated location for all players
App.showCenterLabel(text: string, color: uint = 0xFFFFFF, bgColor: uint = 0x000000, offset: int = 0)

// Displays text for 1 second at the designated location for all players, customizable
App.showCustomLabel(text: string, color: number = 0xFFFFFF, bgColor: number = 0x000000, offset: number = 0, width = 100, opacity = 0.6);

// Displays text in the chat window
App.sayToAll(text: string, color: uint = 0xFFFFFF)

// Loads the corresponding HTML file as a widget at the align position specified for all players
App.showWidget(fileName: string, align: string, width: integer, height: integer): ScriptWidget

// Plays the video from the YouTube link at the specified align position for all players
App.showYoutubeWidget(link: string, align: string, width: integer, height: integer): ScriptWidget
```

### loadSpritesheet

{% hint style="info" %}
App.loadSpritesheet(fileName: string, frameWidth: integer, frameHeight: integer, anims: array, frameRate: integer): ScriptDynamicResource
{% endhint %}

This function reads a sprite sheet picture file and makes it an object.

To better understand ScriptDynamicResource, please refer to the [<mark style="color:purple;">Understanding Sprite Sheets</mark>](/zep-script/zep-script-guide/appendix/understanding-sprite-sheets) page.

**Parameters**

<table><thead><tr><th width="158.33333333333331">Name</th><th width="135">Type</th><th>Description</th></tr></thead><tbody><tr><td>fileName</td><td>String</td><td>Name of the file to be loaded</td></tr><tr><td>frameWidth <br>frameHeight</td><td>Integer</td><td>The frame’s width and height pixel size</td></tr><tr><td>anims</td><td>Array</td><td>Array of frame image numbers to be set as animation</td></tr><tr><td>frameRate</td><td>Integer</td><td>Rate of data displayed per frame<br>frameRate: 8 → displays 8 images per second</td></tr></tbody></table>

**Example**

Paintman - Apply a Blueman sprite image

{% file src="/files/YwgdxBSfI7HogLMbJTjj" %}

```jsx
// One frame's size 48x64
let blueman = App.loadSpritesheet('blueman.png', 48, 64, {
    left: [5, 6, 7, 8, 9], // image moving left
    up: [15, 16, 17, 18, 19],
    down: [0, 1, 2, 3, 4],
    right: [10, 11, 12, 13, 14],
		dance: [20,21,22,23,24,25,26,27,28,29,30,31,32,33,34,35,36,37],
		down_jump: [38],
		left_jump: [39],
		right_jump: [40],
		up_jump: [41],
}, 8);
// Avatar image changes when the player enters
App.onJoinPlayer.Add(function(player){
	player.sprite = blueman;
	player.sendUpdated();
});
```

### showCenterLabel

{% hint style="info" %}
App.showCenterLabel(text: string, color: uint = 0xFFFFFF, bgColor: uint = 0x000000, offset: int = 0, time: number = 3000)
{% endhint %}

This function displays text for 3 seconds at the designated location for all players.

**Parameters**

<table><thead><tr><th width="126.33333333333331">Name</th><th width="111">Type</th><th>Description</th></tr></thead><tbody><tr><td>text</td><td>String</td><td>Text to display on the label</td></tr><tr><td>color</td><td>Unit</td><td>Color of text to be displayed (HexCode)<br>If left blank, it is set to white (0xFFFFFF).<br>➡️<a href="https://www.google.com/search?q=COLOR+PICKER&#x26;sxsrf=ALiCzsbc_6XvOn9SiJdEBkLmfLurJ4tvOA%3A1658153265956&#x26;ei=MWnVYrX3Ocv4wAOXk6-wBg&#x26;ved=0ahUKEwj105mjzoL5AhVLPHAKHZfJC2YQ4dUDCA4&#x26;uact=5&#x26;oq=COLOR+PICKER&#x26;gs_lcp=Cgdnd3Mtd2l6EAMyBAgjECcyBQgAEIAEMgUIABCABDIFCAAQgAQyBQgAEIAEMgUIABCABDIFCAAQgAQyBQgAEIAEMgUIABCABDIFCAAQgAQ6CwgAEIAEELEDEIMBOhEILhCABBCxAxCDARDHARDRAzoRCC4QgAQQsQMQgwEQxwEQrwE6CAgAEIAEELEDOhAIABCABBCHAhCxAxCDARAUOgoIABCABBCHAhAUSgQIQRgASgQIRhgAUABYhRVgvxZoAHABeACAAYwBiAHmC5IBBDAuMTKYAQCgAQHAAQE&#x26;sclient=gws-wiz">Color Picker</a></td></tr><tr><td>bgColor</td><td>Unit</td><td>Background color of the label where a message is displayed<br>If left blank, it is set to black (0x000000).</td></tr><tr><td>offset</td><td>Integer</td><td>The larger the offset value, the closer the displayed position is toward the bottom of the screen.<br>If left blank, it is set to 0.</td></tr><tr><td>time</td><td>number</td><td>Label display time (ms), default 3000 ms (3 seconds)</td></tr></tbody></table>

**Example**

ssDisplay a message label with the yellow background.

<figure><img src="/files/SVbJOnJvGjfbOdrqZ3XA" alt=""><figcaption></figcaption></figure>

```jsx
App.onJoinPlayer.Add(function(player){
	App.showCenterLabel(`${player.name} has entered.`, 0x000000, 0xFFFF00, 200, 2000); // Display with the yellow background and black text
});
```

### showCustomLabel

{% hint style="info" %}
App.showCustomLabel(text: string, color: number = 0xFFFFFF, bgColor: number = 0x000000, offset: number = 0, width = 100, opacity = 0.6, time: number = 3000);
{% endhint %}

This function displays text for 1 second at the designated location for all players. You can decorate text by inserting <mark style="color:red;">`span`</mark> tags in the text part.

**Parameters**

<table><thead><tr><th width="150.33333333333331">Name</th><th width="118">Type</th><th>Description</th></tr></thead><tbody><tr><td>text</td><td>String</td><td>Text to display on the label (span tags allowed)</td></tr><tr><td>color</td><td>Unit</td><td>Color of text to be displayed (HexCode)<br>If left blank, it is set to white (0xFFFFFF).<br>➡️<a href="https://www.google.com/search?q=COLOR+PICKER&#x26;sxsrf=ALiCzsbc_6XvOn9SiJdEBkLmfLurJ4tvOA%3A1658153265956&#x26;ei=MWnVYrX3Ocv4wAOXk6-wBg&#x26;ved=0ahUKEwj105mjzoL5AhVLPHAKHZfJC2YQ4dUDCA4&#x26;uact=5&#x26;oq=COLOR+PICKER&#x26;gs_lcp=Cgdnd3Mtd2l6EAMyBAgjECcyBQgAEIAEMgUIABCABDIFCAAQgAQyBQgAEIAEMgUIABCABDIFCAAQgAQyBQgAEIAEMgUIABCABDIFCAAQgAQ6CwgAEIAEELEDEIMBOhEILhCABBCxAxCDARDHARDRAzoRCC4QgAQQsQMQgwEQxwEQrwE6CAgAEIAEELEDOhAIABCABBCHAhCxAxCDARAUOgoIABCABBCHAhAUSgQIQRgASgQIRhgAUABYhRVgvxZoAHABeACAAYwBiAHmC5IBBDAuMTKYAQCgAQHAAQE&#x26;sclient=gws-wiz">Color Picker</a></td></tr><tr><td>bgColor</td><td>Unit</td><td>Background color of the label where a message is displayed<br>If left blank, it is set to black (0x000000).</td></tr><tr><td>offset</td><td>number</td><td>The larger the offset value, the closer the displayed position is toward the bottom of the screen.<br>If left blank, it is set to 0.</td></tr><tr><td>width</td><td>number</td><td>Value to set the label‘s width to n%. (default value: 100)</td></tr><tr><td>opacity</td><td>number</td><td>Value to set the transparency of the label’s background (default value: 0.6, range: 0-1)</td></tr><tr><td>time</td><td>number</td><td>Label display time (ms), default 3000 ms (3 seconds)</td></tr></tbody></table>

**Example**

Format the label based on the HTML tags.

<div align="left"><figure><img src="/files/AUNMsv2oc2Wx3Wk6CKxt" alt=""><figcaption></figcaption></figure></div>

```jsx
// Activates function when q is pressed
App.addOnKeyDown(88, function (player) {
  // Style of the box to put x in
	let style =
		"display: inline-block; text-align: center; width:1.2em; height:1.2em; line-height: 1.2em; color: black; background-color: white; font-size: 1.2em; border-radius:3px";
	App.showCustomLabel(
		`You can run the example by pressing the <span style="${style}">X</span> button.`,
		0xffffff, // white text
		0, // black background
		300, // offset 300
		20, // width 20%
		1 // transparency 1 -> opacity
	);
});
```

### sayToAll

{% hint style="info" %}
App.sayToAll(text: string, color: uint = 0xFFFFFF)
{% endhint %}

This function displays text in the chat window.

**Parameters**

<table><thead><tr><th width="132.33333333333331">Name</th><th width="103">Type</th><th>Description</th></tr></thead><tbody><tr><td>text</td><td>String</td><td>Text to display in the chat window</td></tr><tr><td>color</td><td>Unit</td><td>Color of text to be displayed (HexCode)<br>If left blank, it is set to white (0xFFFFFF).<br>➡️<a href="https://www.google.com/search?q=COLOR+PICKER&#x26;sxsrf=ALiCzsbc_6XvOn9SiJdEBkLmfLurJ4tvOA%3A1658153265956&#x26;ei=MWnVYrX3Ocv4wAOXk6-wBg&#x26;ved=0ahUKEwj105mjzoL5AhVLPHAKHZfJC2YQ4dUDCA4&#x26;uact=5&#x26;oq=COLOR+PICKER&#x26;gs_lcp=Cgdnd3Mtd2l6EAMyBAgjECcyBQgAEIAEMgUIABCABDIFCAAQgAQyBQgAEIAEMgUIABCABDIFCAAQgAQyBQgAEIAEMgUIABCABDIFCAAQgAQ6CwgAEIAEELEDEIMBOhEILhCABBCxAxCDARDHARDRAzoRCC4QgAQQsQMQgwEQxwEQrwE6CAgAEIAEELEDOhAIABCABBCHAhCxAxCDARAUOgoIABCABBCHAhAUSgQIQRgASgQIRhgAUABYhRVgvxZoAHABeACAAYwBiAHmC5IBBDAuMTKYAQCgAQHAAQE&#x26;sclient=gws-wiz">Color Picker</a></td></tr></tbody></table>

**Example**

Display an entrance message in light blue.

<div align="left"><figure><img src="/files/okLkzI5nn6NovxGmYWBv" alt=""><figcaption></figcaption></figure></div>

```jsx
// Executes when a player enters
App.onJoinPlayer.Add(function (player) {
	App.sayToAll(`${player.name} has entered.`, 0x00ffff); // Displays in light blue
});
```

### showWidget

{% hint style="info" %}
App.showWidget(fileName: string, align: string, width: integer, height: integer): ScriptWidget
{% endhint %}

This function loads the HTML file as a widget at the align position specified for all players.

**Parameters**

<table><thead><tr><th width="151.33333333333331">Name</th><th width="117">Type</th><th>Description</th></tr></thead><tbody><tr><td>fileName</td><td>String</td><td>Name of the file to be loaded</td></tr><tr><td>align</td><td>String</td><td>Where to display the widget<br>’popup’, ‘sidebar’, ‘top’, ‘topleft’, ‘topright’, ‘middle’, ‘middleleft’, ‘middleright’, ‘bottom’, ‘bottomleft’, ‘bottomright’</td></tr><tr><td>width<br>height</td><td>Integer</td><td>Width and height of the area to display the widget (px)</td></tr></tbody></table>

**Example**

Create a Hangul game widget.

{% file src="/files/d35Asvsn12MVyFJN3aVK" %}

<div align="left"><figure><img src="/files/ykWd0YfzLDUQ0ZaY6U8N" alt=""><figcaption></figcaption></figure></div>

```jsx
let _widget = null;
// Executes when a player enters
App.onJoinPlayer.Add(function (player) {
	_widget = App.showWidget("widget.html", "top", 200, 300); // Displays the widget at the top of the screen in the 200x300 area
	_widget.sendMessage({
		timer: 15,
		answer: "ㅅㅍㅋ",
	});
});
```

### showYoutubeWidget

{% hint style="info" %}
App.showYoutubeWidget(link: string, align: string, width: integer, height: integer): ScriptWidget
{% endhint %}

This function calls the YouTube video corresponding to the link to the widget.

**Parameters**

<table><thead><tr><th width="114.33333333333331">Name</th><th width="105">Type</th><th>Description</th></tr></thead><tbody><tr><td>link</td><td>String</td><td>YouTube video’s url</td></tr><tr><td>align</td><td>String</td><td>Where to display the widget<br>’popup’, ‘sidebar’, ‘top’, ‘topleft’, ‘topright’, ‘middle’, ‘middleleft’, ‘middleright’, ‘bottom’, ‘bottomleft’, ‘bottomright’</td></tr><tr><td>width<br>height</td><td>Integer</td><td>Width and height of the area to display the widget (px)</td></tr></tbody></table>

**Example**

Display a YouTube widget.

<div align="left"><figure><img src="/files/tPIMkgNU5SeOBhgZsOOu" alt=""><figcaption></figcaption></figure></div>

```jsx
// Executes when a player enters
App.onJoinPlayer.Add(function (player) {
	App.showYoutubeWidget("https://www.youtube.com/watch?v=SXnMGIR8cjY","top",600,500);
});
```

## 🙍‍♂️**User Control Methods**

<mark style="background-color:yellow;">**User Control at a Glance**</mark>

```jsx
// Moves the player corresponding to playerID to tileX, tileY coordinates
App.spawnPlayer(playerID: string, tileX: integer, tileY: integer)

// Kicks the player corresponding to playerID
// The kicked user will not be able to access the space for 24 hours.
App.kickPlayer(playerID: string)

// Shuts down the mini-game app
App.forceDestroy();

// Deletes all chat history.
App.clearChat();

//Retuns a player corresponding to the id
App.getPlayerID(playerID:string);
```

### spawnPlayer

{% hint style="info" %}
App.spawnPlayer(playerID: string, tileX: integer, tileY: integer)
{% endhint %}

This function moves the player corresponding to playerID to tileX and tileY coordinates.

**Parameters**

<table><thead><tr><th width="149.33333333333331">Name</th><th width="117">Type</th><th>Description</th></tr></thead><tbody><tr><td>playerID</td><td>String</td><td>The player’s ID value</td></tr><tr><td>tileX<br>tileY</td><td>Integer</td><td>The X and Y coordinates to move the player</td></tr></tbody></table>

**Example**

Move an entering player to the designated coordinates.

```jsx
// Executes when a player enters
App.onJoinPlayer.Add(function (player) {
	App.spawnPlayer(player.id, 5, 5); // Moves the player to 5, 5
});
```

### kickPlayer

{% hint style="info" %}
&#x20;App.kickPlayer(playerID: string)
{% endhint %}

This function kicks the player corresponding to playerID.

**Parameter**

<table><thead><tr><th width="141.33333333333331">Name</th><th width="132">Type</th><th>Description</th></tr></thead><tbody><tr><td>playerID</td><td>String</td><td>The player’s ID value</td></tr></tbody></table>

**Example**

Create a command for kicking.

⛔ The kicked user will not be able to access the Space for 24 hours. Please use this command carefully.

```jsx
// Executes when a player enters chat
// Command format '!nickname to kick'
App.onSay.Add(function (player, text) {
	let players = App.players;
	if (text.indexOf("!Kick") == 0) {
		let nickname = text.slice(4);
		for (let i in players) {
			let p = players[i];
			if (p.name == nickname) {
				App.kickPlayer(p.id);
				break;
			}
		}
	}
});
```

###

### forceDestroy

{% hint style="info" %}
App.forceDestroy();
{% endhint %}

This function shuts down the mini-game app.

**Example**

End the mini-game app by force.

```
// Activates function when q is pressed
App.addOnKeyDown(81, function (player) {
	App.forceDestroy();
});
```

###

### clearChat

{% hint style="info" %}
App.clearChat();
{% endhint %}

This function deletes all chat history.

**Example**

Press Q to delete the chat history.

```jsx
// Activates function when q is pressed
App.addOnKeyDown(81, function (player) {
	App.clearChat();
});
```

###

### getPlayerByID

{% hint style="info" %}
App.getPlayerByID(playerID: string);
{% endhint %}

This function returns a player corresponding to the id.

**Example**

How to use App.getPlayerByID

```jsx
// Activates function when q is pressed
App.addOnKeyDown(81, function (player) {
	const myPlayer = App.getPlayerByID(player.id);
});
```

## 🔉 **Sound Methods**

<mark style="background-color:yellow;">**Sound at a Glance**</mark>

```jsx
// Plays the sound file to all players
App.playSound(fileName: string, loop: boolean = false)

// Plays the sound corresponding to the link to all players
App.playSoundLink(link: string, loop: boolean = false)

// Stops all playing sounds
App.stopSound()

// Changes the poke (Z key) sound effects
App.changeAttackSound(fileName:string)
```

### playSound

{% hint style="info" %}
App.playSound(fileName: string, loop: boolean = false)
{% endhint %}

This function plays the sound file to all players.

**Parameters**

<table><thead><tr><th width="139.33333333333331">Name</th><th width="139">Type</th><th>Description</th></tr></thead><tbody><tr><td>fileName</td><td>String</td><td>Name of the file to be loaded</td></tr><tr><td>loop</td><td>boolean</td><td>true: play on repeat<br>false: play once</td></tr></tbody></table>

**Example**

Apply entrance music when a player enters (file).

{% file src="/files/zUOeUpWps95aXuKgp9JX" %}

```jsx
// Executes when a player enters
App.onJoinPlayer.Add(function (player) {
	App.playSound("join.mp3",false);
});
```

### playSoundLink

{% hint style="info" %}
App.playSoundLink(link: string, loop: boolean = false)
{% endhint %}

This function plays the sound corresponding to the link to all players.

{% hint style="success" %}
When the link does not play even though it is correct:

You have probably violated the CORS policy. If you cannot follow the CORS policy, it is recommended to use playSound by uploading the music file instead of playSoundLink.
{% endhint %}

**Parameters**

<table><thead><tr><th width="157.33333333333331">Name</th><th width="147">Type</th><th>Description</th></tr></thead><tbody><tr><td>link</td><td>String</td><td>Sound url</td></tr><tr><td>loop</td><td>boolean</td><td>true: play on repeat<br>false: play once</td></tr></tbody></table>

**Example**

Apply the entrance music when a player enters (sound url).

```jsx
// Executes when a player enters
App.onJoinPlayer.Add(function (player) {
	App.playSoundLink("https://zep.us/assets/sounds/ring.mp3",false);
});
```

### stopSound

{% hint style="info" %}
App.stopSound();
{% endhint %}

This function stops all playing sounds.

**Parameter**

* None

**Example**

Create a function that stops sound upon pressing q.

```jsx
// Activates function when q is pressed
App.addOnKeyDown(81,function(p){
	App.stopSound();
})
```

### changeAttackSound

{% hint style="info" %}
App.changeAttackSound(fileName:string)
{% endhint %}

This function changes the poke (Z key) sound effects.

**Parameter**

<table><thead><tr><th width="152.33333333333331">Name</th><th width="160">Type</th><th>Description</th></tr></thead><tbody><tr><td>fileName</td><td>String</td><td>Name of the sound file to use</td></tr></tbody></table>

**Example**

How to use changeAttackSound

```javascript
App.onStart.Add(function(){
	App.changeAttackSound("attack.mp3");
})j
```

## 📡 Communication **Methods**

<mark style="background-color:yellow;">**Communication at a Glance**</mark>

```jsx
// Executes HTTP Get request to the URL
App.httpGet(url: string, headers: object, callback: ((string) => void))

// Executes HTTP Get posting to the URL
App.httpPost(url: string, headers: object, body: object, callback: ((string) => void))

// Executes HTTP Post to the URL
App.httpPostJson(url: string, headers: object, body: object, callback: ((string) => void))
```

### httpGet

{% hint style="info" %}
App.httpGet(url: string, headers: object, function(res: string){})
{% endhint %}

This function calls for HTTP Get request.

**Parameters**

<table><thead><tr><th width="144.33333333333331">Name</th><th width="128">Type</th><th>Description</th></tr></thead><tbody><tr><td>url</td><td>String</td><td>Address to send the request to</td></tr><tr><td>headers</td><td>Object</td><td>Request header</td></tr><tr><td>res</td><td>String</td><td>Response to the request</td></tr></tbody></table>

**Example**

Change the nickname of an entering player using [<mark style="color:purple;">Korean Nickname Generator</mark>](https://nickname.hwanmoo.kr/) API.

<div align="left"><figure><img src="/files/ZYY2wRxvcYuNwcTmBhP0" alt=""><figcaption></figcaption></figure></div>

```jsx
// Executes when a player enters
App.onJoinPlayer.Add(function (player) {
	App.httpGet(
		"https://nickname.hwanmoo.kr/?format=json&count=1&max_length=6&whitespace=_",
		null,
		function (res) {
			// Change the response to a json object
			let response = JSON.parse(res);
			player.name = response.words[0];
			player.sendUpdated();
		}
	);
});
```

### httpPost

{% hint style="info" %}
App.httpPost(url: string, headers: object, body: object, function(res: string))
{% endhint %}

This function calls for HTTP Post request.

**Parameters**

<table><thead><tr><th width="122">Name</th><th width="130">Type</th><th>Description</th></tr></thead><tbody><tr><td>url</td><td>String</td><td>Address to send the request to</td></tr><tr><td>headers</td><td>Object</td><td>Request header</td></tr><tr><td>body</td><td>Object</td><td>Request body (form data)</td></tr><tr><td>res</td><td>String</td><td>Response to the request</td></tr></tbody></table>

**Example**

Receive the header and data sent by the app as a response and display in the chat window.

As shown in the example, key and value should be written in the form of a string, and the requesting server should receive form data and be able to process it.

```jsx
// Activates function when q is pressed
App.addOnKeyDown(81, function (player) {
	App.httpPost(
		"https://postman-echo.com/post",
		{
			"test-header": "zep",
		},
		{
			"id": "ox2wd",
			"name": "zepscript",
			"number" : "5"
		},
		(res) => {
			// Changes the response to a json object
			let response = JSON.parse(res);
			App.sayToAll(`header sent: ${response.headers["test-header"]}`, 0xffffff);
			App.sayToAll(`data sent: ${response.form.id}`, 0xffffff);
			App.sayToAll(`data sent: ${response.form.name}`, 0xffffff);
			App.sayToAll(`data sent: ${response.form.number}`, 0xffffff);
		}
	);
});
```

### httpPostJson

{% hint style="info" %}
App.httpPostJson(url: string, headers: object, body: object, function(res: string))
{% endhint %}

This function calls for HTTP Post request in JSON.

**Parameters**

<table><thead><tr><th width="142.33333333333331">Name</th><th width="142">Type</th><th>Description</th></tr></thead><tbody><tr><td>url</td><td>String</td><td>Address to send the request to</td></tr><tr><td>headers</td><td>Object</td><td>Request header. If blank, enter <mark style="color:purple;background-color:yellow;"><strong>{ }</strong></mark>.</td></tr><tr><td>body</td><td>Object</td><td>Request body (JSON data)</td></tr><tr><td>res</td><td>String</td><td>Response to the request</td></tr></tbody></table>

**Example**

Receive the data sent by the app as a response and display in the chat window.

```jsx
// Activates function when q is pressed
App.addOnKeyDown(81, function (player) {
	App.httpPostJson(
		"https://postman-echo.com/post",
		{},
		{
			name: "zepscript",
		},
		(res) => {
			App.sayToAll(`${res}`, 0xffffff);
			// Changes the response to a json object
			let response = JSON.parse(res);
			App.sayToAll(`data sent: ${response.data.name}`, 0xffffff);
		}
	);
});
```

## 💠 **Common Methods**

<mark style="background-color:yellow;">**Common Methods at a Glance**</mark>

```jsx
// Applies the changed values whenever App related field values are changed 
App.sendUpdated()

// Saves App storage value
App.save()
```

***

### sendUpdated

{% hint style="info" %}
App.sendUpdated()
{% endhint %}

This function applies the updated app-related field values when changes are made.

**Parameter**

* None

### save

{% hint style="info" %}
App.save()
{% endhint %}

This function applies the updated app storage values when changes are made.

**Parameter**

* None


# ScriptMap

**ScriptApp** class consists of the two categories provided below.

### [<mark style="color:purple;">Field</mark>](/zep-script/zep-script-api/scriptmap/field)

> This category contains the attribute values pertaining to maps.

### [<mark style="color:purple;">Methods</mark>](/zep-script/zep-script-api/scriptmap/methods)

> This category contains functions pertaining to map tile effects, object uploads, and other convenient functions for maps.


# Field

### Introduction

Provided below are all the attribute values pertaining to Map. Currently, the Map’s width and height fields cannot be seen.

🔒 Fields with this icon are read-only fields that cannot be revised.

<table><thead><tr><th width="180">Name</th><th>Description</th></tr></thead><tbody><tr><td>🔒 width</td><td>Calls the map’s width value.</td></tr><tr><td>🔒 height</td><td>Calls the map’s height value.</td></tr></tbody></table>

## 📚 API Explanation and Example

### width & height

{% hint style="info" %}
Map.width : Number \
Map.height : Number
{% endhint %}

Calls the map’s width and height values.

**Example**

Display the map’s width and height values on the chat screen.

```jsx
// Activates function when q is pressed  
// **[App.addOnKeyDown Description (Link)](https://www.notion.so/Callbacks-7ac5078bab7c4f3180ae05463713581d)**
App.addOnKeyDown(81, function (player) {
	App.sayToAll(`map's horizontal size: ${Map.width}`);
	App.sayToAll(`map's vertical size: ${Map.height}`);
});
```


# Methods

### Introduction

Functions pertaining to Map’s tile effects, object upload, and other convenient feature functions for maps are provided below.

<table><thead><tr><th width="217">Name</th><th>Description</th></tr></thead><tbody><tr><td>putTileEffect</td><td>Function to apply a tile effect to the specified coordinates</td></tr><tr><td>putObject</td><td>Function to place an object on the specified coordinates</td></tr><tr><td>putObjectMultiple</td><td>Function to install objects at once by entering coordinates to place objects in a two-dimensional array.</td></tr><tr><td>putObjectWithKey</td><td>Function to place an object with a key value on the specified coordinates</td></tr><tr><td>playObjectAnimation</td><td>Function to execute an object’s sprite animation on the specified coordinates</td></tr><tr><td>playObjectAnimationWithKey</td><td>Function to execute an object's sprite animation whose key value matches</td></tr><tr><td>moveObject</td><td>Function to move an object from one x and y axis coordinates to another x and y axis coordinates during an X amount of time</td></tr><tr><td>moveObjectWithKey</td><td>Function to move an object with a key value to the specified coordinates</td></tr><tr><td>clearAllObjects</td><td>Function to remove all objects created using ZEP script</td></tr><tr><td>getTile</td><td>Function to return the enum value of the tile at the x and y coordinates of the corresponding layer</td></tr><tr><td>hasLocation</td><td>Function to check if the corresponding location exists in the map and return true or false</td></tr><tr><td>getObjectsByType</td><td>Function to return the objects that correspond to Type</td></tr><tr><td>getTopObjectsByType</td><td>Function to return the top objects that correspond to Type</td></tr><tr><td>sayObjectWithKey</td><td>Function to display a word balloon above an object with a key value</td></tr></tbody></table>

## 📚 API Explanation and Example

<mark style="background-color:yellow;">**Methods at a Glance**</mark>

```jsx
// Applies tile effect to the specified coordinates 
Map.putTileEffect(x: number, y: number, tileID: TileEffectType)

// Places the object at the specified coordinates (Reference coordinates: Left-Top)
Map.putObject(x: number, y: number, dynamicResource: ScriptDynamicResource)

// Install objects at once by entering coordinates to place objects in a two-dimensional array
Map.putObjectMultiple(tileArray: array, type: PutObjectType, dynamicResource: ScriptDynamicResource, option: object);

// Places the object with a key value at the specified coordinates (Reference coordinates: Left-Top)
Map.putObjectWithKey(x: number, y: number, dynamicResource: ScriptDynamicResource, option: JsValue)

// Executes a sprite animation of the object at the specified coordinates 
// (must be preceded by putObject)
Map.playObjectAnimation(x: number, y: number, name: string, loop: number)

// Executes an object's sprite animation whose key value matches
Map.playObjectAnimationWithKey(key: string,) animName: string, repeatCount: number)

// Removes all objects created by the ZEP script 
Map.clearAllObjects()

// Moves the object from the corresponding coordinates to the target coordinates for time 
// (in seconds)
Map.moveObject(x: number, y: number, targetX: number, targetY: number, time: number)

// Moves the object with a key value to the target coordinates
Map.moveObjectWithKey(key: string, targetX: number, targetY: number, path:boolean = true)

// Returns the type value of the tile at the x and y coordinates of the corresponding layer
Map.getTile(layer: number, x: number, y: number)

// Checks if the corresponding location exists in the map and returns true or false
Map.hasLocation(locationName: string)

// Returns the objects that correspond to Type
Map.getObjectsByType(type: number)

// Returns the top objects that correspond to Type
Map.getTopObjectsByType(type: number)

// Displays a word balloon above an object with a key value
Map.sayObjectWithKey( key: string, message: string )
```

### putTileEffect

{% hint style="info" %}
&#x20;Map.putTileEffect(x: number, y: number, tileID: TileEffectType)
{% endhint %}

This function applies a tile effect to the specified coordinates.

**Parameters**

More information on TileEffectType can be found on the [<mark style="color:purple;">Tile Effect Type Detailed Explanation</mark> ](/zep-script/zep-script-guide/appendix/tileeffecttype-detailed-explanation)page.

<table><thead><tr><th width="101.33333333333331">Name</th><th width="147">Type</th><th>Description</th></tr></thead><tbody><tr><td>x, y</td><td>Number</td><td>Object’s x and y coordinates</td></tr><tr><td>tileID</td><td>TileEffectType</td><td>• TileEffectType.NONE: no effect<br>•TileEffectType.IMPASSABLE: players cannot pass<br>• TileEffectType.SPAWN: players spawn here<br>• TileEffectType.PORTAL: move players to a different location<br>•TileEffectType.PRIVATE_AREA: designates a private discussion area<br>•TileEffectType.SPOTLIGHT: designates a spotlight area<br>• TileEffectType.EMBED: adds a web link<br>• TileEffectType.LOCATION: designated area for ZEP script<br>•TileEffectType.AMBIENT_SOUND: sets background sounds<br>•TileEffectType.TILE_EMBED: embeds something from the web<br>•TileEffectType.WEB_PORTAL: a web portal<br>•TileEffectType.SPACE_PORTAL: a portal to another Space</td></tr></tbody></table>

**Example**

Set up an **IMPASSABLE** tile effect.

```jsx
// Activates function when q is pressed 
// **[App.addOnKeyDown](https://www.notion.so/Callbacks-7ac5078bab7c4f3180ae05463713581d) Explanation [(Link)](https://www.notion.so/Callbacks-7ac5078bab7c4f3180ae05463713581d)**
App.addOnKeyDown(81, function (player) {
	// Sets an impassible tile effect on coordinates 5, 5 
	Map.putTileEffect(5, 5, TileEffectType.IMPASSABLE);
});
```

### putObject

{% hint style="info" %}
Map.putObject(x: number, y: number, dynamicResource: ScriptDynamicResource, option: JsValue)
{% endhint %}

This function places the object at the specified coordinates. (Reference coordinates: Left-Top) → What are [**Reference Coordinates?**](broken://spaces/u4PFrNZjiq0L6ogrcQ8C)

To better understand ScriptDynamicResource, please refer to the [<mark style="color:purple;">Understanding Sprite Sheets</mark> ](/zep-script/zep-script-guide/appendix/understanding-spaces-and-maps)page.

> You can delete the object installed from script by sending the null value to parameter.
>
> ```
> Map.putObject(x, y, null);
> ```

**Parameters**

<table><thead><tr><th width="183.33333333333331">Name</th><th width="215">Type</th><th>Description</th></tr></thead><tbody><tr><td>x, y</td><td>Number</td><td>x, y coordinates of where the tile effect will be applied</td></tr><tr><td>dynamicResource</td><td>ScriptDynamicResource</td><td>Variable name of the saved sprite.</td></tr><tr><td>loop</td><td>Number</td><td>Specify the number of times to repeat the animation</td></tr><tr><td>option</td><td>Object</td><td>Input { overlap: true } in the parameter field to recognize the object from <a href="/pages/ANYzOPmajWGs923GTU3b"><mark style="color:purple;"><strong>App EventListener</strong></mark> </a>such as <strong>onObjectTouched</strong> and <strong>onObjectAttacked</strong><mark style="color:purple;">.</mark></td></tr></tbody></table>

**Example**

Create the blueman object.

<div align="left"><figure><img src="/files/AShHrg6On5tNoByqrirb" alt=""><figcaption></figcaption></figure></div>

```jsx
// Creates an blueman.png and save the blueman variable
let blueman = App.loadSpritesheet("blueman.png");
// Activates function when q is pressed  
App.addOnKeyDown(81, function (player) {
	// Executes the blueman object on coordinates 5, 5 
	Map.putObject(5, 5, blueman, {overlap: true});
});
// Activates function when w is pressed
App.addOnKeyDown(81, function (player) {
	// Delets the object on corrdinates 5, 5
	Map.putObject(5, 5, null);
});
```

### putObjectMultiple

{% hint style="info" %}
Map.putObjectMultiple(tileArray: array, type: PutObjectType, dynamicResource: ScriptDynamicResource, option: object);
{% endhint %}

This function installs objects at once by entering coordinates to place objects in a two-dimensional array. This allows you to reduce the load when you install many objects at once.

**Parameters**

<table><thead><tr><th width="121.33333333333331">Name</th><th width="152">Type</th><th>Description</th></tr></thead><tbody><tr><td>tileArray</td><td>Array</td><td>Enter a two-dimensional array defining the coordinates where you want to place the objects. (Maximum length limited to 10)</td></tr><tr><td>type</td><td>PutObjectType</td><td><p><code>PutObjectType.STROKE</code></p><ul><li>Once a path is created by connecting the coordinates defined in the tileArray array in order, objects are placed in all coordinates along the created path.</li></ul></td></tr><tr><td>dynamicResource</td><td>ScriptDynamicResource</td><td>Image resources loaded using App.loadSpriteSheet</td></tr><tr><td>option</td><td>Object</td><td>In order for App EventListener to recognize an object, such as onObjectTouched and onObjectAttached, you should enter <code>{overlap:true}</code> in the parameter box.</td></tr></tbody></table>

**Example**

Place objects in a square or circle.

![](/files/Jp9LpmkAAFk5J0zaiq78)

![](/files/ScsxQoE0qa8DmQJ1ga5T)![](/files/QGrXwTWyJd0dBgYgWF7q)

```javascript
const _mark = App.loadSpritesheet("mark.png");

// Activates function when q is pressed - Place in a square
App.addOnKeyDown(81, function (player) {
	const tileArray = [
		[5, 5],
		[9, 5],
		[9, 9],
		[5, 9],
		[5, 5],
	];
	Map.putObjectMultiple(tileArray, PutObjectType.STROKE, _mark, { overlap: true });
});

// Activates function when w is pressed - Place in a circle
App.addOnKeyDown(87, function (player) {
	const tileArray = [
		[10, 5],
		[8, 7],
		[8, 10],
		[10, 12],
		[13, 12],
		[15, 10],
		[15, 7],
		[13, 5],
		[10, 5],
	];
	Map.putObjectMultiple(tileArray, PutObjectType.STROKE, _mark, { overlap: true });
});
```

###

### putObjectWithKey

{% hint style="info" %}
Map.putObjectWithKey(x: number, y: number, dynamicResource: ScriptDynamicResource, option: JsValue)
{% endhint %}

This function places an object on the specified coordinates (Reference coordinates: Left-Top)

**Parameters**

<table><thead><tr><th width="183.33333333333331">Name</th><th width="215">Type</th><th>Description</th></tr></thead><tbody><tr><td>x, y</td><td>Number</td><td>x, y coordinates of where the object will be placed</td></tr><tr><td>dynamicResource</td><td>ScriptDynamicResource</td><td>Variable name of the saved sprite.</td></tr><tr><td>option</td><td>Object</td><td>Sets the attributes including key values, moveSpeed, overlap, useDirAnim etc.</td></tr></tbody></table>

**Example**

Create the blueman object with a key value.

![](/files/8OylzTNLVOH3v4o6nnfW)

```bash
let blueman = App.loadSpritesheet("blueman.png");
// Activates function when q is pressed
App.addOnKeyDown(81, function (player) {
	Map.putObjectWithKey(18, 6, blueman, {
		overlap: true,
		movespeed: 100, // move speed, default: 80
		key: "TestBlueMan", // key value
		useDirAnim: true // Option to play animation after recognizing the direction
	});
});
```

### getObjectWithKey

{% hint style="info" %}
Map.getObjectWithKey(key: String)
{% endhint %}

This function gets the information of the object with the corresponding key value.

**Parameter**

<table><thead><tr><th width="108.33333333333331">Name</th><th width="160">Type</th><th>Description</th></tr></thead><tbody><tr><td>key</td><td>String</td><td>The key value of the object to get information from</td></tr></tbody></table>

**Example**

Create an object with a key value and display the related data.

![](/files/DBg38a0Ks2yep215mhXt)

```bash
let blueman = App.loadSpritesheet("blueman.png");
App.onStart.Add(function() {
	Map.putObjectWithKey(18, 6, blueman, {
		overlap: true,
		movespeed: 80,
		key: "TestBlueMan", // Key value
	});
});
// Activates function when q is pressed
App.addOnKeyDown(81, function (player) {
	let object_blueman = Map.getObjectWithKey("TestBlueMan");
	for(let data in object_blueman){
		App.sayToAll(`${data}: ${object_bluemane[data]}`)
	}
})
```

### playObjectAnimation

{% hint style="info" %}
Map.playObjectAnimation(x: number, y: number, name: string)
{% endhint %}

This function activates the object animation at the corresponding coordinates.

The above function must be preceded by the Map.putObject function.

Check the [Understanding Sprite Sheets](https://app.gitbook.com/o/-MkvEtFn2kFBYSN4_5rX/s/-MkvEvcz_LX5eDyvl13E/~/changes/w3N0YzSI1GwzatxlXlfM/zep-script-guide-v2/appendix/understanding-spaces-and-maps) page if it’s your first time hearing about sprite sheets.

**Parameters**

<table><thead><tr><th width="114.33333333333331">Name</th><th width="101">Type</th><th>Description</th></tr></thead><tbody><tr><td>x, y</td><td>Number</td><td>x, y coordinates of where the tile effect will be applied</td></tr><tr><td>name</td><td>String</td><td><code>let variable = App.loadSpritesheet(...)</code><br>The saved variable name of the sprite must be inputted as below:<br>→ ‘#’ + variable.id</td></tr></tbody></table>

**Example**

Set up a dancing blueman object.

<div align="left"><figure><img src="/files/yUySk4jJ9d7BulSPOMVb" alt=""><figcaption></figcaption></figure> <figure><img src="/files/2aWVd5vonPnzIAG7I8ME" alt=""><figcaption></figcaption></figure></div>

```jsx
// One frame's size 48x64
let blueman_dance = App.loadSpritesheet(
	"blueman.png",
	48,
	64,
	[20, 21, 22, 23, 24, 25, 26, 27, 28, 29, 30, 31, 32, 33, 34, 35, 36, 37], // Animation comprised of 21st ~ 38th image
	8
);
// Activates function when q is pressed 
App.addOnKeyDown(81, function (player) {
	Map.putObject(5, 5, blueman_dance, { overlap: true });
	Map.playObjectAnimation(5, 5, "#" + blueman_dance.id, -1);
});
```

### playObjectAnimationWithKey

{% hint style="info" %}
Map.playObjectAnimation(key: string, animName: string, repeatCount: number)
{% endhint %}

This function executes the object's sprite animation whose key value matches.

The <mark style="color:purple;">`Map.putObjectWithKey`</mark> function must preceed this function.

If you are not familiar with sprite images, please refer to the [Understanding Sprite Sheets ](/zep-script/zep-script-guide/appendix/understanding-sprite-sheets)page!

**Parameters**

<table><thead><tr><th width="153.33333333333326">Name</th><th width="137">Type</th><th>Description</th></tr></thead><tbody><tr><td>key</td><td>String</td><td>The key value of the object</td></tr><tr><td>animName</td><td>String</td><td>The name of the animation to play</td></tr><tr><td>repeatCount</td><td>Number</td><td>Specify the number of times to repeat the animation ("-1" means infinite.)</td></tr></tbody></table>

**Example**

Set up a dancing blueman object.

<div align="left"><figure><img src="/files/yUySk4jJ9d7BulSPOMVb" alt=""><figcaption><p>blueman_sprite</p></figcaption></figure></div>

```jsx
var blueman_sprite = App.loadSpritesheet(
	"blueman.png",
	48,
	64,
	{
		left: [5, 6, 7, 8, 9],
		up: [15, 16, 17, 18, 19],
		down: [0, 1, 2, 3, 4],
		right: [10, 11, 12, 13, 14],
		dance: [20, 21, 22, 23, 24, 25, 26, 27, 28, 29, 30, 31, 32, 33, 34, 35, 36, 37],
		idle: [0],
	},
	8
);

// Activates function when q is pressed 
App.addOnKeyDown(81, function (player) {
	Map.putObjectWithKey(10, 10, blueman_sprite, {
		overlap: true,
		movespeed: 80, // default: 80
		key: "blueman",
	});
	// play the "dance" animation
	Map.playObjectAnimationWithKey("blueman", "dance", -1);
});
```

### moveObject

{% hint style="info" %}
Map.moveObject(x: number, y: number, targetX: number, targetY: number, time: number)
{% endhint %}

This function moves the object from the object’s x and y coordinates to the target x and y coordinates for a certain amount of time (secs).

The above function must be preceded by the **Map.putObject** function.

Check the[ Understanding Sprite Sheets](https://app.gitbook.com/o/-MkvEtFn2kFBYSN4_5rX/s/-MkvEvcz_LX5eDyvl13E/~/changes/w3N0YzSI1GwzatxlXlfM/zep-script-guide-v2/appendix/understanding-spaces-and-maps) page if it’s your first time hearing about sprite sheets.

**Parameters**

<table><thead><tr><th width="175.33333333333331">Name</th><th width="128">Type</th><th>Description</th></tr></thead><tbody><tr><td>x, y</td><td>Number</td><td>Object’s x and y coordinates</td></tr><tr><td>targetX, targetY</td><td>Number</td><td>Target location’s x and y coordinates</td></tr><tr><td>time</td><td>Number</td><td>Time(seconds) to reach the target location.</td></tr></tbody></table>

**Example**

Move the blueman object.

<div align="left"><figure><img src="/files/MBq8b1sBqrCZ5AbTt0Of" alt=""><figcaption></figcaption></figure> <figure><img src="/files/F57K5QOmgKkjLEFrvg5v" alt=""><figcaption></figcaption></figure></div>

```jsx
// One frame's size 48x64
let blueman_move_right = App.loadSpritesheet(
	"blueman.png",
	48,
	64,
	[10, 11, 12, 13, 14], // Animation comprised of the 11th ~ 15th images
	8
);
// Activates function when q is pressed  
// **[App.addOnKeyDown](https://www.notion.so/Callbacks-7ac5078bab7c4f3180ae05463713581d) Explanation [(Link)](https://www.notion.so/Callbacks-7ac5078bab7c4f3180ae05463713581d)**
App.addOnKeyDown(81, function (player) {
	Map.putObject(5, 5, blueman_right, { overlap: true });
	Map.playObjectAnimation(5, 5, "#" + blueman_right, -1);
	Map.moveObject(5, 5, 10, 5, 3) // At (5,5) move to (10,5) in 3 seconds
});
```

### moveObjectWithKey

{% hint style="info" %}
Map.moveObjectWithKey(key: string, targetX: number, targetY: number, path:boolean = true)
{% endhint %}

This function moves an object with a key value to the specified coordinates.

💡 When "path" is "true", the object doesn't move when the target location is an impassable tile or unreachable.

**Parameters**

<table><thead><tr><th width="171.33333333333331">Name</th><th width="134">Type</th><th>Description</th></tr></thead><tbody><tr><td>key</td><td>String</td><td>Object's key value</td></tr><tr><td>targetX, targetY</td><td>Number</td><td>Target location’s x and y coordinates</td></tr><tr><td>path</td><td>Boolean</td><td>true: cannot pass an impassable tile<br>false: can pass an impassable tile</td></tr></tbody></table>

**Example**

How `moveObjectWithKey` works

![](/files/0pB7yFtfS1sCDFdXNtKm)

```jsx
let blueman = App.loadSpritesheet('blueman.png', 48, 64, {
    left: [5, 6, 7, 8, 9], // Image that moves to the left
    up: [15, 16, 17, 18, 19],
    down: [0, 1, 2, 3, 4],
    right: [10, 11, 12, 13, 14],
    dance: [20,21,22,23,24,25,26,27,28,29,30,31,32,33,34,35,36,37],
    down_jump: [38],
    left_jump: [39],
    right_jump: [40],
    up_jump: [41],
}, 10);
// Activates function when q is pressed
App.addOnKeyDown(81, function (player) {
	Map.putObjectWithKey(18, 6, blueman, {
		overlap: true,
		movespeed: 50, // default: 80
		key: "TestBlueMan",
		useDirAnim: true // Option to play animation after recognizing the direction
	});
	Map.moveObjectWithKey("TestBlueMan", 10, 10, true);
});
```

### clearAllObjects()

{% hint style="info" %}
Map.clearAllObjects()
{% endhint %}

This function removes all objects created by the ZEP script.

**Parameter**

* None

**Example**

Remove all created objects.

<div align="left"><figure><img src="/files/IwaGkHy7t9jE1ER3p8kr" alt=""><figcaption></figcaption></figure></div>

```jsx
let blueman = App.loadSpritesheet("blueman.png");

// Activates function when q is pressed 
// **[App.addOnKeyDown](https://www.notion.so/Callbacks-7ac5078bab7c4f3180ae05463713581d) Explanation [(Link)](https://www.notion.so/Callbacks-7ac5078bab7c4f3180ae05463713581d)**
App.addOnKeyDown(81, function (player) {
	// Creates 5 blueman objects starting from coordinates 5, 5 
	Map.putObject(5, 5, blueman, {overlap: true});
	Map.putObject(6, 5, blueman, {overlap: true});
	Map.putObject(7, 5, blueman, {overlap: true});
	Map.putObject(8, 5, blueman, {overlap: true});
	Map.putObject(9, 5, blueman, {overlap: true});
});

// Activates function when w is pressed 
App.addOnKeyDown(87, function (player) {
	// Removes all objects created using script
	Map.clearAllObjects();
});
```

***

### getTile

{% hint style="info" %}
Map.getTile(layer: number, x: number, y: number)
{% endhint %}

Return the type value of the tile at the x and y coordinates of the corresponding layer. If no tile, returns "-1."

**Parameters**

<table><thead><tr><th width="134">Name</th><th width="123.33333333333331">Type</th><th>Description</th></tr></thead><tbody><tr><td>layer</td><td>Number</td><td>Values corresponding to the layer<br>0 = Floor (floor tile),<br>1 = WALL (wall tile),<br>2 = TileEffect (tile effects),<br>3 = Object (objects),<br>5 = TopObject (top objects),</td></tr><tr><td>x, y</td><td>Number</td><td>X and Y coordinates</td></tr></tbody></table>

**Example**

Check the types of all objects in the map.

```jsx
const LayerType = {
	FLOOR: 0,
	WALL: 1,
	TILE_EFFECTS: 2,
	OBJECTS: 3,
	TOP_OBJECTS: 5,
};
// Activates function when q is pressed 
App.addOnKeyDown(81, function (player) {
	let layer = LayerType.OBJECTS;
	for (let x = 0; x < Map.width; x++) {
		for (let y = 0; y < Map.height; y++) {
			let data = Map.getTile(layer, x, y);
			if (data >= 0) {
				App.sayToAll(`(${x},${y})  type: ${data}`);
			}
		}
	}
});
```

### hasLocation

{% hint style="info" %}
Map.hasLocation(locationName: String)
{% endhint %}

This function checks if the corresponding location exists in the map and returns true or false accordingly.

**Parameter**

| Name         | Type   | Description          |
| ------------ | ------ | -------------------- |
| locationName | String | Name of the location |

**Example**

Create a function that checks if the location is installed.

```jsx
// Activates function when q is pressed
App.addOnKeyDown(81, function (player) {
	if(Map.hasLocation("test")){
		App.sayToAll("Test location is installed.")
	} else {
		App.sayToAll("Test location is not installed.")
	}
});
```

***

### getObjectsByType

{% hint style="info" %}
Map.getObjectsByType(type: numer) : array
{% endhint %}

This function returns the objects that correspond to Type.

**Parameter**

| Name | Type   | Description              |
| ---- | ------ | ------------------------ |
| type | Number | Type value of the object |

**Example**

Check all type of objects.

```
const ObjectType = {
    NONE : 0,
    SHOW_NOTE : 1,
    SHOW_IMAGE : 2,
    PASSWORD_DOOR : 3,
    LINK_WEBSITE : 4,
    EMBED_WEBSITE : 5,
    API_CALL : 6,
    REPLACE_IMAGE : 7,
    NFT_GIVEAWAY : 8,
    NFT_DOOR : 9,
    POST_MESSAGE : 10,
    SHOW_CHAT_BALLOON : 11,
    FT_DOOR : 12,
    POST_MESSAGE_TO_APP : 13,
    DONATION_DOOR : 14,
    IMPASSABLE : 15,
    INTERACTION_WITH_ZEPSCRIPTS : 16,
    TOKEN_DONATION_DOOR : 17,
    CHANGE_OBJECT : 18,
    ANIMATION : 19,
}
// Activates function when q is pressed
App.addOnKeyDown(81,function(player){
    for(let key in ObjectType){
        let type = ObjectType[key];
        let arr = Map.getObjectsByType(type);
        let index = 0;
        for(let obj of arr){
            for(let key in obj){
                App.sayToAll(`${key}: ${obj[key]}`);        
            }
        }
    }
})
```

![](/files/rPIIzV4hPoyKQ1DtSLIP)

***

### getTopObjectsByType

{% hint style="info" %}
Map.getTopObjectsByType(type: numer) : array
{% endhint %}

This function returns the top objects that correspond to each type.

**Parameter**

| Name | Type   | Description              |
| ---- | ------ | ------------------------ |
| type | Number | Type value of the object |

**Example**

Check all types of top objects.

```jsx
const ObjectType = {
    NONE : 0,
    SHOW_NOTE : 1,
    SHOW_IMAGE : 2,
    PASSWORD_DOOR : 3,
    LINK_WEBSITE : 4,
    EMBED_WEBSITE : 5,
    API_CALL : 6,
    REPLACE_IMAGE : 7,
    NFT_GIVEAWAY : 8,
    NFT_DOOR : 9,
    POST_MESSAGE : 10,
    SHOW_CHAT_BALLOON : 11,
    FT_DOOR : 12,
    POST_MESSAGE_TO_APP : 13,
    DONATION_DOOR : 14,
    IMPASSABLE : 15,
    INTERACTION_WITH_ZEPSCRIPTS : 16,
    TOKEN_DONATION_DOOR : 17,
    CHANGE_OBJECT : 18,
    ANIMATION : 19,
}
// Activates function when q is pressed
App.addOnKeyDown(81,function(player){
    for(let key in ObjectType){
        let type = ObjectType[key];
        let arr = Map.getTopObjectsByType(type);
        let index = 0;
        for(let obj of arr){
            for(let key in obj){
                App.sayToAll(`${key}: ${obj[key]}`);        
            }
        }
    }
})
```

***

### sayObjectWithKey

{% hint style="info" %}
Map.sayObjectWithKey( key: string, message: string )
{% endhint %}

This function displays a word balloon above an object with a key value.

**Parameters**

<table><thead><tr><th width="160">Name</th><th width="115.33333333333331">Type</th><th>Description</th></tr></thead><tbody><tr><td>key</td><td>String</td><td>The key value of the object</td></tr><tr><td>message</td><td>String</td><td>Message to display in a word balloon</td></tr></tbody></table>

**Example**

Display a word balloon above an object with a key value.

![](/files/oSHGdmvjHYhhH8v1t8PD)

{% file src="/files/0jvNGI6SFS2fnb1MSz6h" %}

```javascript
const objectKey = "TestBlueMan";
// Activates function when q is pressed
App.addOnKeyDown(81, function (player) {
	Map.putObjectWithKey(18, 6, blueman, {
		npcProperty: { name: "BlueMan", hpColor: 0x03ff03, hp: 100, hpMax: 100 },
		overlap: true,
		movespeed: 100, 
		key: objectKey, 
		useDirAnim: true
	});
});

// Activates function when w is pressed
App.addOnKeyDown(87, function(player){
    Map.sayObjectWithKey(objectKey, `I'm BlueMan!`)
})
```

### Appendix

[Understanding Sprite Sheets](/zep-script/zep-script-guide/appendix/understanding-sprite-sheets)

[TileEffectType Detailed Explanation](/zep-script/zep-script-guide/appendix/tileeffecttype-detailed-explanation)

[What are Reference Coordinates?](/zep-script/zep-script-guide/appendix/what-are-reference-coordinates)


# ScriptPlayer

**ScriptApp** class consists of the two categories provided below.

### [<mark style="color:purple;">Field</mark>](/zep-script/zep-script-api/scriptplayer/field)

> This category contains the attribute values pertaining to players.
>
> It contains various useful functions to view map player’s names and location, change the avatar’s appearance, movement speed, etc.

### [<mark style="color:purple;">Methods</mark>](/zep-script/zep-script-api/scriptplayer/methods)

> This category contains convenient functions that can execute a sound, display a UI element to players who enter the map, move players to specific locations, etc.


# Field

### Introduction

These are the attribute values pertaining to players.

The player’s nickname ([<mark style="color:purple;">name</mark>](#id-name)), location ([<mark style="color:purple;">tileX / tileY</mark>](#tilex-tiley)), etc. can be viewed. The player’s spotlight ([<mark style="color:purple;">spotlight</mark>](#spotlight)) feature and hide ([<mark style="color:purple;">hidden</mark>](#hidden)) feature can be activated. The player’s movement speed ([<mark style="color:purple;">moveSpeed</mark>](#movespeed)) and image ([<mark style="color:purple;">sprite</mark>](#sprite)) can be adjusted. It’s also possible to utilize the Space's storage ([<mark style="color:purple;">storage</mark>](#storage)) for storing player values.

🔒 Fields with this icon are read-only fields that cannot be revised.

<table><thead><tr><th width="196">Name</th><th>Description</th></tr></thead><tbody><tr><td>🔒 id</td><td>Player ID value</td></tr><tr><td>name</td><td>Player Nickname value</td></tr><tr><td>title</td><td>Text to be displayed in yellow above an avatar’s nickname</td></tr><tr><td>🔒 role</td><td>A numerical value that represents a player’s permissions</td></tr><tr><td>🔒 tileX / tileY</td><td>The X and Y coordinate values where the avatar is standing</td></tr><tr><td>🔒 dir</td><td>A value representing the direction a player is looking</td></tr><tr><td>moveSpeed</td><td>A value representing the player’s movement speed</td></tr><tr><td>sprite</td><td>An avatar’s sprite image value</td></tr><tr><td>tag</td><td>Value storage space to assign required attribute values</td></tr><tr><td>hidden</td><td>If the value is set to true, the player is invisible</td></tr><tr><td>spotlight</td><td>Toggle player spotlight</td></tr><tr><td>🔒 disableVideo</td><td>Toggle player video</td></tr><tr><td>🔒 disableAudio</td><td>Toggle player audio</td></tr><tr><td>attackType</td><td>Player’s attack type when z is pressed</td></tr><tr><td>attackSprite</td><td>Player’s attack image value when z is pressed</td></tr><tr><td>attackParam1</td><td>Distance value that affects how far the attack image flies</td></tr><tr><td>attackParam2</td><td>Distance value available for attack<br>Only valid when <code>attackType</code> is set to 2 (ranged attack)</td></tr><tr><td>🔒 walletAddress</td><td>The player’s wallet address value</td></tr><tr><td>storage</td><td>Storage space for player values in the Space (limited to the Space)</td></tr><tr><td>🔒 isMobile</td><td>Whether the player is connected via mobile</td></tr><tr><td>🔒 isMoving</td><td>If the player is moving, returns True. If not, returns False</td></tr><tr><td>🔒 isJumping</td><td>If the player is jumping, returns True. If not, returns False</td></tr><tr><td>customData</td><td>Can read the URL query string and save the value</td></tr><tr><td>displayRatio</td><td>Zoom in or out player's display</td></tr><tr><td>titleColor</td><td>Player's title color</td></tr><tr><td>🔒 emailHash</td><td>The hash value of the player's email</td></tr><tr><td>🔒 isGuest</td><td>If the player is not signed in, returns True.</td></tr></tbody></table>

## 📚 API Description and Examples

### id , name

{% hint style="info" %}
player.id: Number \
player.name: String
{% endhint %}

Calls the player ID and nickname values.

**Example**

Make the player’s ID and nickname value display when a player enters.

```jsx
// Activates function when a player enters
App.onJoinPlayer.Add(function(player){
  App.sayToAll(`id: ${player.id} name: ${player.name}`);
})
```

### title

{% hint style="info" %}
player.title: String
{% endhint %}

Title is a yellow text that displays above the avatar’s nickname.

**Example**

Set up a title for a player when they enter.

```jsx
// Activates function when a player enters 
App.onJoinPlayer.Add(function(player){
	player.title = "title";
	player.sendUpdated();
})
```

### role

{% hint style="info" %}
player.role: Number
{% endhint %}

Role is the player’s permission roles’ number value.

The following values will be displayed depending on the player’s role.

<table><thead><tr><th width="146">Role</th><th width="137">Number</th><th width="154">Role</th><th width="168">Number</th></tr></thead><tbody><tr><td>Guest</td><td>-1</td><td>Staff</td><td>2000</td></tr><tr><td>Member</td><td>0</td><td>Admin</td><td>3000</td></tr><tr><td>Editor</td><td>1000</td><td>Owner</td><td>3001</td></tr></tbody></table>

**Example**

Display the permission role value in the chat screen.

```jsx
// Activates function when q is pressed 
// **[App.addOnKeyDown Description (Link)](https://www.notion.so/Callbacks-7ac5078bab7c4f3180ae05463713581d)**
App.addOnKeyDown(81,function(player){
	App.sayToAll(`${player.name}'s permissions: ${player.role}`)
})
```

### tileX, tileY

{% hint style="info" %}
player.tileX: Number \
player.tileY: Number
{% endhint %}

The x axis value and y axis value of where the player’s avatar is standing.

**Example**

Display my avatar’s x and y coordinates.

```jsx
// Activates function when q is pressed 
// **[App.addOnKeyDown Description (Link)](https://www.notion.so/Callbacks-7ac5078bab7c4f3180ae05463713581d)**
App.addOnKeyDown(81,function(player){
	App.sayToAll(`Current Coordinates: (${player.tileX}, ${player.tileY})`)
})
```

### dir

{% hint style="info" %}
player.dir: Number
{% endhint %}

The direction the player’s avatar is looking.

The following values are displayed depending on the direction the avatar is looking.

![](/files/EDxBDkN9XIDv4Uz3Hk2R)

| Direction | Number | Direction    | Number |
| --------- | ------ | ------------ | ------ |
| Left      | 1      | Top-Left     | 5      |
| Up        | 2      | Bottom-Left  | 6      |
| Right     | 3      | Top-Right    | 7      |
| Down      | 4      | Bottom-Right | 8      |

**Example**

Display the value of where the avatar is looking.

```jsx
// Activates function when q is pressed 
// App.addOnKeyDown Description
App.addOnKeyDown(81,function(player){
	App.sayToAll(`Direction the avatar is looking: ${player.dir}`)
})
```

### moveSpeed

{% hint style="info" %}
player.moveSpeed: Number
{% endhint %}

This is the player’s movement speed value. (Default Value: 80)

If the movement speed value is 0, the player cannot move.

**Example**

Increase the movement speed when q is pressed.

```jsx
// Activates function when q is pressed 
// App.addOnKeyDown Description 
App.addOnKeyDown(81,function(player){
	player.moveSpeed = 150;
	player.sendUpdated();
})
```

### sprite

{% hint style="info" %}
player.sprite: ScriptDynamicResource
{% endhint %}

A sprite image of the player’s avatar. (Resets to the default avatar image when inputting **null**)

Check the [<mark style="color:purple;">Understanding Sprite Sheets</mark>](/zep-script/zep-script-guide/appendix/understanding-sprite-sheets) page if it’s your first time hearing about sprite images.

**Example**

Apply the Paintman-Blueman image as the avatar image.

{% file src="/files/r42zZVmOUI3NDpENOt24" %}

<div align="left"><figure><img src="/files/etUxqznxedHQixvV7U9G" alt=""><figcaption></figcaption></figure></div>

```jsx
// One frame's size 48x64
let blueman = App.loadSpritesheet('blueman.png', 48, 64, {
    left: [5, 6, 7, 8, 9], // left direction facing image
    up: [15, 16, 17, 18, 19],
    down: [0, 1, 2, 3, 4],
    right: [10, 11, 12, 13, 14],
		dance: [20,21,22,23,24,25,26,27,28,29,30,31,32,33,34,35,36,37],
		down_jump: [38],
		left_jump: [39],
		right_jump: [40],
		up_jump: [41],
}, 8);
// Changes avatar's image when player enters
App.onJoinPlayer.Add(function(player){
	player.sprite = blueman;
	player.sendUpdated();
});
```

### tag

{% hint style="info" %}
player.tag: Any
{% endhint %}

Give necessary attribute values to a player by using tag.

**Example**

Give a player the ‘alive’ attribute value. The ‘alive’ attribute value is a deliberately created attribute.

If the attribute is unused, it won’t be a useful attribute value. In this case, the "alive" attribute value can check if a player has been eliminated from a game or not.&#x20;

```jsx
// Activates function when a player enters 
App.onJoinPlayer.Add(function (player) {
	player.tag = {
		alive: true,
	};
	player.sendUpdated();

	App.sayToAll(`alive: ${player.tag.alive}`);
});
```

### hidden

{% hint style="info" %}
player.hidden: Boolean
{% endhint %}

If the hidden attribute value is true, the corresponding player is not visible to other players.

{% hint style="danger" %}
The avatar in a hidden state is not visible, but it is possible to connect the video and audio.
{% endhint %}

**Example**

Give an avatar the hidden attribute to make the avatar not visible to other players.

```jsx
// Activates function when q is pressed 
// App.addOnKeyDown Description
App.addOnKeyDown(81,function(player){
	player.hidden = true;
	player.sendUpdated();
});
```

### spotlight

{% hint style="info" %}
player.spotlight: Boolean
{% endhint %}

This activates or deactivates the player’s spotlight feature.

**Example**

Make a function that turns the spotlight feature ON or OFF by pressing q.

```jsx
// Activates function when q is pressed
// App.addOnKeyDown Description
App.addOnKeyDown(81,function(player){
	if(player.spotlight){
		player.spotlight = false;
	}
	else{
		player.spotlight = true;
	}
	player.sendUpdated();
});
```

### disableVideo, disableAudio

{% hint style="info" %}
player.disableVideo: Boolean \
player.disableAudio: Boolean
{% endhint %}

This activates or deactivates the player’s video/audio features.

**Example**

Display in the chat screen if the video and/or audio are deactivated or not.

```jsx
// Activates function when q is pressed 
// App.addOnKeyDown Description 
App.addOnKeyDown(81, function (player) {
	App.sayToAll(`video activation or deactivation: ${player.disableVideo}`);
	App.sayToAll(`audio activation or deactivation: ${player.disableAudio}`);
});
```

### attackType

{% hint style="info" %}
player.attackType: Number
{% endhint %}

This is a player’s attack type performed by pressing z. (default value: 0)

<table><thead><tr><th width="134">attackType</th><th>Description</th></tr></thead><tbody><tr><td>0</td><td>If the attackType is not set up, it means it is set to the default attack type.</td></tr></tbody></table>

**Example**

Change the avatar’s attackType.

```jsx
// Activates function when q is pressed 
// App.addOnKeyDown Description
App.addOnKeyDown(81, function (player) {
	player.attackType = 0;
	App.sayToAll(`attackType: ${player.attackType}`);
	player.sendUpdated();
});
```

### attackParam1

{% hint style="info" %}
&#x20;player.attackParam1: Number
{% endhint %}

This is an attribute for the attack image’s distance range shown when pressing z. The attack’s possible distance range does not increase.

**Example**

Change the attackParam1.

<div align="left"><figure><img src="/files/1qtnk53bCtQcKDA7NfM0" alt=""><figcaption></figcaption></figure></div>

```jsx
// Activates function when q is pressed 
// App.addOnKeyDown Description
App.addOnKeyDown(81, function (player) {
	App.sayToAll(`attackType: ${player.attackType}`);
	App.sayToAll(`attackParam1: ${player.attackParam1}`);
	player.attackType = 0;
	player.attackParam1 = 10;
	player.sendUpdated();
});
```

### attackParam2

{% hint style="info" %}
player.attackParam2: Number
{% endhint %}

This is an attribute for distance available for attack. This is only valid when attackType is set to a ranged attack.

**Example**

Set a ranged attack using attackParam2.

![](/files/lrbwejclzv81JkOPuBpI)

```jsx
// Activates function when q is pressed
// App.addOnKeyDown
App.addOnKeyDown(81, function (player) {
	player.attackType = 2;
	player.attackParam2 = 5;
	App.sayToAll(`attackType: ${player.attackType}`);
	App.sayToAll(`attackParam2: ${player.attackParam2}`);
	player.sendUpdated();
});
```

### attackSprite

{% hint style="info" %}
&#x20;player.attackSprite: ScriptDynamicResource
{% endhint %}

This is an attribute for the attack image shown when pressing z.

**Example**

Apply the boxing game’s glove attack image.

<div align="left"><figure><img src="/files/ycFk2gF6uIr7Zknc2EC7" alt=""><figcaption></figcaption></figure></div>

<div align="left"><figure><img src="/files/ZxWDpgWQp2zyyKTNgxft" alt=""><figcaption></figcaption></figure></div>

```jsx
let redBoxing = App.loadSpritesheet("redBoxing.png");
// Activates function when q is pressed 
// App.addOnKeyDown Description
App.addOnKeyDown(81, function (player) {
	player.attackSprite = redBoxing;
	player.sendUpdated();
});
```

### walletAddress

{% hint style="info" %}
player.walletAddress: String
{% endhint %}

This is the player’s wallet address.

**Example**

Call the wallet address. If there is no wallet address, the results called will be **null**.

```jsx
// Activates function when q is pressed 
// **[App.addOnKeyDown Description (Link)](https://www.notion.so/Callbacks-7ac5078bab7c4f3180ae05463713581d)**
App.addOnKeyDown(81, function (player) {
	App.sayToAll(`${player.walletAddress}`)
});
```

### storage

{% hint style="info" %}
player.storage: String
{% endhint %}

This is the storage space for the player value within the space. (Limited to the Space)

**Example**

Store the data in player storage and check it.

{% hint style="success" %}
&#x20;Even after closing the app and restarting it, the stored values will not disappear.
{% endhint %}

```jsx
// Activates function when q is pressed 
// App.addOnKeyDown Description
App.addOnKeyDown(81,function(player){
	player.storage = "data";
	player.save(); // Applies the changed storage value to player.save() when storage values are changed
})

// Activates function when w is pressed 
App.addOnKeyDown(87,function(player){
	App.sayToAll(player.storage); // Displays the value saved in player storage on the chat screen
})
```

### isMobile

{% hint style="info" %}
&#x20;player.isMobile : Boolean
{% endhint %}

This displays whether the player is connected via mobile in true or false.

**Example**

Display mobile  PC status in the entry message when a player enters.

```jsx
// Activates function when a player enters
App.onJoinPlayer.Add(function(player){	
	if(player.isMobile){
		App.sayToAll(`${player.name} entered from mobile.`)	
	} else{
		App.sayToAll(`${player.name} entered from PC.`)
	}
});
```

####

### isMoving

{% hint style="info" %}
player.isMoving : Boolean
{% endhint %}

If the player is moving, this function returns True. If not, this returns False.

**Example**

Detect the player's movement and display a message.

```jsx
App.onUpdate.Add(function (dt) {
	let _players = App.players;
	for (let i in _players) {
		let p = _players[i];
		if (p.isMoving) {
			App.sayToAll(`${p.name} is moving...`);
		}
	}
});
```

####

### isJumping

{% hint style="info" %}
player.isJumping : Boolean
{% endhint %}

If the player is jumping, this function returns True. If not, this returns False.

**Example**

Detect the player's movement and display a message.

```jsx
App.onUpdate.Add(function (dt) {
	let _players = App.players;
	for (let i in _players) {
		let p = _players[i];
		if (p.isJumping) {
			App.sayToAll(`[System] ${p.name} is jumping...`);
		}
	}
});
```

####

### customData

{% hint style="info" %}
&#x20;player.customData : String
{% endhint %}

This field saves the value received as a query string.

**Example**

[**How to Use URL Query Strings**](/zep-script/zep-script-guide/appendix/how-to-use-url-query-strings)

### displayRatio

{% hint style="info" %}
player.displayRatio
{% endhint %}

This function zooms the player's display in or out. (Default Value: 1)

**Example**

Create a key to zoom in or out.

```
// Activates function when Q is pressed
// Press once to zoom in and press again to zoom out
App.addOnKeyDown(81,function(player){
	if(player.displayRatio == 1){
		player.displayRatio = 5;
	}else{
		player.displayRatio = 1;
	}
	player.sendUpdated(); //* When the player's field value is updated, apply it as player.sendUpdated()
})
```

<div><figure><img src="/files/V47Y4IRrUaHau9uqmwf8" alt=""><figcaption><p>displayRatio = 1</p></figcaption></figure> <figure><img src="/files/l8o4W328hvsncfTA6T77" alt=""><figcaption><p>displayRatio = 5</p></figcaption></figure></div>

### titleColor

{% hint style="info" %}
player.titleColor
{% endhint %}

This function can read and change the player title's color.

You can enter enum values or hex code values.

```
Available Enum ColorType
{ WHITE, BLACK, RED, GREEN, BLUE, ORANGE, PURPLE, GRAY, YELLOW, MAGENTA, CYAN }
```

**Example**

Change the title color.

![](/files/YQibydKv3ZYDZgG83e19)

```
// Activates function when Q is pressed
App.addOnKeyDown(81, function (player) {
	player.title = "🔸Title🔸";
	// When enum values are entered
	player.titleColor = ColorType.CYAN;
	
	// When hex codes are entered (Delete "//" when using the following)
	// player.titleColor = 0x00FFFF;
	
	player.sendUpdated(); //*When the player's field value is updated, apply it as player.sendUpdated()
});
```

### emailHash

{% hint style="info" %}
player.emailHash
{% endhint %}

This function reads the hash value of the player's email.

**Example**

Display the hash value of a player.

```javascript
// Activates function when a player enters 
App.onJoinPlayer.Add(function(player){
  App.sayToAll(`name: ${player.name} emailHash: ${player.emailHash}`);
})
```

### isGuest

{% hint style="info" %}
player.isGuest
{% endhint %}

If the player is not signed in, this function returns True.

**Example**

Show "GUEST" as a title when a guest who is not signed in enters.

```jsx
// Activates function when a player enters 
App.onJoinPlayer.Add(function(player){
  if(player.isGuest){
    player.title = "GUEST";
    player.sendUpdated();
  }
})
```


# Methods

### Introduction

The following functions provide general features that occur within ZEP such as UI, user control, sound, etc.

Convenient features such as displaying UI on a player’s personal screen, moving players, playing sounds exclusively for a player, etc. are provided below.

### UI

<table><thead><tr><th width="214">Name</th><th>Description</th></tr></thead><tbody><tr><td>showCenterLabel</td><td>Function to display a text for 3 seconds at a specific location to a player</td></tr><tr><td>showCustomLabel</td><td>Function to display a text for 3 seconds at a specific location to a player<br>Text can be decorated by using <code>span</code> tags in the text part.</td></tr><tr><td>showWidget</td><td>Function to call a widget to a specific location to a player</td></tr><tr><td>showBuyAlert</td><td>Function to display a purchase widget to a player and execute a callback function that runs when a purchase is completed</td></tr><tr><td>hideBuyAlert</td><td>Function to hide a player's purchase widget</td></tr><tr><td>sendMessage</td><td>Function to send a private message to a player in the chat window</td></tr><tr><td>showPrompt</td><td>Function to display an input window and execute a callback function that runs according to a player's response.</td></tr><tr><td>showConfirm</td><td>Function to display an confirm window and execute a callback function that runs when a player clicks "OK".</td></tr><tr><td>showAlert</td><td>Function to display an alert window and execute a callback function that runs when a player clicks "OK".</td></tr><tr><td>showWidgetResponsive</td><td>Function to display the widget by defining the top/bottom/left/right margin in percentage to the screen size.</td></tr><tr><td>openWebLink</td><td>Function to open a web URL in a new tab or window to a player </td></tr><tr><td>showEmbed</td><td>Function to open a web URL as an embed.<br>Size and location are adjustable.</td></tr></tbody></table>

### Data Load

<table><thead><tr><th width="215">Name</th><th>Description</th></tr></thead><tbody><tr><td>isEmail</td><td>Function to compare the player’s email</td></tr><tr><td>getLocationName</td><td>Displays the name of the specific location of where the player is standing</td></tr></tbody></table>

### **User Control**

<table><thead><tr><th width="215">Name</th><th>Description</th></tr></thead><tbody><tr><td>spawnAt</td><td>Function to move the player’s avatar to a designated coordinate</td></tr><tr><td>spawnAtLocation</td><td>Function to move the player’s avatar to a designated location</td></tr><tr><td>spawnAtMap</td><td>Function to move a player to another Space or to another map</td></tr></tbody></table>

### Sound

<table><thead><tr><th width="221">Name</th><th>Description</th></tr></thead><tbody><tr><td>playSound</td><td>Function to play a sound file to a player</td></tr><tr><td>playSoundLink</td><td>Function to play the sound URL to a player</td></tr></tbody></table>

### **Common**

<table><thead><tr><th width="222">Name</th><th>Description</th></tr></thead><tbody><tr><td>sendUpdated</td><td>Function to apply the changed value whenever changes are made to any of the field values pertaining to Player</td></tr><tr><td>save</td><td>Function to apply the changed values to whenever changes are made to any Player storage values</td></tr></tbody></table>

## 📚 API Explanation and Example

### 🎨 **UI Methods**

<mark style="background-color:yellow;">**UI at a Glance**</mark>

<pre class="language-jsx"><code class="lang-jsx">// Displays a text for 3 seconds at a specific location to a player
player.showCenterLabel(text: string, color: uint = 0xFFFFFF, bgColor: uint = 0x000000, offset: int = 0, time: int = 3000)

// Displays a text for 3 seconds at a specific location to a player, customizable
player.showCustomLabel(text: string, color: number = 0xFFFFFF, bgColor: number = 0x000000, offset: number = 0, width = 100, opacity = 0.6, time: int = 3000);

// Calls the corresponding html file as a widget to a specific align location to a player 
player.showWidget(fileName: string, align: string, width: integer, height: integer): ScriptWidget

// Displays a purchase widget to a player and executes a callback function that runs when a purchase is completed
player.showBuyAlert(itemName: string, price: number, callback: function);

// Hides a player's purchase widget
player.hideBuyAlert();

<strong>// Sends a private message to a player in the chat window
</strong>player.sendMessage(message: string, color: number = 0xFFFFFF)

// Displays an input window and execute a callback function that runs according to a player's response
player.showPrompt(text: string, function(inputText))

// Displays an confirm window and execute a callback function that runs when a player clicks "OK"
player.showConfirm(text: string, function(result))

// Displays an alert window and execute a callback function that runs when a player clicks "OK"
player.showAlert(text: string, function())

// Displays the widget by defining the top/bottom/left/right margin in percentage to the screen size
player.showWidgetResponsive(fileName:string, marginTop:number, marginRight:number, marginBottom:number, marginLeft:number)

// Opens a web URL in a new tab or window to a player 
player.openWebLink(url:string, popup:boolean);

// Opens a web URL as an embed
player.showEmbed(url: string, align: string, width: number, height: number, hasBackdrop: boolean = true)
</code></pre>

### showCenterLabel

{% hint style="info" %}
player.showCenterLabel(text: string, color: uint = 0xFFFFFF, bgColor: uint = 0x000000, offset: int = 0, time: number = 3000)
{% endhint %}

This function displays text for 3 seconds at a designated location to the corresponding player.

**Parameters**

<table><thead><tr><th width="148.33333333333331">Name</th><th width="117">Type</th><th>Description</th></tr></thead><tbody><tr><td>text</td><td>String</td><td>Text to display on label</td></tr><tr><td>color</td><td>Unit</td><td>Color of text to be displayed (HexCode)<br>If left blank, it is set to white (0xFFFFFF).<br>➡️<a href="https://www.google.com/search?q=COLOR+PICKER&#x26;sxsrf=ALiCzsbc_6XvOn9SiJdEBkLmfLurJ4tvOA%3A1658153265956&#x26;ei=MWnVYrX3Ocv4wAOXk6-wBg&#x26;ved=0ahUKEwj105mjzoL5AhVLPHAKHZfJC2YQ4dUDCA4&#x26;uact=5&#x26;oq=COLOR+PICKER&#x26;gs_lcp=Cgdnd3Mtd2l6EAMyBAgjECcyBQgAEIAEMgUIABCABDIFCAAQgAQyBQgAEIAEMgUIABCABDIFCAAQgAQyBQgAEIAEMgUIABCABDIFCAAQgAQ6CwgAEIAEELEDEIMBOhEILhCABBCxAxCDARDHARDRAzoRCC4QgAQQsQMQgwEQxwEQrwE6CAgAEIAEELEDOhAIABCABBCHAhCxAxCDARAUOgoIABCABBCHAhAUSgQIQRgASgQIRhgAUABYhRVgvxZoAHABeACAAYwBiAHmC5IBBDAuMTKYAQCgAQHAAQE&#x26;sclient=gws-wiz"><mark style="color:purple;">Color Picker</mark></a></td></tr><tr><td>bgColor</td><td>Unit</td><td>Background color of the message to be displayed as the label<br>If left blank, it is set to black (0xFFFFFF).</td></tr><tr><td>offset</td><td>Integer</td><td>The higher the offset value, the location will be closer to the bottom.<br>If left blank, 0 is the designated value.</td></tr><tr><td>time</td><td>number</td><td>Label display time (ms), default 3000 ms (3 seconds)</td></tr></tbody></table>

**Example**

Display the label as yellow.

<div align="left"><figure><img src="/files/F1x0Udne7KUUXDlHLwgp" alt=""><figcaption></figcaption></figure></div>

```jsx
App.onJoinPlayer.Add(function(player){
	player.showCenterLabel(`${player.name} has entered.`, 0x000000, 0xFFFF00, 500, 2000); // Displays as black text with a yellow background
});
```

### showCustomLabel

{% hint style="info" %}
player.showCustomLabel(text: string, color: number = 0xFFFFFF, bgColor: number = 0x000000, offset: number = 0, width = 100, opacity = 0.6, time: number = 3000);
{% endhint %}

This function displays a text for 3 seconds at a specific location to all players.

You can decorate the text by adding `span` tags to the text.

**Parameters**

<table><thead><tr><th width="121.33333333333331">Name</th><th width="112">Type</th><th>Description</th></tr></thead><tbody><tr><td>text</td><td>String</td><td>Text to display on label (allows <code>span</code> tags)</td></tr><tr><td>color</td><td>Unit</td><td>Color of text to be displayed (HexCode)<br>If left blank, it is set to white (0xFFFFFF).<br>➡️<a href="https://www.google.com/search?q=COLOR+PICKER&#x26;sxsrf=ALiCzsbc_6XvOn9SiJdEBkLmfLurJ4tvOA%3A1658153265956&#x26;ei=MWnVYrX3Ocv4wAOXk6-wBg&#x26;ved=0ahUKEwj105mjzoL5AhVLPHAKHZfJC2YQ4dUDCA4&#x26;uact=5&#x26;oq=COLOR+PICKER&#x26;gs_lcp=Cgdnd3Mtd2l6EAMyBAgjECcyBQgAEIAEMgUIABCABDIFCAAQgAQyBQgAEIAEMgUIABCABDIFCAAQgAQyBQgAEIAEMgUIABCABDIFCAAQgAQ6CwgAEIAEELEDEIMBOhEILhCABBCxAxCDARDHARDRAzoRCC4QgAQQsQMQgwEQxwEQrwE6CAgAEIAEELEDOhAIABCABBCHAhCxAxCDARAUOgoIABCABBCHAhAUSgQIQRgASgQIRhgAUABYhRVgvxZoAHABeACAAYwBiAHmC5IBBDAuMTKYAQCgAQHAAQE&#x26;sclient=gws-wiz"><mark style="color:purple;">Color Picker</mark></a></td></tr><tr><td>bgColor</td><td>Unit</td><td>The background color of the message to be displayed as the label<br>If left blank, it is set to black (0xFFFFFF).</td></tr><tr><td>offset</td><td>number</td><td>The higher the offset value, the location will be closer to the bottom.<br>If left blank, 0 is the designated value.</td></tr><tr><td>width</td><td>number</td><td>A value that sets the label's width to n% (default 100)</td></tr><tr><td>opacity</td><td>number</td><td>A value that sets the label background's transparency (default 0.6, range 0 to 1)</td></tr><tr><td>time</td><td>number</td><td>Label display time (ms), default 3000 ms (3 seconds)</td></tr></tbody></table>

**Example**

Decorate the label using HTML tags.

![](/files/b1soWdVMlEUhjkgkgIb9)

```jsx
// Activates function when x is pressed
App.addOnKeyDown(88, function (player) {
    // Style of the white box to input x into
      let style =
          "display: inline-block; text-align: center; width:1.2em; height:1.2em; line-height: 1.2em; color: black; background-color: white; font-size: 1.2em; border-radius:3px";
      player.showCustomLabel(
          `You can run the example by pressing the <span style = "${style}">X</span> button.`,
          0xffffff, // white text
          0, // black background
          300, // offset 300
          30, // width 20%
          1, // transparency 1 -> opacity
          5000 // display time 5000 -> for 5 seconds
      );
});

```

### showWidget

{% hint style="info" %}
player.showWidget(fileName: string, align: string, width: integer, height: integer): ScriptWidget
{% endhint %}

This function calls the html file as a widget to the player’s designated align location.

**Parameters**

<table><thead><tr><th width="146">Name</th><th width="94.33333333333331">Type</th><th>Description</th></tr></thead><tbody><tr><td>fileName</td><td>String</td><td>Name of the file being called</td></tr><tr><td>align</td><td>String</td><td>Location to display widget<br>’popup’, ‘sidebar’, ‘top’, ‘topleft’, ‘topright’, ‘middle’, ‘middleleft’, ‘middleright’, ‘bottom’, ‘bottomleft’, ‘bottomright’</td></tr><tr><td>width<br>height</td><td>Integer</td><td>Width and height size area to display the widget (px)</td></tr></tbody></table>

**Example**

Replicate the Korean consonant quiz widget.

{% file src="/files/h9F9tY4b6MC3PgPS9Ccy" %}

<div align="left"><figure><img src="/files/GmRnHuf5D7vBQweJ3bMZ" alt=""><figcaption></figcaption></figure></div>

```jsx
let _widget = null;
// Activates when player enters 
App.onJoinPlayer.Add(function (player) {
	_widget = player.showWidget("widget.html", "top", 200, 300); // Displays widget at the top of the screen in an 200x300 area
	_widget.sendMessage({
		timer: 15,
		answer: "ㅅㅍㅋ",
	});
});
```

### showBuyAlert <a href="#showbuyalert" id="showbuyalert"></a>

{% hint style="info" %}
player.showBuyAlert(itemName: string, price: number, callback: function)
{% endhint %}

This function displays a purchase widget to a player and executes a callback function that runs when a purchase is completed.

> The consumed ZEM will be sent to the creators and the history can be found in the [My Donation History](https://zep.us/manage/donations) page.
>
> Please refer to the [Settlement Guide](https://teamzep.notion.site/Settlement-Guide-8291d5141b9848b68184ab597d09f1ae) for more detailed information on ZEP settlement.

**Parameters**

<table><thead><tr><th width="144.33333333333331">Name</th><th width="115">Type</th><th>Description</th></tr></thead><tbody><tr><td>itemName</td><td>String</td><td>Name of the item to display in the purchase widget</td></tr><tr><td>price</td><td>Number</td><td>Price of the item (Currency: ZEM)</td></tr><tr><td>callback</td><td>Function</td><td>Callback functions to execute when a purchase is completed</td></tr><tr><td>payToSpaceOwner</td><td>Boolean</td><td><p>When false: the revenue goes to the app owner</p><p>When true: the revenue goes to the map owner</p><p>(Default value: false)</p></td></tr><tr><td>option</td><td>Object</td><td>You can set the following options.<br><strong><code>message</code></strong> : Sets the text to be displayed in the purchase widget.<br><strong><code>timer</code></strong> : You can set the time (ms) for displaying the purchase widget.</td></tr></tbody></table>

**Example**

Purchase an item and save data in player.storage.

<pre class="language-java" data-overflow="wrap"><code class="lang-java">const itemName = "ITEM";

//Activates function when Q is pressed - Purchase an item and save data in player.storage.
App.addOnKeyDown(81, function (player) {
	let pStorage = JSON.parse(player.storage);
	if (!player.tag) {
		player.tag = {};
	}
	if (pStorage == null) {
		pStorage = {};
	}
	//Displays a message if the item has already been purchased
	if (pStorage[itemName]) {
		player.showCenterLabel(`${itemName} has been already purchased.`);
	} else {
		player.showBuyAlert(itemName, 0, function (success, buyAlertResult) {
			if (success) {
				App.sayToAll(`[Info.] ${player.name} has purchased ${itemName}!`);
				pStorage[itemName] = true;
				player.tag.buyAlertResult = buyAlertResult
				player.storage = JSON.stringify(pStorage);
				player.save();
			}
		}, 
		false,// if false, the revenue goes to the app owner, if true the revenue goes to the Space owner
		{
			message: `${itemName} custom message`,//Highlights a text corresponding to itemName in the message.
			timer: 10000 // 10 seconds - purchase widget display time (ms)
		}
		);
	}
});

<strong>// Activates function when W is pressed - Refund
</strong>App.addOnKeyDown(87, function (player) {
	let pStorage = JSON.parse(player.storage);
	if( pStorage &#x26;&#x26; player.tag.buyAlertResult )
	{	
		if( player.tag.buyAlertResult.Refund() )
		{
			App.sayToAll("===== refund success!");
			pStorage[itemName] = false;
		}
		else {
			App.sayToAll("===== refund failed");
		}
		player.tag.buyAlertResult = null;
		player.storage = JSON.stringify(pStorage);
		player.save();
	}
})
</code></pre>

<div align="left"><figure><img src="/files/Si5m2pvv2Hrh6mgwAVQe" alt=""><figcaption><p>Purchase Menu</p></figcaption></figure></div>

<div align="left"><figure><img src="/files/iqb3PtY42gWJdHomgm0G" alt=""><figcaption><p>When 'timer' and 'message' Options Were Set Up</p></figcaption></figure></div>

### hideBuyAlert

{% hint style="info" %}
player.hideBuyAlert()
{% endhint %}

This function closes a player's purchase widget.

**Parameter**

None

### sendMessage

{% hint style="info" %}
&#x20;player.sendMessage(text: string, color: uint = 0xFFFFFF)
{% endhint %}

This function sends a private message to a player in the chat window.

**Parameters**

<table><thead><tr><th width="137.33333333333331">Name</th><th width="131">Type</th><th>Description</th></tr></thead><tbody><tr><td>text</td><td>String</td><td>Text to display on label</td></tr><tr><td>color</td><td>Uint</td><td>Color of text to be displayed (HexCode)<br>If left blank, it is set to white (0xFFFFFF).<br>➡️<a href="https://www.google.com/search?q=COLOR+PICKER&#x26;sxsrf=ALiCzsbc_6XvOn9SiJdEBkLmfLurJ4tvOA%3A1658153265956&#x26;ei=MWnVYrX3Ocv4wAOXk6-wBg&#x26;ved=0ahUKEwj105mjzoL5AhVLPHAKHZfJC2YQ4dUDCA4&#x26;uact=5&#x26;oq=COLOR+PICKER&#x26;gs_lcp=Cgdnd3Mtd2l6EAMyBAgjECcyBQgAEIAEMgUIABCABDIFCAAQgAQyBQgAEIAEMgUIABCABDIFCAAQgAQyBQgAEIAEMgUIABCABDIFCAAQgAQ6CwgAEIAEELEDEIMBOhEILhCABBCxAxCDARDHARDRAzoRCC4QgAQQsQMQgwEQxwEQrwE6CAgAEIAEELEDOhAIABCABBCHAhCxAxCDARAUOgoIABCABBCHAhAUSgQIQRgASgQIRhgAUABYhRVgvxZoAHABeACAAYwBiAHmC5IBBDAuMTKYAQCgAQHAAQE&#x26;sclient=gws-wiz"><mark style="color:purple;">Color Picker</mark></a></td></tr></tbody></table>

**Example**

Display a welcome message that is only shown to the designated player.

![](/files/cuGfdJHBJmSxKFG0d5Iz)

```jsx
App.onJoinPlayer.Add(function(player){
    player.sendMessage(`Welcome, ${player.name}!\nhttps://docs.zep.us/ Click the link to check the guide.`,0xffffff);
    });
```

### showPrompt

{% hint style="info" %}
player.showPrompt(text: string, function(inputText))
{% endhint %}

This function displays an input window and executes a callback function that runs according to a player's response.

**Parameters**

<table><thead><tr><th width="174.33333333333331">Name</th><th width="185">Type</th><th>Description</th></tr></thead><tbody><tr><td>text</td><td>String</td><td>Text to display on the input window</td></tr><tr><td>inputText</td><td>String</td><td>Text a player entered</td></tr></tbody></table>

**Example**

Create an input window that shows a "correct" message when entering "1234".

<figure><img src="/files/QrhwdcBKd4NZRGdNHv4v" alt=""><figcaption></figcaption></figure>

```javascript
// Activates function when q is pressed
App.addOnKeyDown(81, function (player) {
	player.showPrompt("🔐 Please enter a password", function (inputText) {
		if (inputText == "1234") {
			player.showCenterLabel("Correct");
		} else {
			player.showCenterLabel("Incorrect");
		}
	});
});
```

### showConfirm

{% hint style="info" %}
player.showConfirm(text: string, function(result))
{% endhint %}

&#x20;This function displays an confirm window and executes a callback function that runs when a player clicks "OK". When a player clicks "Cancel," this callback function doesn't operate.

**Parameters**

<table><thead><tr><th width="174.33333333333331">Name</th><th width="179">Type</th><th>Description</th></tr></thead><tbody><tr><td>text</td><td>String</td><td>Text to display on the confirm window</td></tr><tr><td>result</td><td>Boolean</td><td>When a player clicks "OK", true</td></tr></tbody></table>

**Example**

Display a text to the chat window when "OK" is clicked.

<figure><img src="/files/j8INRcJULdiXehUDzPdo" alt=""><figcaption></figcaption></figure>

```javascript
// Activates function when q is pressed
App.addOnKeyDown(81, function (player) {
	player.showConfirm("confirm", (result) => {
		App.sayToAll(result);
	});
});
```

### showAlert

{% hint style="info" %}
&#x20;player.showAlert(text: string, function())
{% endhint %}

This function displays an alert window and executes a callback function that runs when a player clicks "OK".

**Parameter**

<table><thead><tr><th width="174.33333333333331">Name</th><th width="214">Type</th><th>Description</th></tr></thead><tbody><tr><td>text</td><td>String</td><td>Text to display on the alert window</td></tr></tbody></table>

**Example**

Display a text to the chat window when "OK" is clicked.

<figure><img src="/files/RaRwx9yM0sWa9HNkw5SE" alt=""><figcaption></figcaption></figure>

```javascript
// Activates function when q is pressed
App.addOnKeyDown(81, function (player) {
	player.showAlert("alert", () => {
		App.sayToAll(player.name + " show alert.");
	});
});
```

### showWidgetResponsive

{% hint style="info" %}

```
player.showWidgetResponsive(fileName:string, marginTop:number, marginRight:number, marginBottom:number, marginLeft:number)
```

{% endhint %}

This function displays the widget by defining the top/bottom/left/right margin using a responsive percentage of the screen size.

**Parameters**

<table><thead><tr><th width="206.33333333333331">Name</th><th width="104">Type</th><th>Description</th></tr></thead><tbody><tr><td>fileName</td><td>String</td><td>Name of the file to call</td></tr><tr><td>margin top/left/right/bottom</td><td>String</td><td>Top/bottom/left/right margin as a percentage</td></tr></tbody></table>

**Example**

Check how the widget size changes when scaling the screen size.

{% file src="/files/ABiTDBeAVLtByk4zkXF1" %}

<figure><img src="/files/rNiekOdrMjSyaLvipLmo" alt=""><figcaption></figcaption></figure>

```javascript
App.onJoinPlayer.Add(function (player) {
	player.tag = {};
});

// Activates function when q is pressed
App.addOnKeyDown(81, function (player) {
	player.tag.widget = player.showWidgetResponsive("result.html", 15, 15, 15, 15);
	player.tag.widget.onMessage.Add(function (player, data) {
		if (data.type == "close") {
			player.tag.widget.destroy();
			player.tag.widget = null;
		}
	});
});
```

### openWebLink

{% hint style="info" %}

```
player.openWebLink(url:string, popup:boolean=false)
```

{% endhint %}

This function opens a web URL in a new tab or window to a player.

**Parameters**

<table><thead><tr><th width="206.33333333333331">Name</th><th width="104">Type</th><th>Description</th></tr></thead><tbody><tr><td>url</td><td>String</td><td>URL adress to open</td></tr><tr><td>popup</td><td>boolean</td><td>When true: the URL opens as a new window</td></tr></tbody></table>

**Example**

Open a web URL in a new windwow.

```javascript
// Activates function when q is pressed
App.addOnKeyDown(81, function (player) {
	player.openWebLink("https://docs-kr.zep.us", true);
});
```

<figure><img src="/files/LTIkeNFSaKXjUvGIQfQ1" alt=""><figcaption><p>Web Page in a New Window</p></figcaption></figure>

### showEmbed

{% hint style="info" %}
player.showEmbed(url: string, align: string, width: number, height: number, hasBackdrop: boolean = true)
{% endhint %}

This function opens a web URL as an embed in the designated location.

**Parameters**

<table><thead><tr><th width="153.33333333333331">Name</th><th width="104">Tyoe</th><th>Description</th></tr></thead><tbody><tr><td>url</td><td>String</td><td>URL adress to open</td></tr><tr><td>align</td><td>String</td><td>Embedding area<br>‘sidebar’, ‘top’, ‘topleft’, ‘topright’, ‘middle’, ‘middleleft’, ‘middleright’, ‘bottom’, ‘bottomleft’, ‘bottomright’</td></tr><tr><td>width<br>height</td><td>number</td><td>Width and hight size of the embedding area (px)</td></tr><tr><td>hasBackdrop</td><td>boolean</td><td>When true:  shadows appear on the outline of the embedding area</td></tr></tbody></table>

**Example**

Display a web URL as an embed

```javascript
// Activates function when q is pressed
App.addOnKeyDown(81, function (player) {
	player.showEmbed("https://youtu.be/ztuTrpXJyks", "middle", 900, 600, true);
});
```

## 💻 Data Load Methods

<mark style="background-color:yellow;">**Data Load Methods at a Glance**</mark>

```jsx
// Compares the player's email with the specified email 
player.isEmail(email: string): boolean

// Calls the area location name of where the player is standing
player.getLocationName(): string
```

### isEmail

{% hint style="info" %}
player.isEmail(email: string): boolean
{% endhint %}

Depending on whether the corresponding player’s email is the same as the parameter value, the value will return as true when it matches and false when it does not match.

**Parameter**

<table><thead><tr><th width="126.33333333333331">Name</th><th width="117">Type</th><th>Description</th></tr></thead><tbody><tr><td>email</td><td>String</td><td>Email text that will be used for comparison</td></tr></tbody></table>

**Example**

Compare the player’s email to the specified text.

```jsx
// Activates function when q is pressed 
// **[App.addOnKeyDown Description (Link)](https://www.notion.so/Callbacks-7ac5078bab7c4f3180ae05463713581d)**
App.addOnKeyDown(81,function(player){
	let check = player.isEmail("supercat@supercat.co.kr");
	App.sayToAll(`check if the email matches: ${check}`)
})
```

### getLocationName

{% hint style="info" %}
&#x20;player.getLocationName : string
{% endhint %}

This displays the location name of where the player is standing.

Specific areas can be set up on the **Map Editor > Tile Effects** menu.

**Parameter**

* None

**Example**

Display the area name of the tile the avatar is standing on.

→ If there is no specified area set, it will be displayed as an empty space.

```jsx
// Activates function when q is pressed 
//App.addOnKeyDown Description 
App.addOnKeyDown(81,function(player){
	App.sayToAll(`Current area where the player is standing: ${player.getLocationName()}`)
})
```

## 🙍‍♂️ **User Control**

<mark style="background-color:yellow;">**User Control at a Glance**</mark>

```jsx
// Spawns the player to the corresponding coordinates
player.spawnAt(tileX: int ,tileY: int, dir: int = 0)

// Spawns the player to the corresponding area 
player.spawnAtLocation(name: string ,dir:int = 0)

// Moves the player to the corresponding space's map 
player.spawnAtMap(spaceHashID string, mapHashID:string = null)
```

### spawnAt

{% hint style="info" %}
player.spawnAt(tileX: int ,tileY: int, dir: int = 0)
{% endhint %}

This moves the player’s avatar to look in the designated direction when on tileX and tileY coordinates.

**Parameters**

<table><thead><tr><th width="123.33333333333331">Name</th><th width="111">Type</th><th>Description</th></tr></thead><tbody><tr><td>tileX<br>tileY</td><td>Integer</td><td>The x and y coordinates values of where the player will be moved to</td></tr><tr><td>dir</td><td>Integer</td><td>Direction the avatar will look at<br>• Left: 1 • Up: 2 • Right: 3 • Down: 4<br>• Top-Left: 5 • Bottom-Left: 6 • Top-Right: 7 • Bottom-Right: 8</td></tr></tbody></table>

**Example**

Move the players that enter to the designated coordinates.

```jsx
// Activates function when a player enters
App.onJoinPlayer.Add(function (player) {
	player.spawnAt(5, 5, 1); // Moves the player to the 5,5 location and has them look to the left
});
```

### spawnAtLocation

{% hint style="info" %}
player.spawnAtLocation(name: string, dir:int = 0)
{% endhint %}

This moves the player’s avatar to a specific area called name and makes them look in a designated direction.

**Parameters**

<table><thead><tr><th width="111.33333333333331">Name</th><th width="113">Type</th><th>Description</th></tr></thead><tbody><tr><td>name</td><td>String</td><td>Name of the specific are the player will be moved to</td></tr><tr><td>dir</td><td>Integer</td><td>Direction the avatar will look at<br>• Left: 1 • Up: 2 • Right: 3 • Down: 4<br>• Top-Left: 5 • Bottom-Left: 6 • Top-Right: 7 • Bottom-Right: 8</td></tr></tbody></table>

**Example**

Move the players that enter to a specific area.

{% hint style="danger" %}
When there is more than one specific area with the same name, the player will be moved to one of those locations randomly.
{% endhint %}

```jsx
// Activates function when a player enters
App.onJoinPlayer.Add(function (player) {
// Spawns the player to the specific area called "test" and have them look to the left
	player.spawnAtLocation("test", 1); 
});
```

### spawnAtMap

{% hint style="info" %}
player.spawnAtMap(spaceHashID string, mapHashID:string = null)
{% endhint %}

This moves the player to the corresponding Space’s map.

**Parameters**

<table><thead><tr><th width="163.33333333333331">Name</th><th width="109">Type</th><th>Description</th></tr></thead><tbody><tr><td>spaceHashID</td><td>String</td><td>spaceHashID of the Space the player will be moved to</td></tr><tr><td>mapHashID</td><td>String</td><td>If the mapHashID is not mentioned, by default the player will be moved to the “Entry Map” of the corresponding Space.</td></tr></tbody></table>

**Example**

Move the players that enter the map to the ZEP Tutorial Map. ([<mark style="color:purple;">Understanding Spaces and Maps</mark>](/zep-script/zep-script-guide/appendix/understanding-spaces-and-maps))

```jsx
// Activates function when a player enters
App.onJoinPlayer.Add(function (player) {
	// Moves the player to the ZEP tutorial map 
	player.spawnAtMap("65jeBA", "2YvXMJ");
});
```

## 🔉 Sound Methods

<mark style="background-color:yellow;">**Sound Methods at a Glance**</mark>

```jsx
// Plays sound to the player 
player.playSound(fileName: string, loop: boolean = false)

// Plays the corresponding sound from the link to the player 
player.playSoundLink(link: string, loop: boolean = false)
```

### playSound

{% hint style="info" %}
player.playSound(fileName: string, loop: boolean = false, overlap: boolean = false)
{% endhint %}

This function plays sound to the corresponding player.

**Parameters**

<table><thead><tr><th width="128">Name</th><th width="98">Type</th><th>Description</th></tr></thead><tbody><tr><td>fileName</td><td>String</td><td>Name of the file being called</td></tr><tr><td>loop</td><td>boolean</td><td>true: repeatedly play on a loop<br>false: play one time</td></tr><tr><td>overlap</td><td>boolean</td><td>Whether sound overlap is available</td></tr></tbody></table>

**Example**

Set up a sound to play upon entry (file).

{% file src="/files/5LOpJdHZOfVW9UOoRMSJ" %}

```jsx
// Activates function when a player enters
App.onJoinPlayer.Add(function (player) {
	player.playSound("join.mp3",false);
});
```

### playSoundLink

{% hint style="info" %}
player.playSoundLink(link: string, loop: boolean = false)
{% endhint %}

This function plays a sound for all players.

{% hint style="success" %}
When the sound does not play even when the correct link is inputted.

It is highly likely that a CORS regulation was violated. In the case that a CORS regulation cannot be met, please upload the sound file and use the playSound function instead of the playSound Link function.
{% endhint %}

**Parameters**

<table><thead><tr><th width="126.33333333333331">Name</th><th width="117">Type</th><th>Description</th></tr></thead><tbody><tr><td>link</td><td>String</td><td>Sound url</td></tr><tr><td>loop</td><td>boolean</td><td>true: repeatedly play on a loop<br>false: play one time</td></tr></tbody></table>

**Example**

Set up a sound to play upon entry (sound url).

```jsx
// Activates function when a player enters
App.onJoinPlayer.Add(function (player) {
	player.playSoundLink("https://zep.us/assets/sounds/ring.mp3",false);
});
```

## 💠 Common **Methods**

<mark style="background-color:yellow;">**Common Methods at a Glance**</mark>

```jsx
// Updates any player's field values that were changed 
player.sendUpdated()

// Saves the player's storage value 
player.save()
```

### sendUpdated

{% hint style="info" %}
player.sendUpdated()
{% endhint %}

This function applies the changed value whenever field values pertaining to App or Player are changed.

**Parameter**

* None

### save

{% hint style="info" %}
player.save()
{% endhint %}

This function applies the changed value whenever values pertaining to App or Player storage are changed.

**Parameter**

* None


# ScriptWidget

**ScriptWidget** class consists of the 3 categories provided below.

### [<mark style="color:purple;">Field</mark>](/zep-script/zep-script-api/scriptwidget/field)

> This category contains the attribute values pertaining to Widgets.
>
> Currently, there are only widget id fields, but more may be added in a future update.

### [<mark style="color:purple;">Event Listeners</mark>](/zep-script/zep-script-api/scriptwidget/event-listeners)

> This category contains the functions that are activated when data from a widget is sent to an App. An onMessage function is available, but more may be added in a future update.

### [<mark style="color:purple;">Methods</mark>](/zep-script/zep-script-api/scriptwidget/methods)

> This category contains the functions that can send data through widgets, end widgets, etc.


# Field

### Introduction

Provided below are the attribute values pertaining to widgets.

🔒 Fields with this icon are read-only fields that cannot be revised.

<table><thead><tr><th width="157">Name</th><th>Description</th></tr></thead><tbody><tr><td>🔒 id</td><td>Calls the widget id value</td></tr></tbody></table>

## 📚 API Explanation and Example

### id

{% hint style="info" %}
widget.id
{% endhint %}

This calls the widget’s id value.

**Example**

Display the widget id value.

{% file src="/files/2OU8D2tpqnPf4eIoHbFi" %}

<div align="left"><figure><img src="/files/emM6lq1c3mmvlz5yBOjP" alt=""><figcaption></figcaption></figure></div>

```jsx
let _widget = null;
// Activates function when q is pressed 
// App.addOnKeyDown Description
App.addOnKeyDown(81, function (player) {
	_widget = player.showWidget("sample.html","top",300,300);
	App.sayToAll(`widget id: ${_widget.id}`)
});
```


# Event Listeners

### Introduction

Provided below are functions that activate when data is sent to the App from the widget.

<table><thead><tr><th width="190">Name</th><th>Description</th></tr></thead><tbody><tr><td>onMessage</td><td>Function that activates when messages sent from widget are received on the App</td></tr></tbody></table>

## 📚 API Explanation and Example

### onMessage

{% hint style="info" %}
widget.onMessage.Add(function(player, data: any){});
{% endhint %}

Callback function that activates when a message is sent from the widget to the App.

**Parameters**

<table><thead><tr><th width="122.33333333333331">Name</th><th width="116">Type</th><th>Description</th></tr></thead><tbody><tr><td>player</td><td>Player</td><td>The player who owns the widget</td></tr><tr><td>data</td><td>Object</td><td>The message sent from the widget to the App</td></tr></tbody></table>

**Example**

Create a function to close the widget screen when x is pressed.

{% file src="/files/yRUGsi9d1nruA5NR1dPk" %}

<div align="left"><figure><img src="/files/52Rc6zGEK9zC5x4YSmDm" alt=""><figcaption></figcaption></figure></div>

```jsx
// Activates function when a player enters
App.onJoinPlayer.Add(function (player) {
	player.tag = {
		widget: null,
	};

	player.tag.widget = player.showWidget("sample.html.html", "top", 600, 500);
	player.tag.widget.onMessage.Add(function (player, msg) {
		// Closes the widget when the 'type: close' message is sent from the widget to the App 
		if (msg.type == "close") {
			player.showCenterLabel("Widget has been closed.");
			player.tag.widget.destroy();
			player.tag.widget = null;
		}
	});
});
```

**sample.html**: Button and script section

```jsx
<i onclick="closeWidget()" class="fa-solid fa-xmark"></i>
<script type="text/javascript">
			// Calls the function when x button is pressed
			function closeWidget() {
				// Sends message to App 
				window.parent.postMessage(
					{
						type: "close",
					},
					"*"
				);
			}
</script>
```


# Methods

### Introduction

This function closes the widget or sends data to the widget from the App.

<table><thead><tr><th width="204">Name</th><th>Description</th></tr></thead><tbody><tr><td>sendMessage</td><td>Function to send data to the widget from the App</td></tr><tr><td>destroy</td><td>Function to close the widget</td></tr></tbody></table>

## 📚 API Explanation and Example

### **Methods at a Glance**

```jsx
// Sends a message to the created widget
widget.sendMessage(object: any)

// Closes widget
widget.destroy()
```

### sendMessage

{% hint style="info" %}
widget.sendMessage(object: any)
{% endhint %}

This sends data to the widget from the App.

**Parameter**

<table><thead><tr><th width="175.33333333333326">Name</th><th width="134">Type</th><th>Description</th></tr></thead><tbody><tr><td>object</td><td>any</td><td>Data being sent to the widget from the App<br>E.g. { name : “test”, message : “message” }</td></tr></tbody></table>

**Example**

Send text and image data to the widget.

{% file src="/files/rjlLqABtWu1UkpIdF4dQ" %}

<div align="left"><figure><img src="/files/cwpDmVR3fmu3Zglfxf8p" alt=""><figcaption></figcaption></figure> <figure><img src="/files/WPH13bDGU4zUFrlv2UL4" alt=""><figcaption></figcaption></figure></div>

```jsx
// Activates function when a player enters
App.onJoinPlayer.Add(function (player) {
	player.tag = {
		widget: null,
	};

	player.tag.widget = player.showWidget("sample.html", "top", 300, 300);
	player.tag.widget.onMessage.Add(function (player, data) {
		if (data.type == "close") {
			player.showCenterLabel("The widget closed.");
			player.tag.widget.destroy();
			player.tag.widget = null;
		}
	});
	player.sendUpdated();
});

// Activates function when q is pressed
// Sends blueman image and text to the widget
// **[App.addOnKeyDown](https://www.notion.so/Callbacks-7ac5078bab7c4f3180ae05463713581d) Explanation [(Link)](https://www.notion.so/Callbacks-7ac5078bab7c4f3180ae05463713581d)**
App.addOnKeyDown(81, function (player) {
	if (player.tag.widget) {
		player.tag.widget.sendMessage({
			text: "Blueman",
		});
	}
});
```

**sample.html**: Section where the text and image data is received and displayed

```jsx
window.addEventListener("message", function (e) {
	let text = e.data.text;
	let content = document.getElementById("content");
	if (content) {
		while (content.hasChildNodes()) {
			content.removeChild(content.firstChild);
		}
		let content_image = document.createElement("img");
		content_image.setAttribute("src", BLUEMAN);
		content_image.setAttribute("class", "cover");
		content.append(content_image);
	}
	if (text) {
		document.getElementById("text").innerText = text;
	}
});
const BLUEMAN = "data:image/png;base64,iVBORw0KGgoAAAANSUhEUgAAADAAAABACAYAAABcIPRGAAAACXBIWXMAAA7DAAAOwwHHb6hkAAAF+UlEQVRoge2ZX2hTVxzHPxk+lOFDbJCtHYVYmpCO7qHEsDWtyFrppkLtxDD3v8hgm7TLgw42Xeek6wSnD7XgJhvi0G1CpDphlHWdIiN3jrb40CDlRmyhKA7XGvaw9WFw9nBzbm9u7k1zb9L5sHzhkntPfuec7/fc3/md8zsXKqigggoqqKCCCiqooIL/Kzyr3L5Y7b5Wo1GddF1wUC+cVw+udr+uIYxXXXBQv4/0Tgvz/zbXQ4VoVoRoVoSo2fORkM8YCMpn46+8KFHAIyXTz+JG1MPjbx7OKYv0The0vxEt3ZNKFaCPXrMiuPfVoaIrNiuCZkWv/lDcSPh83bYuwgouhGHOyHbckCjpDTzqi+j3htHUn41ldv/Pqwdz2vmvIHy+7pyIY3cVa+P2LbidRULG+Cp/EID0WAzQYr8ss8LSnKqvCYHOhF4G+lrhiNMaR7RtkB6LrUhcosofJOBPsDSnkh6L6SLcomQBVuS9wZCtfUadATQhdQzq9d2iJAHSFSR5SVyStILRpsofBFVrpxQRbiAA0REKC0AEOhMi0jtd1IQlO2kjvdMi0JnIaQcXk9j1G+gIhfX7pTmVibEYi+p1oKOo+tXBp3JGvSMU5ueZKcc8XAuo9Xq4mxFc7uujKbwWb2AU7j/Q/ly/zr5i1mYxOUomrZKa6mPoJ4Var7uAWNJCVuv10BRuwBswRR8pxAxTuTcQpCnc4Jo8lCmMAkRfeifnWfnuc1c2TuFGurjc10di4lcAho4PlEwivq8fgFikha7hYUe8Cr0Bc0TQG20KN9AUbuDQF2dzDIwjbDe6djaH336tCLr5sBMgIr3TejxfnPqGhYVLAtPIxCItlpWLcQ2jjV07xcBqEotAZ4J/Xm4CtJW2OvwKPl83aG/FU98TJzV1a7nG+nW5kUc+W102dVJTt6jviYNDtzYLEIHORN5WQIowwJP11Rwo4+dRxs8X7NDOxqnvSxgFCJ+vWye/5tsUaz/eVWiz5ekaHiaTVu3D5kq4/4BMWnVNHpYFCJ+vO2eUM+oMf/R8Cmjb3ux22dyJp74nbikiumV3wWdJ3o3b5BAwk/cGQ2TUGX2PDkXt08XtM0PagmbwayPpHLcpE3lLAbCcYPy1MMHCwqViOxEAuhAbGIgX225B5IVRt+TlXKnv0TIzbY/UoBucnIdj/RpxaZsei+WFZqfwACLyzCbuLT5vJu6IvJz8H+xcQkkq7K3LNzw5D9HWKEdGqgBtntnMLUcCkCImrv/ipA6AGLkyAaCT+nqfD4DT5xJEW6O6oZJU2POq9nbeOL4AaGIBdrZHzO06FgBZEQCbt+/KM7z2wwVC/M3Z65Oynhi5MkFowxMA7HgriTcYYvNjV/jsw3dtO3zvkxNc+72djDrD96daAZiZveNahLlCwYxIJjHGxOPm7F1dgIT6Y/4ASASfu6DfSwHgXoR5JfYUuiTxjlCY22eGWEyO8uSGWk6fS7BjkyZkaU7l4tVJy84uXp3Ug4S0b/TX0Oiv4YVnN5J1R0dppZN8QFzu66NreJiOUBhv9GlAizZd/XH2Dwzp5I6MVHFkJGXRhDZPluZU2LSWmdk7NPpr9H+liJ3tkaKjk6OMrG33NhaTo3z5/utawf0HtO3elmOTOnqK8S3byagzedf4lu2kjp7SbZWkkteHVVkhOPE3YVykMmlVv69u3cr+gSF9cq50LiQn+7H+ODdn79Lor+Hi1UmUpMKB9qCjVdrprBdygUpN3cK4IzWuBTKPMAoxl8k1YP/AEAAHXtRcUu6pqlu3FsXPcVIvk3iz65hHvZjnQGeCvXUG8i7gNKn31PfE86JEXXDQctTtYDy5q++JZ8+TllHs6IO7U4m8tcN4Lip3svfm1JzzUhmhMhYNZpTf9HunO9RyfO4UVkmP8cjcfBRvhDyWd8upbB/5rCDzCNM3YisYF0xHKIsAY/IjYUqCLEVY1XOKcggoZoQt4eaLjBllO1r0/nlCv89uy/Py5/RYTN/xlgvleAOuSWXrPfwv9W0tG2lr2QjYjr6ERyZNxjr/a/wLheTsVoCMSQ0AAAAASUVORK5CYII="
```

### destroy

{% hint style="info" %}
widget.destroy()
{% endhint %}

This function closes the widget.

**Parameter**

* None

**Example**

* **Event Listeners**